
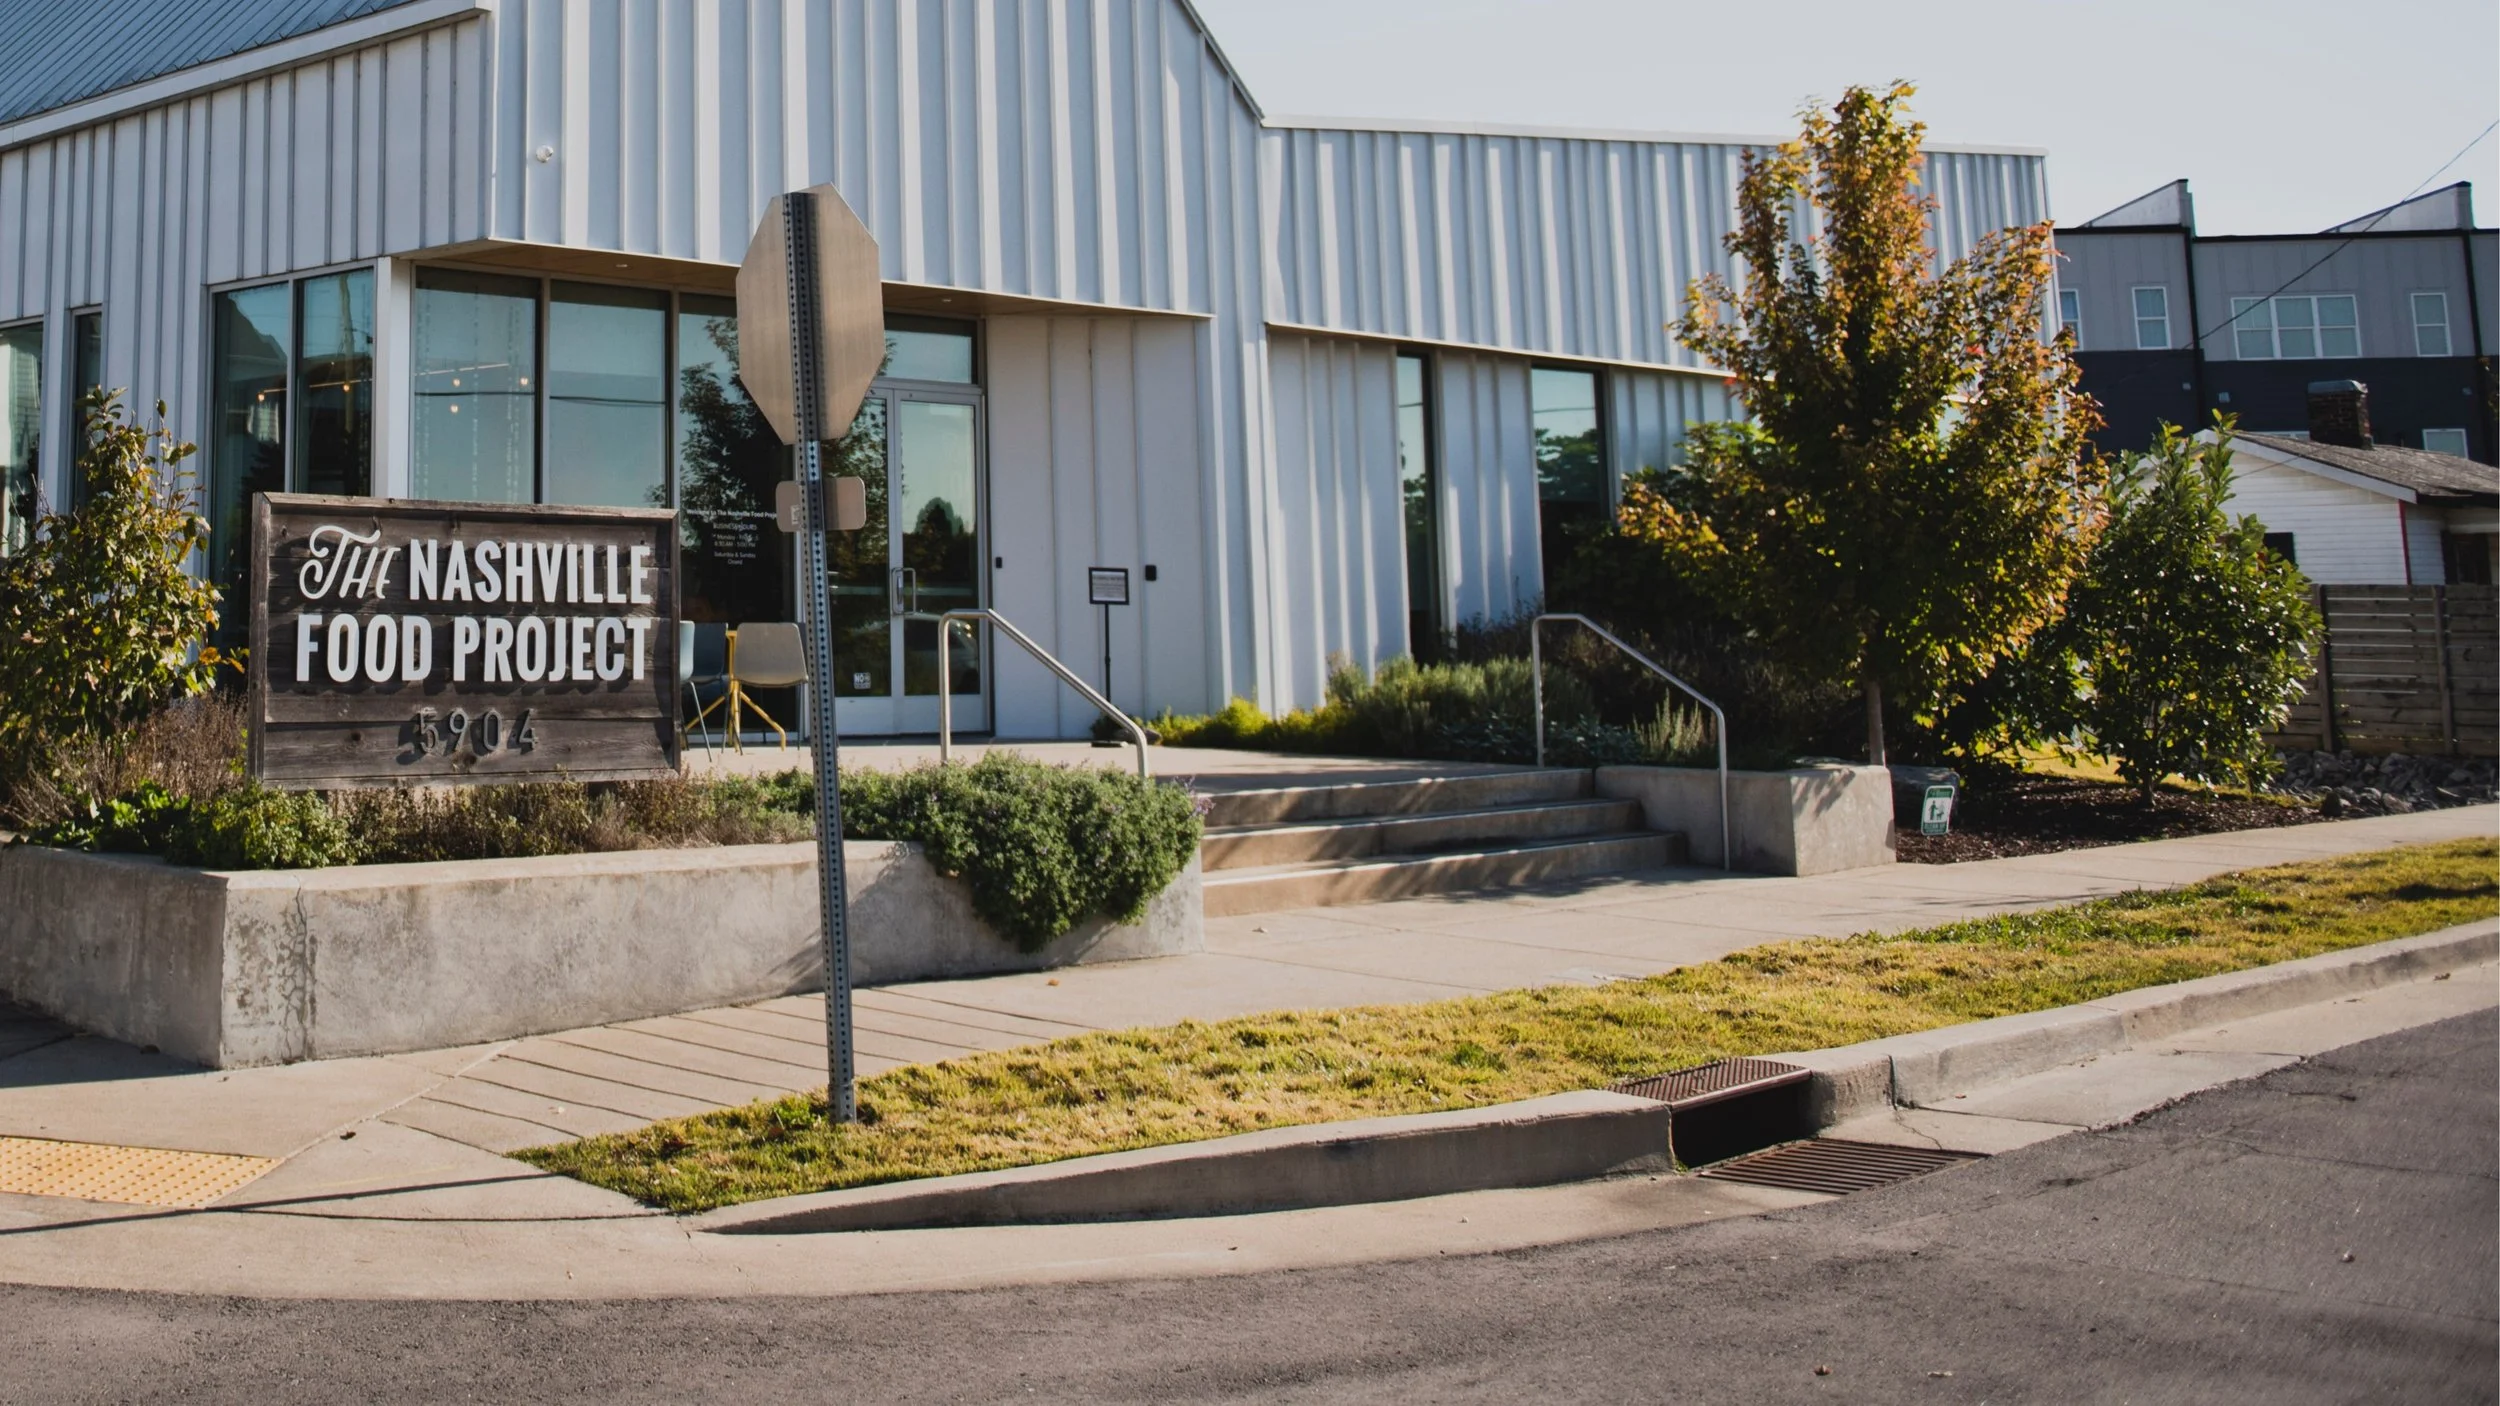
The Nashville Food Project’s Blog


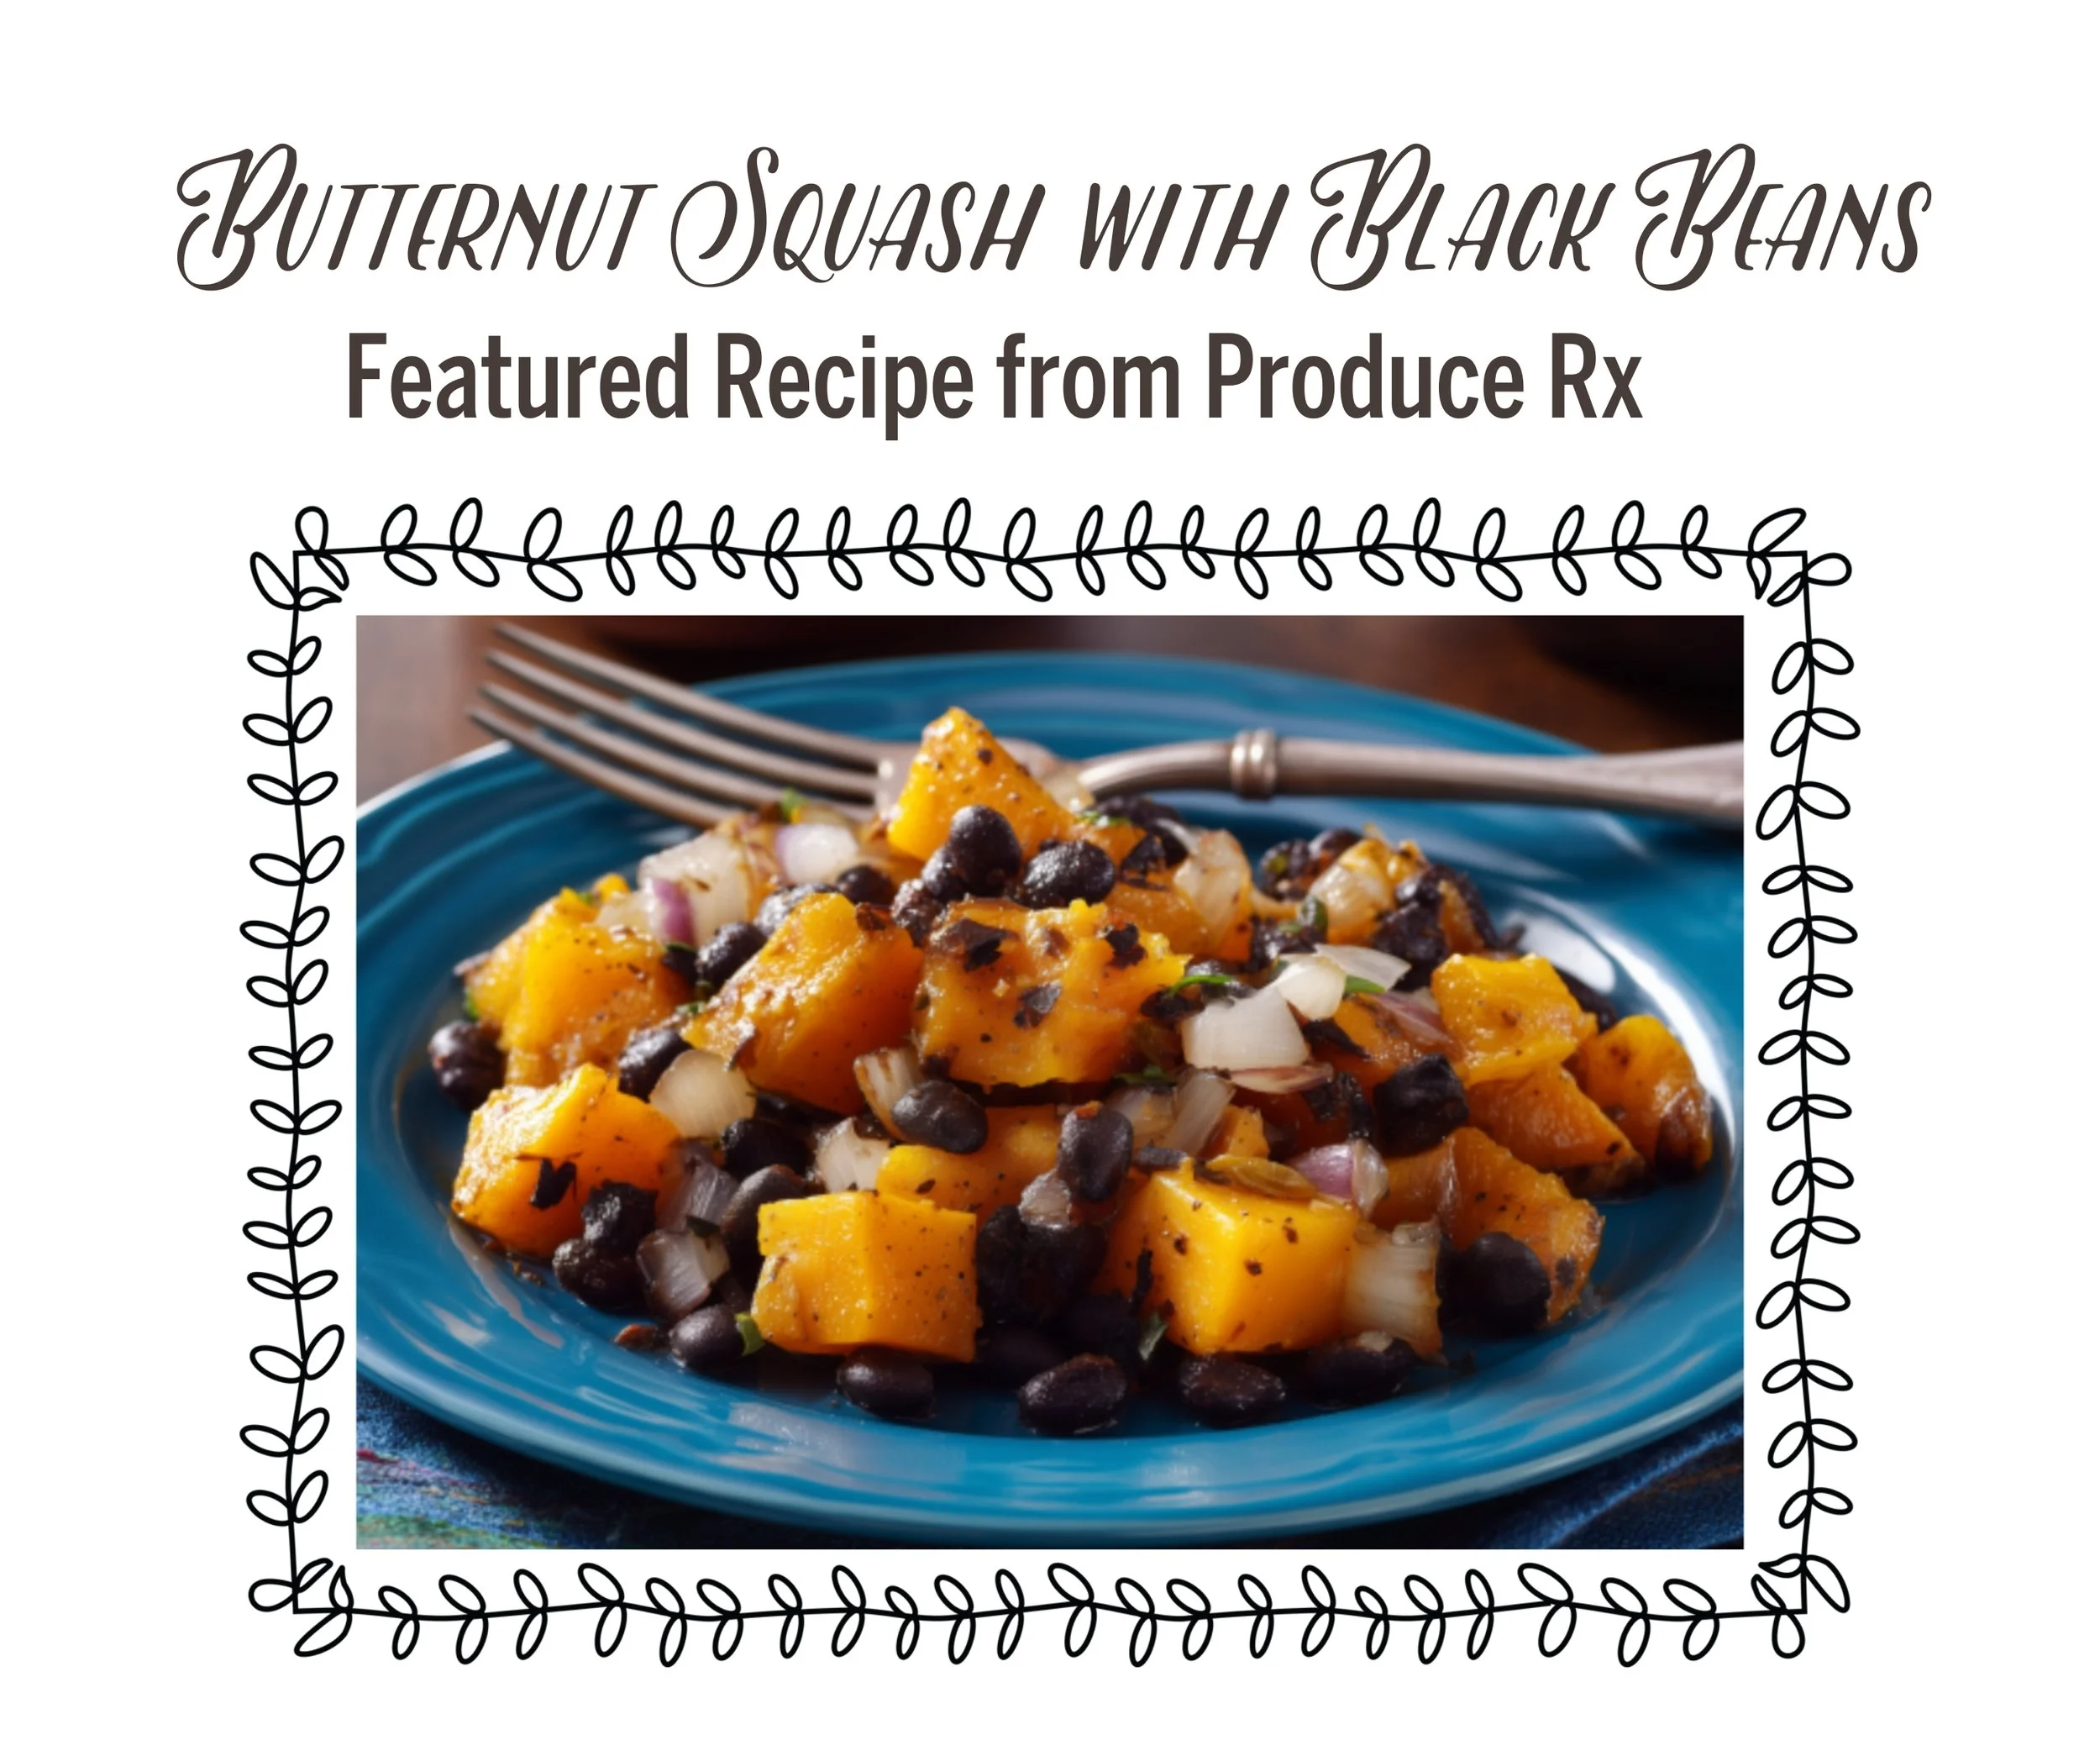
Featured Recipe from Produce Rx: Butternut Squash with Black Beans
Featured Recipe from Produce Rx
A Program of The Nashville Food Project
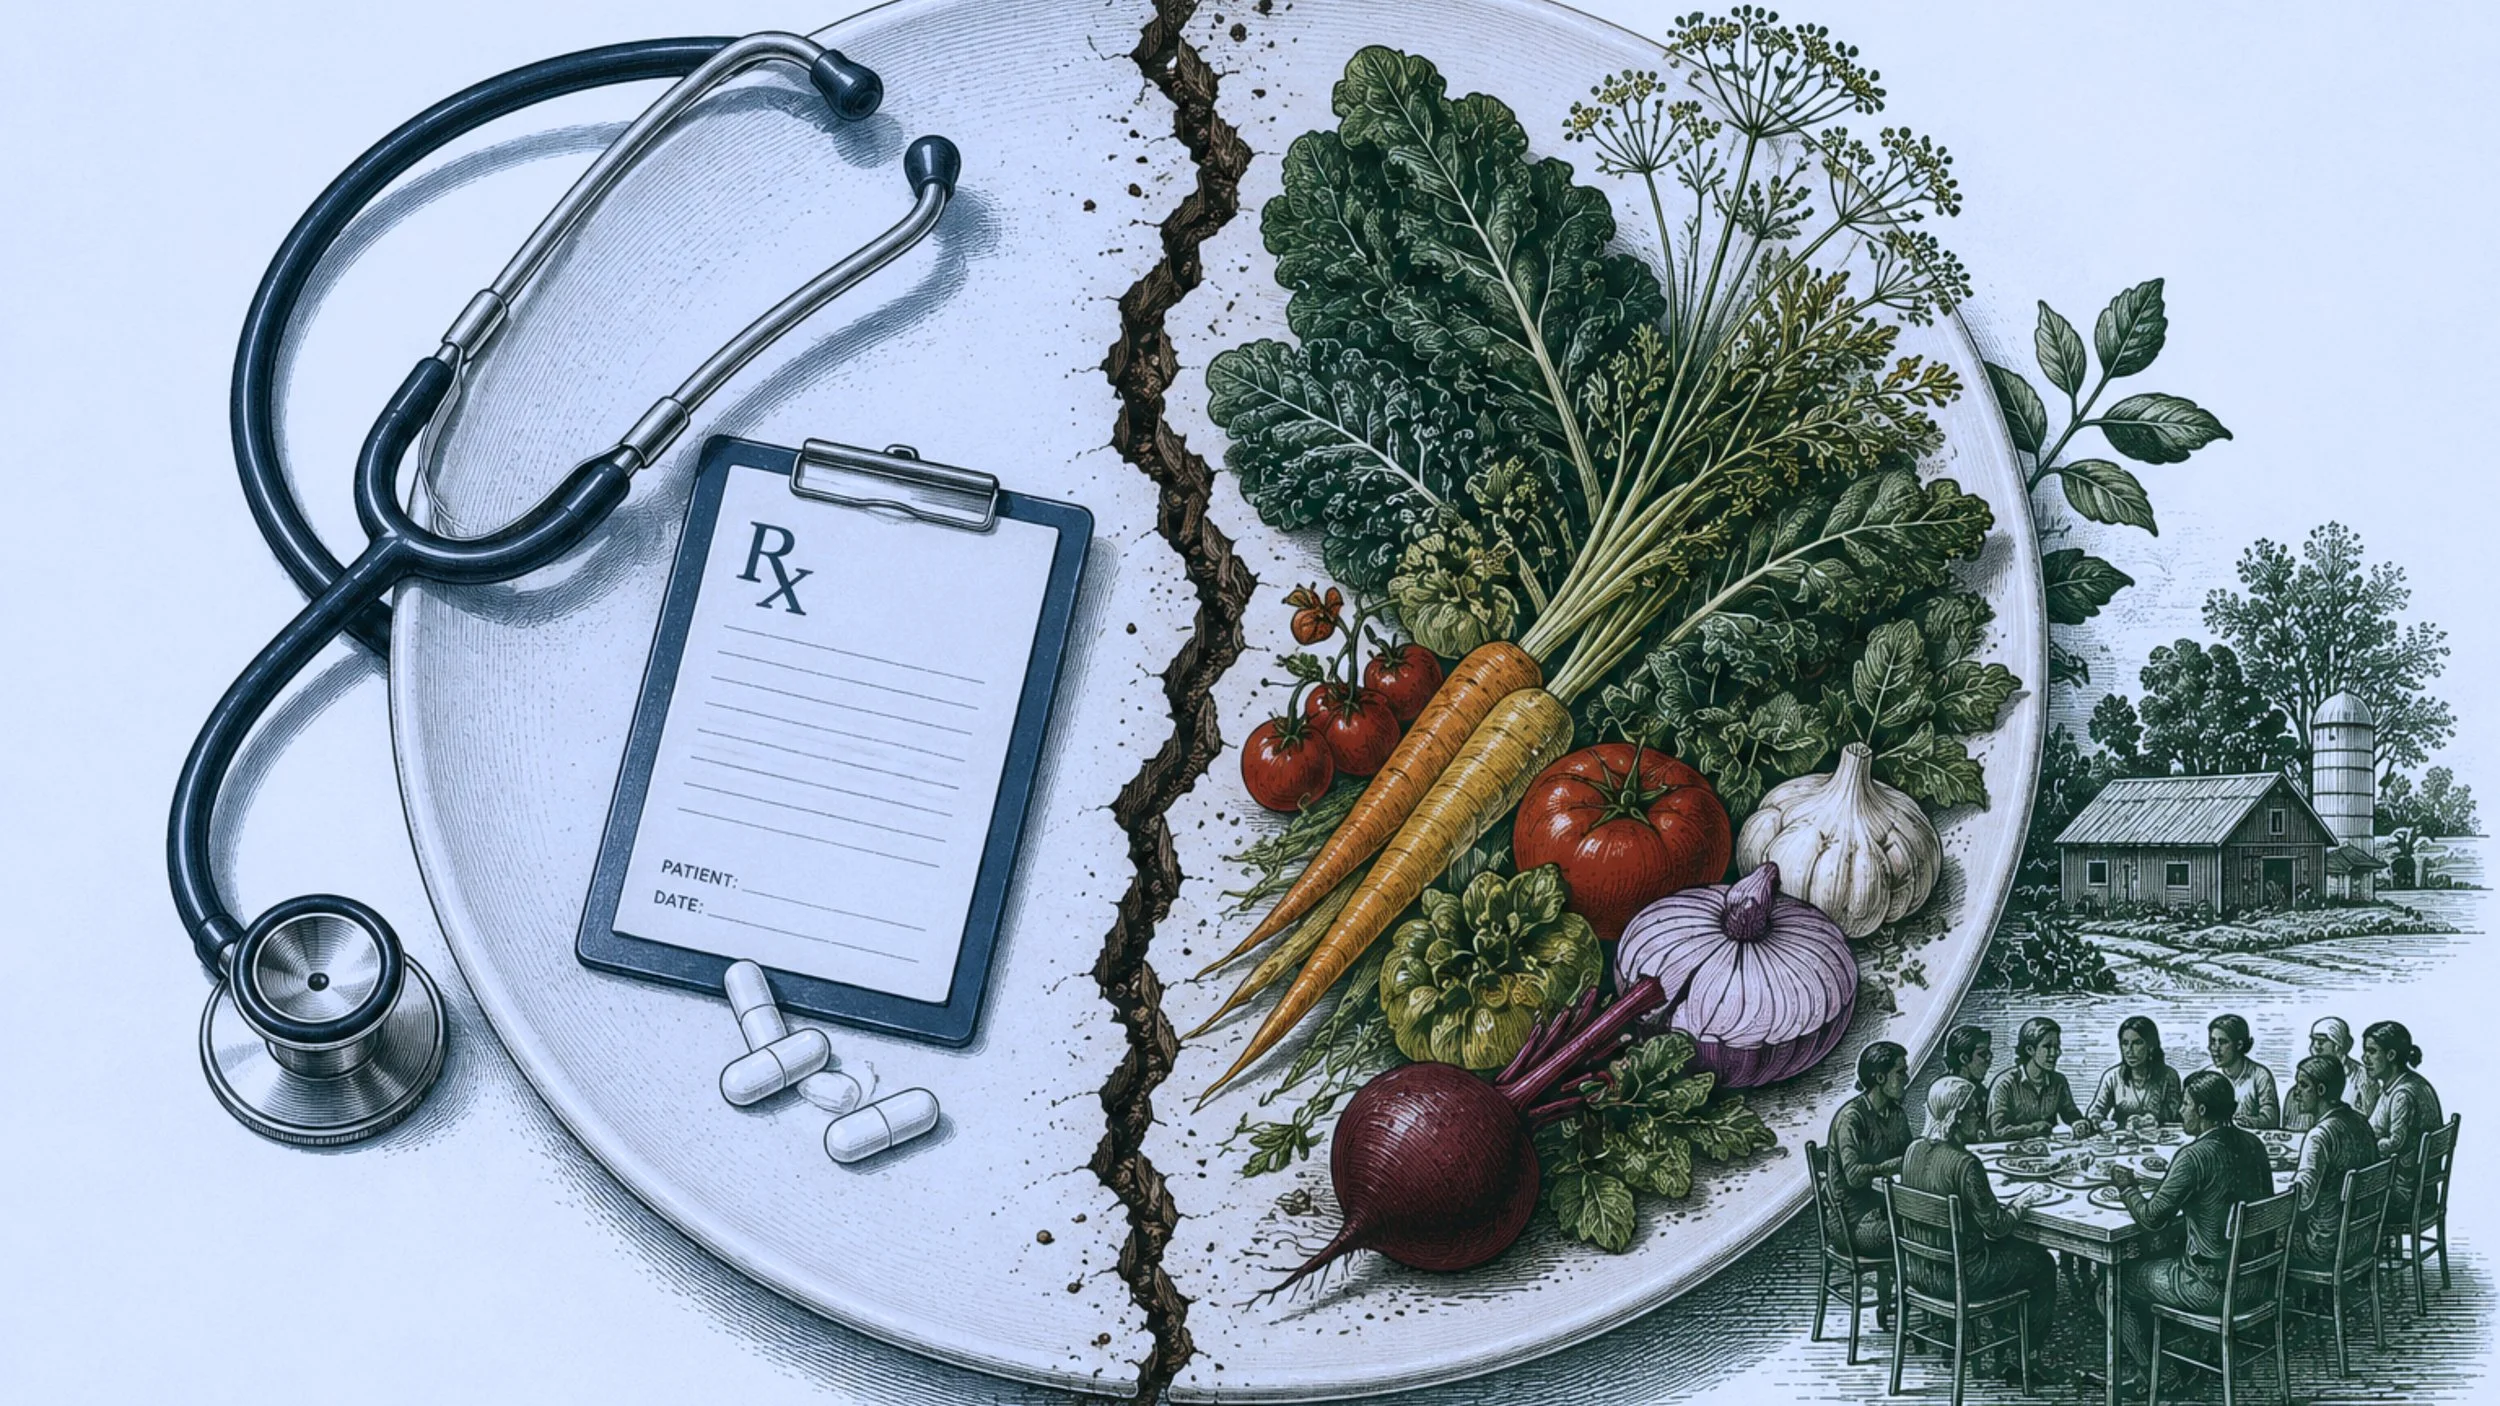
Food can do more than fill a plate. It can support healing, strengthen community, and help people care for their bodies in ways that feel sustainable and dignified.
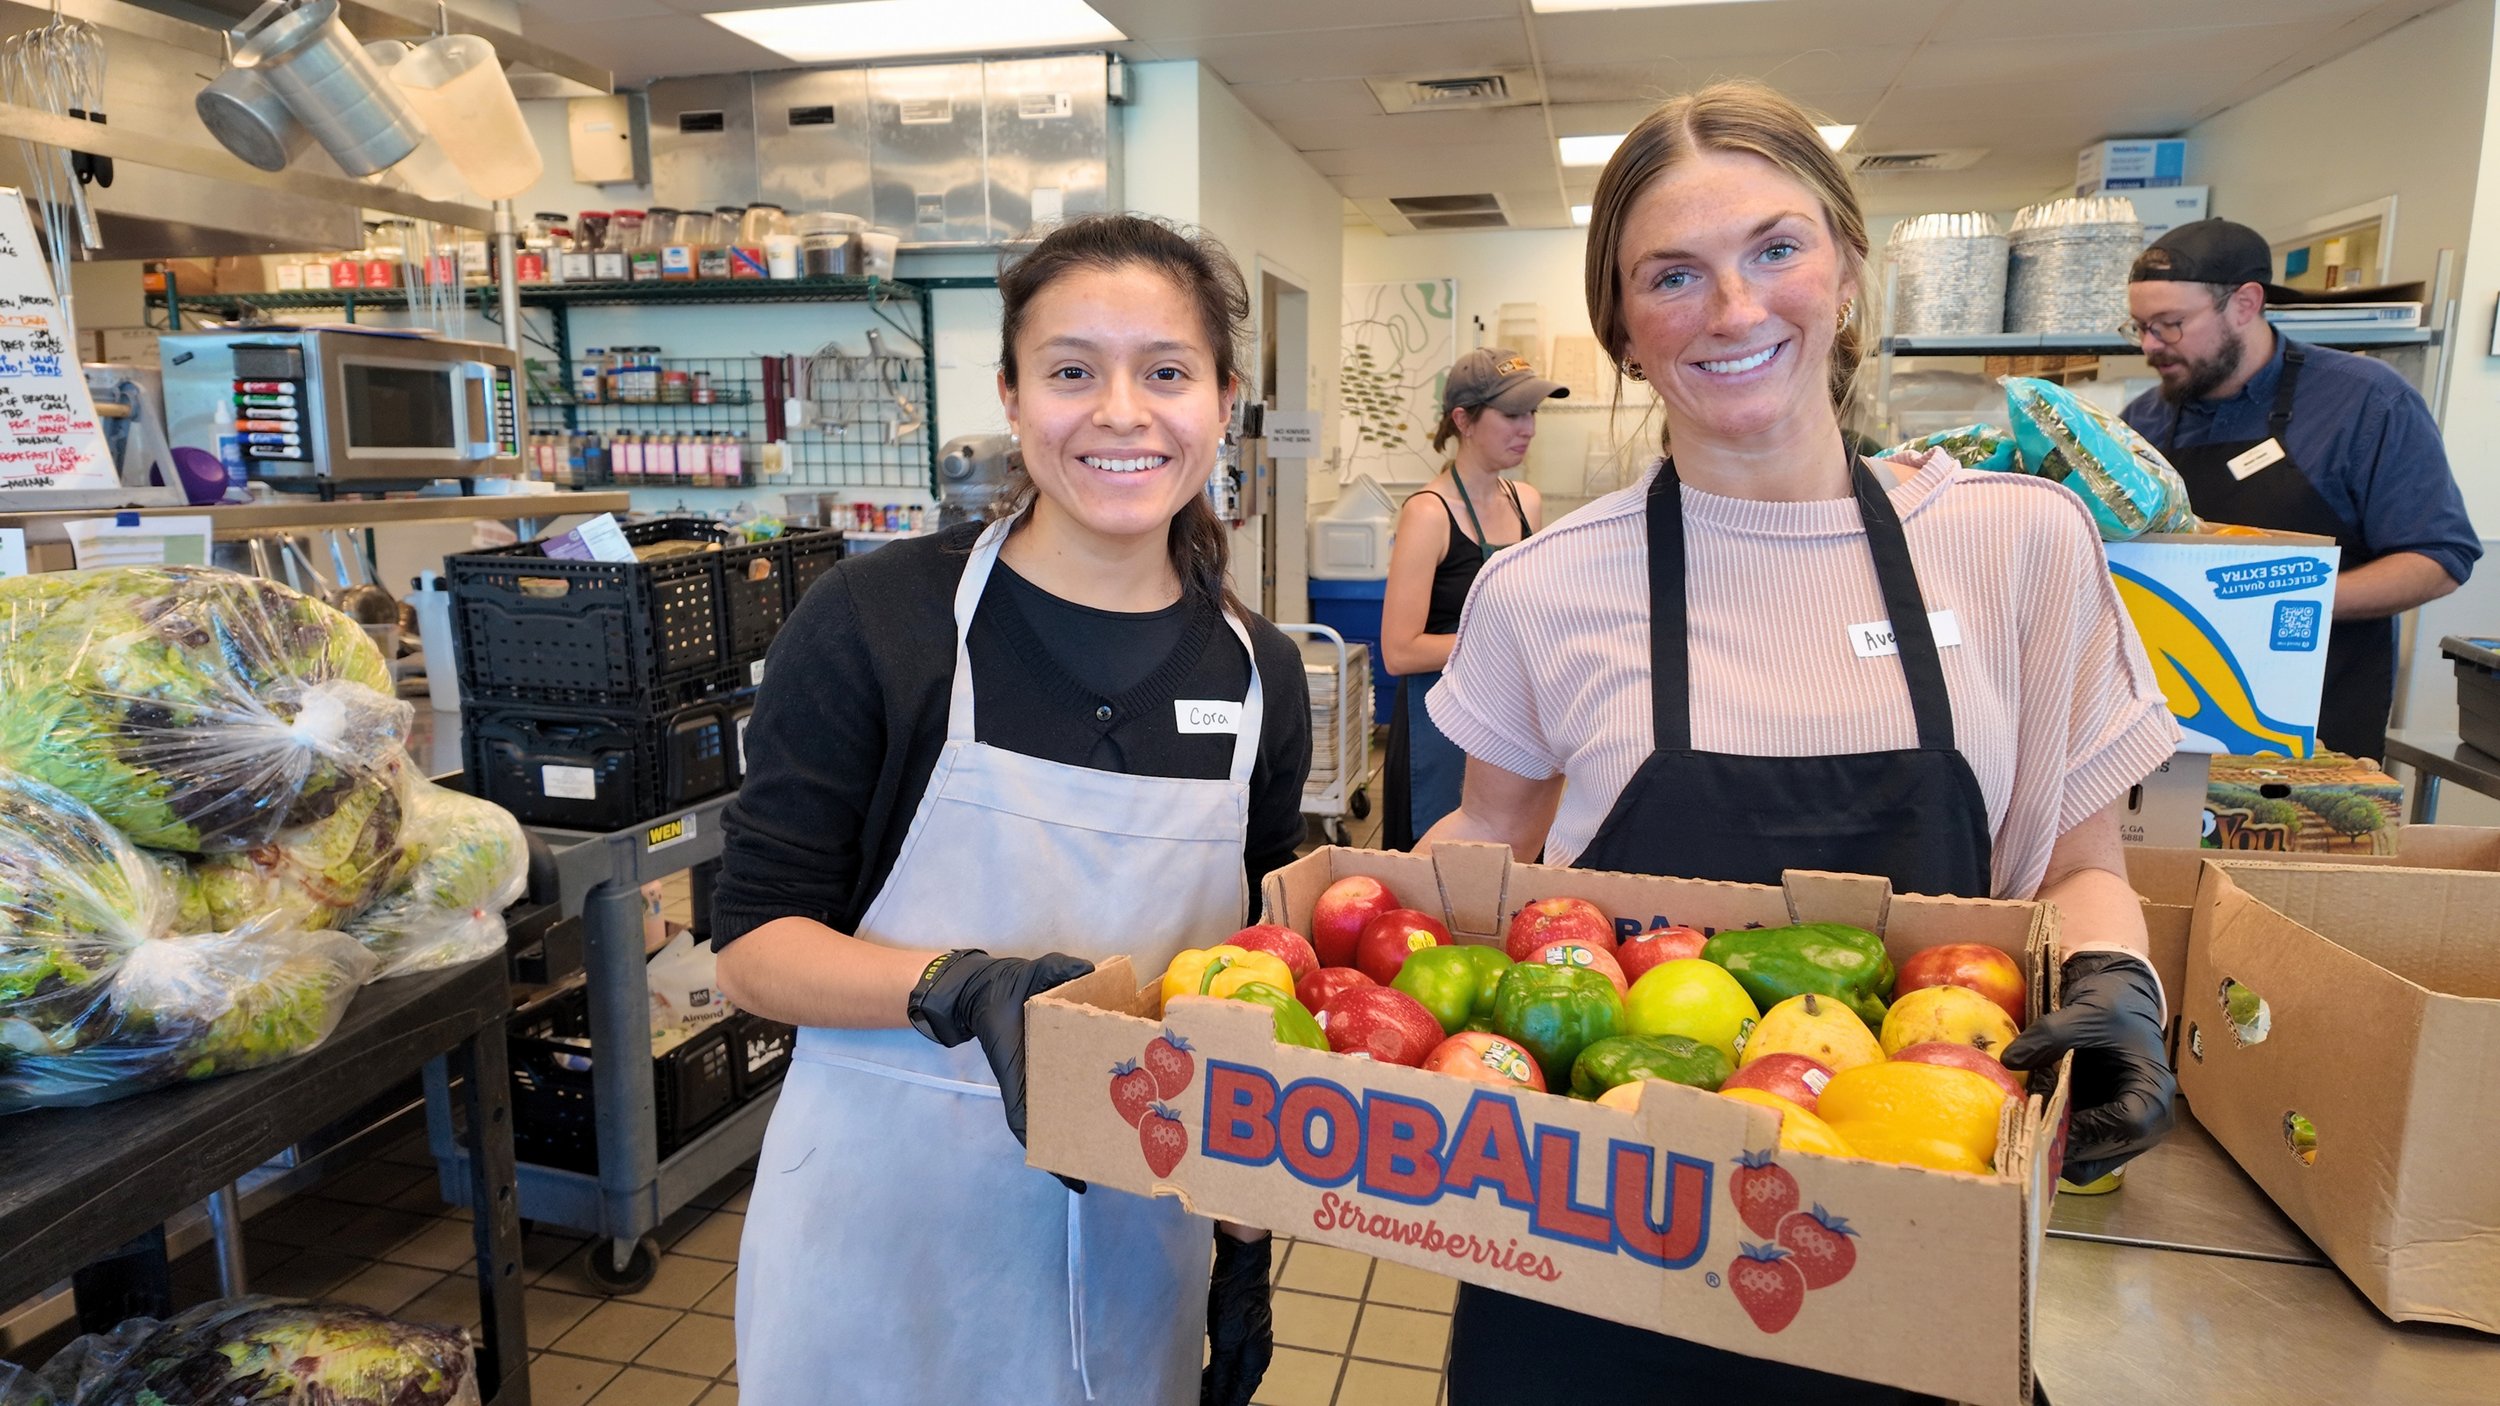
Through our Produce Rx pilot, we are working alongside community partners to support better health outcomes through access to fresh, nourishing food. In partnership with Wayspring, we provide fresh produce for patients while care teams help coordinate access and provide ongoing support.
Together, we are building a model that strengthens dignity, connection, and well-being through food.
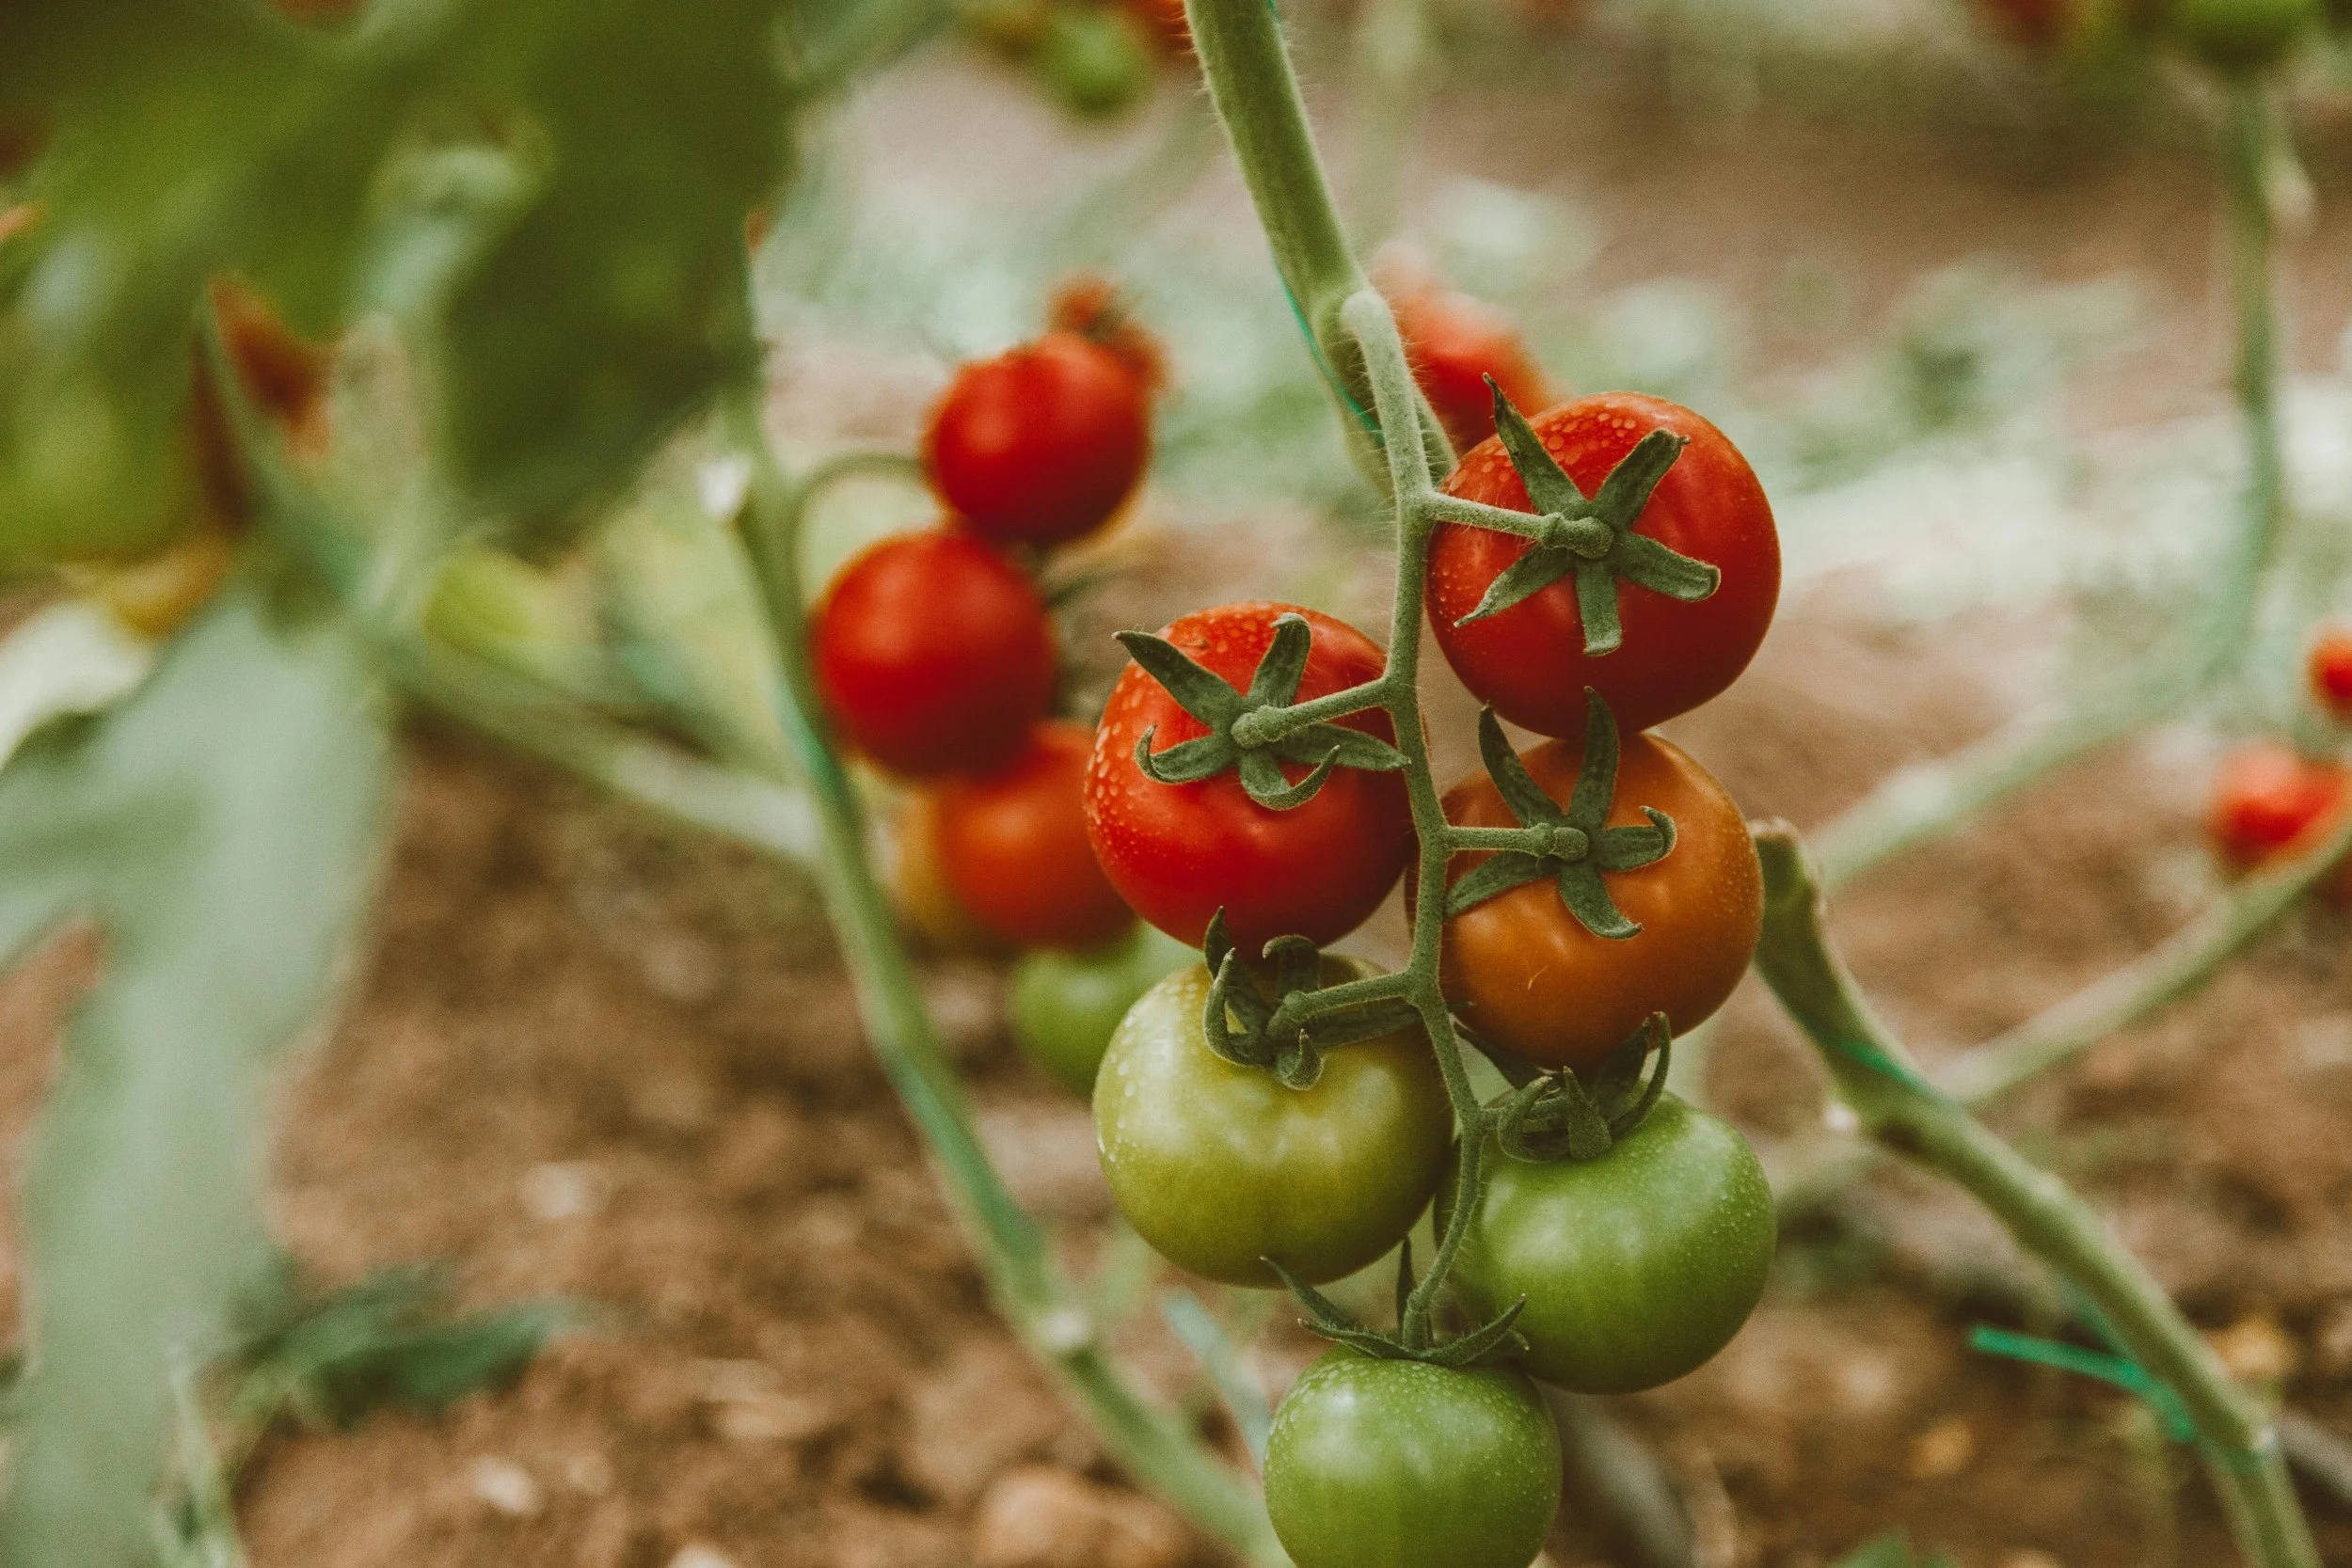
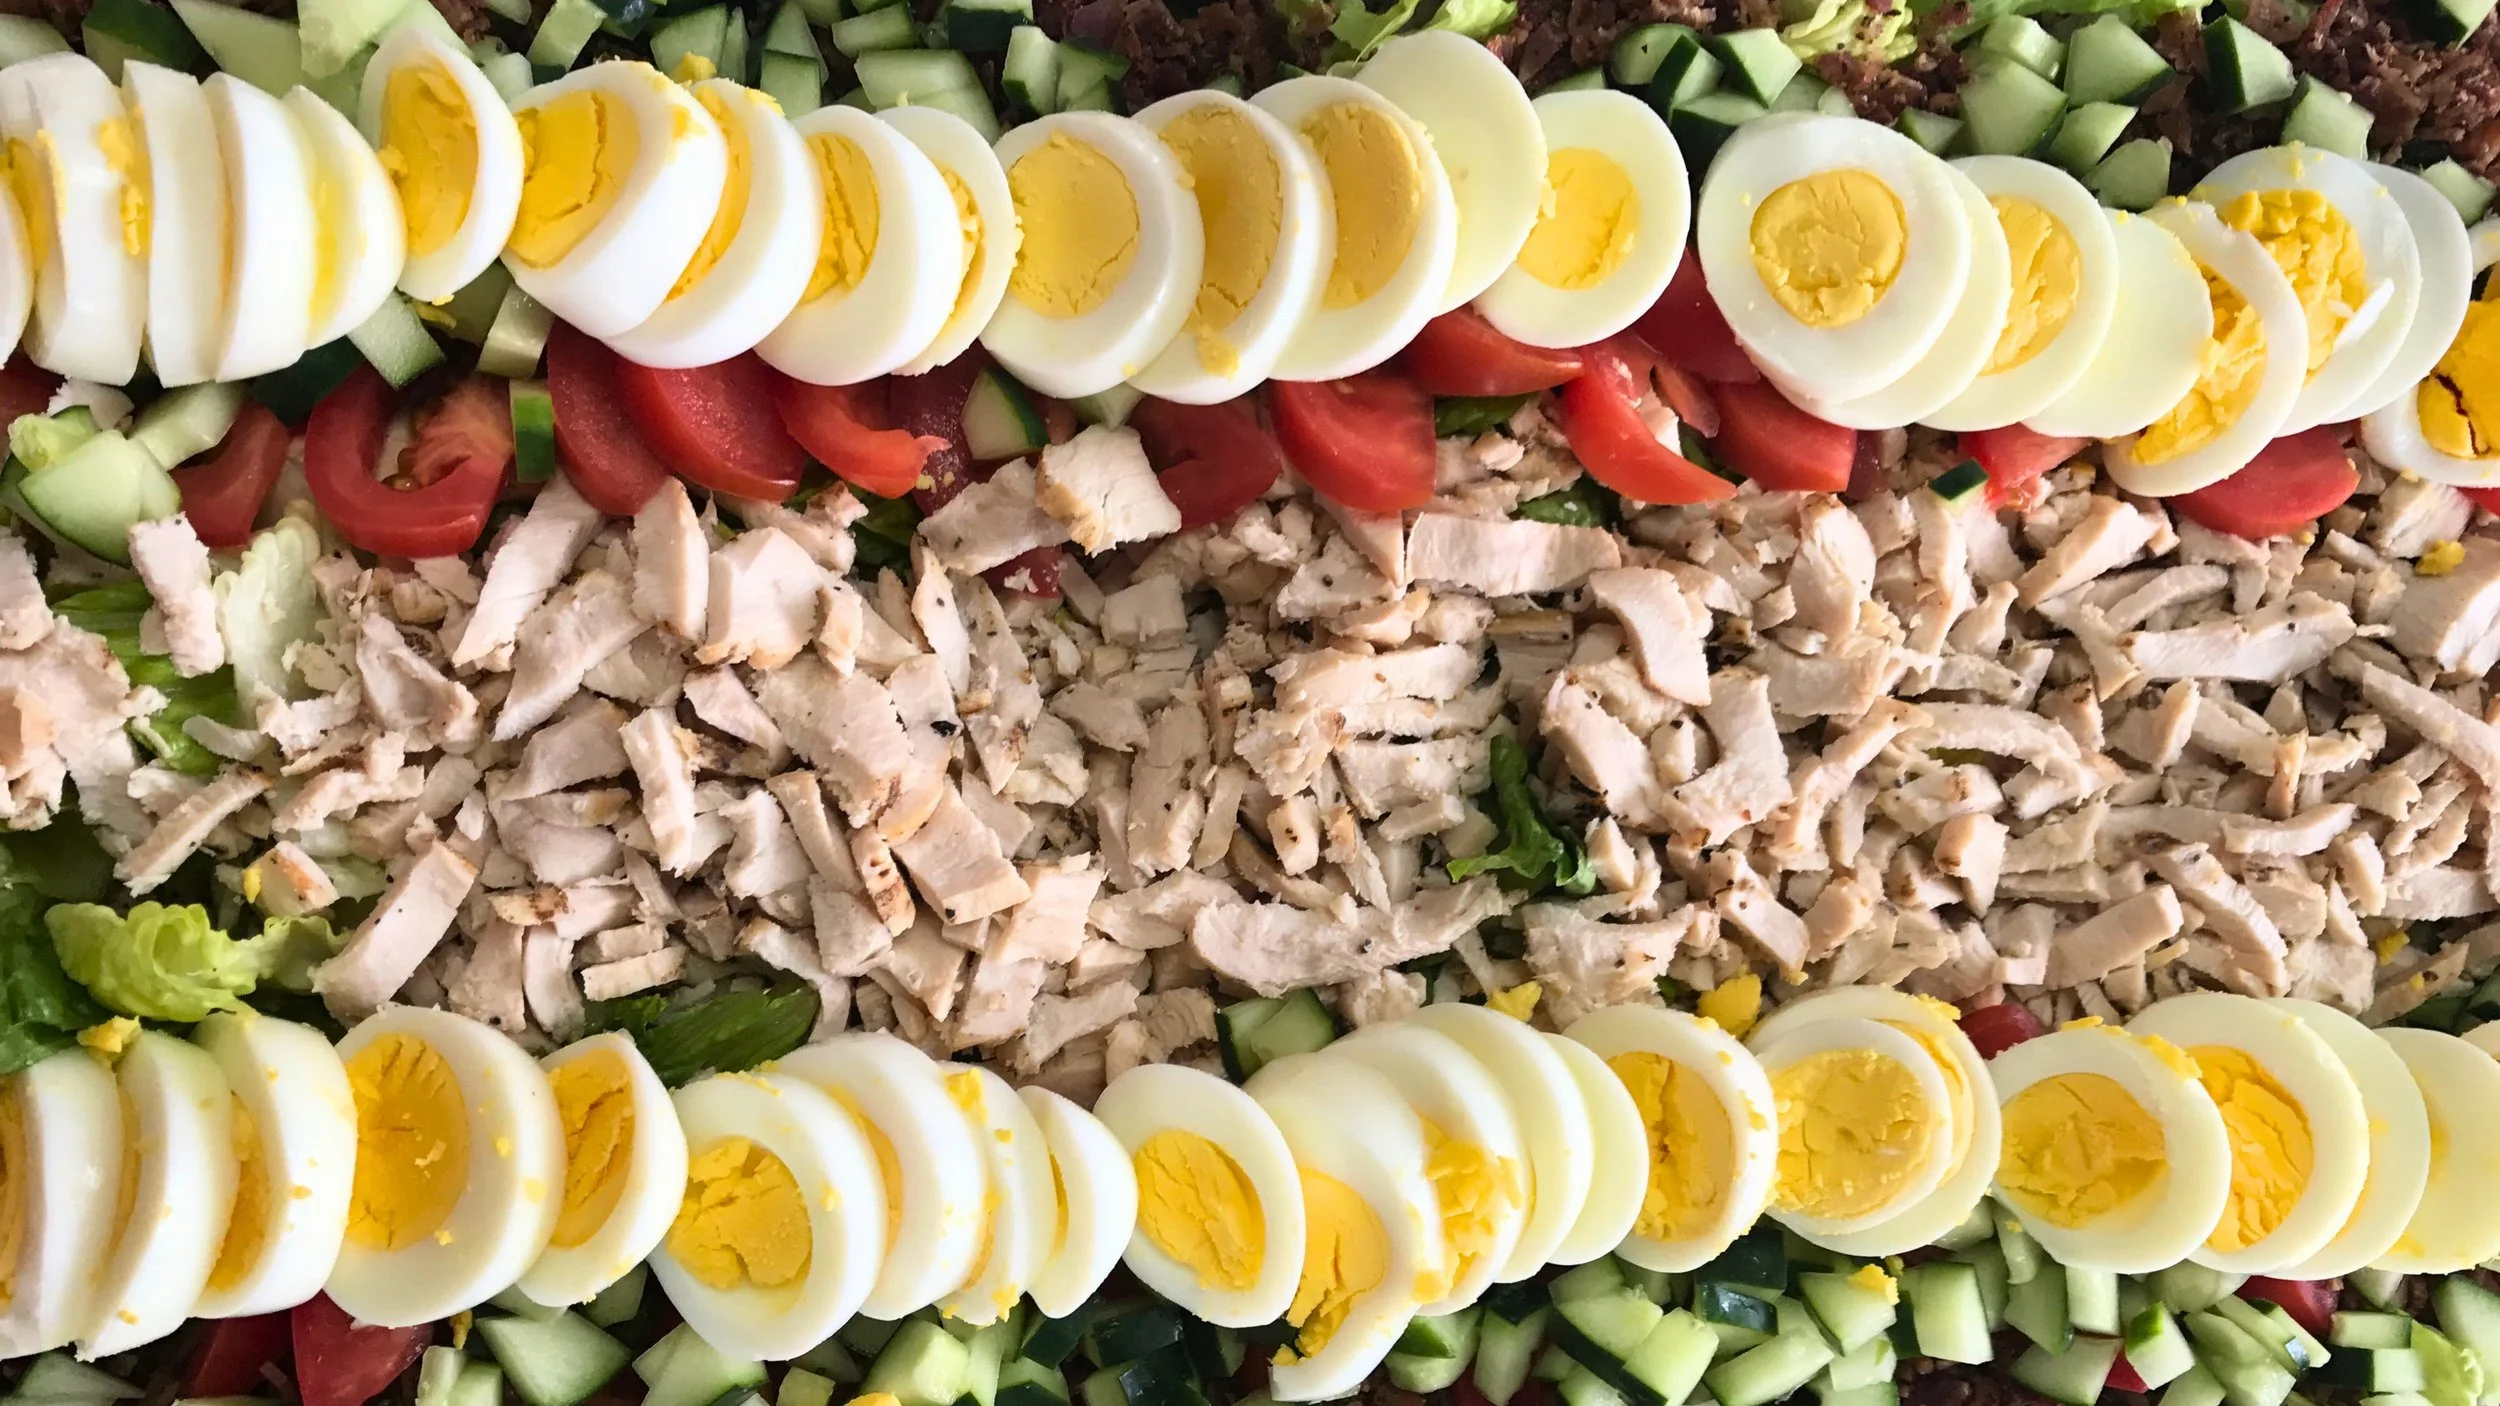
One way we support this work is by sharing simple, nourishing recipes that make fresh ingredients approachable in everyday kitchens. This month’s featured recipe brings together two ingredients that are both accessible and deeply nourishing: butternut squash and black beans.
The natural sweetness of squash pairs beautifully with the earthy richness of black beans, creating a dish that is hearty, flavorful, and full of fiber and plant-based protein. Meals like this remind us that good food does not have to be complicated. With a few ingredients and a little care, it is possible to create something both nourishing and satisfying.
Servings: 6
Ingredients
2¾ cups butternut squash, cubed (about 1 small squash, roughly 1 pound)
1 small onion, chopped
1 teaspoon vegetable oil (or cooking oil of choice)
¼ teaspoon garlic powder
¼ cup red wine vinegar
¼ cup water
2 cans (15.5 ounces each) low-sodium black beans, rinsed and drained
½ teaspoon oregano
Instructions
Wash hands with soap and water.
Heat the squash in the microwave on high heat for 1–2 minutes. This softens the skin and makes it easier to peel.
Carefully peel the squash with a vegetable peeler or small knife, then cut into ½-inch cubes.
Peel and chop the onion.
In a large pan, heat the oil. Add the onion, garlic powder, and squash. Cook over medium heat for about 5 minutes.
Add the vinegar and water. Reduce heat and cook on low until the squash becomes tender, about 10 minutes.
Add the beans and oregano. Cook until the beans are heated through.
Recipes like this are a reminder that nourishing food can begin with simple ingredients and shared knowledge. Through Produce Rx and partnerships across Nashville, we continue working toward a future where access to healthy food supports not only nutrition, but long-term health and well-being.
Together, we are growing a food system where care and nourishment move hand in hand.
Recipe from the United States Department of Agriculture. You can find more recipes at https://snaped.fns.usda.gov/resources/recipes-and-menus
Recipes from the Growing Together Farm: Lu Ja's Fried Rice
By Gabby Raymond, AmeriCorps Food Justice Storytelling Content Leader
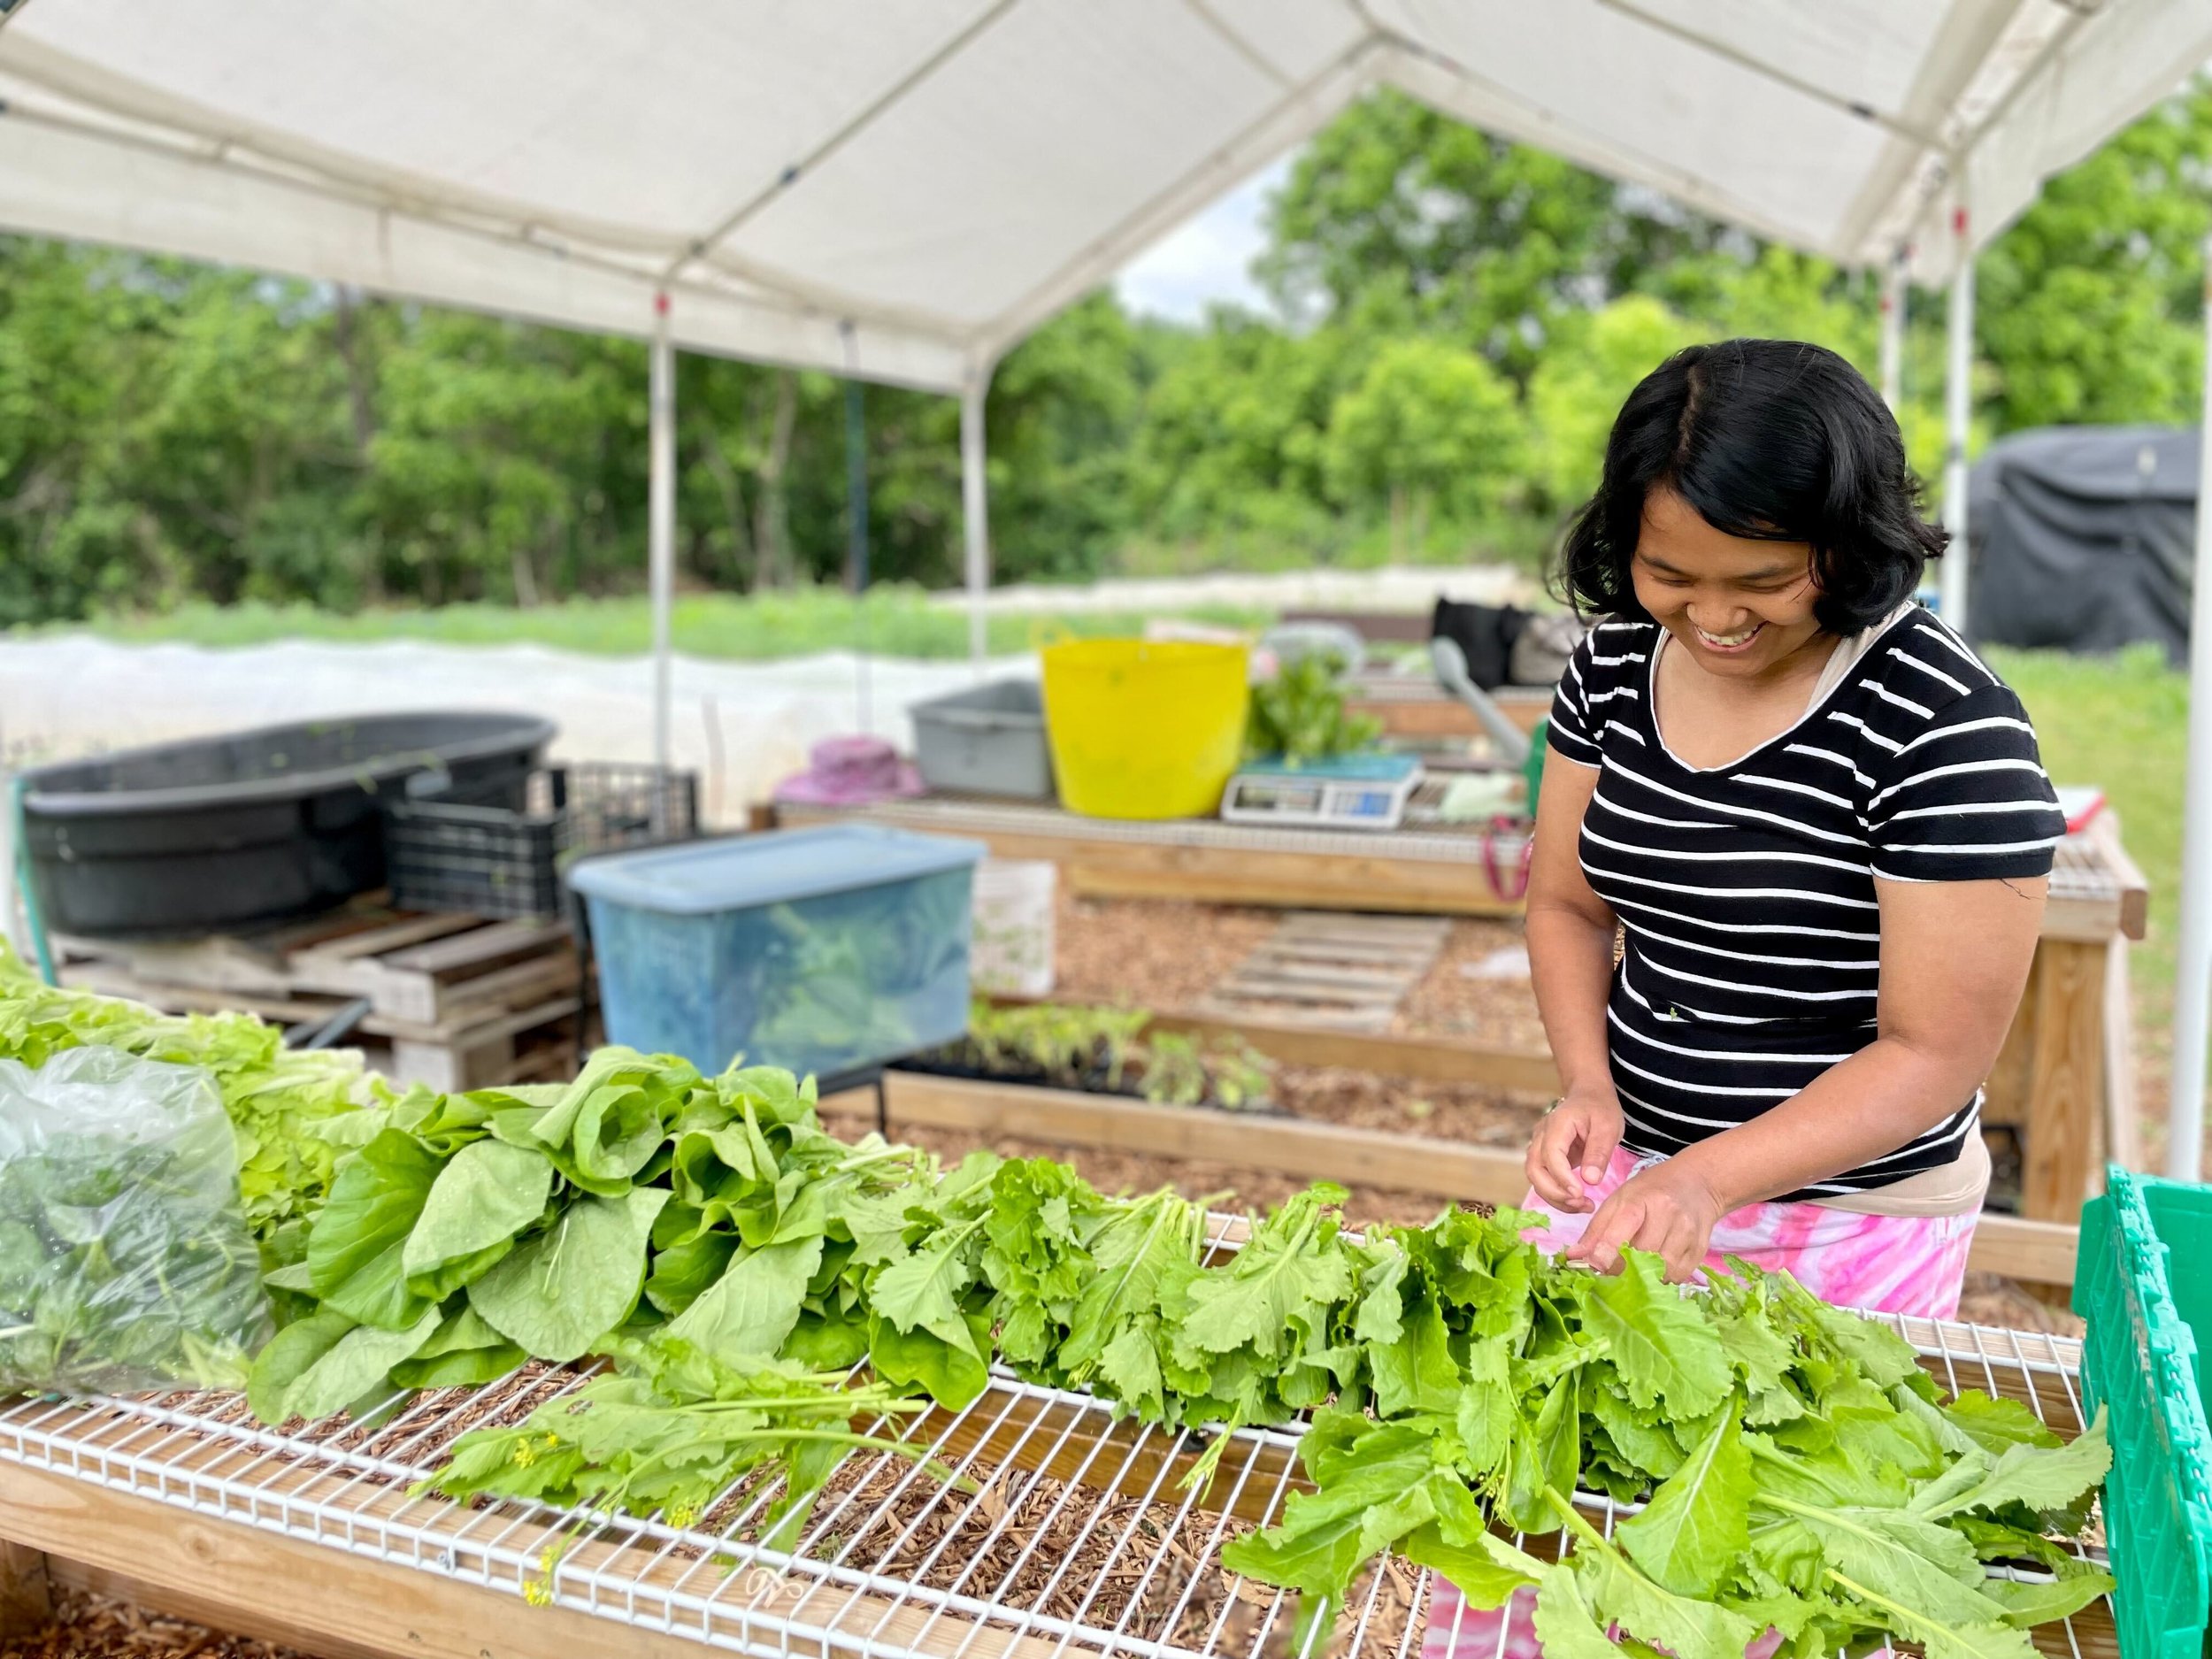
Lu Ja, Growing Together’s newest farmer
"I'm already 30, I need to eat healthy now," says Lu Ja as she vigorously stirs long beans sizzling in a pot with a little oil. She is preparing fried rice homemade style, which she describes as different from restaurants because of its simplicity and lack of lots of salt or MSG.
Lu Ja has two young sons at home, and so she often cooks easy to make, quick meals at home. A go-to meal for her is steamed chickpeas sauteed with garlic and rice, which she used to eat frequently in Myanmar. When she wants to incorporate more vegetable into her meals, she will make this fried rice.
"The tongue likes sweet and spicy," says Lu Ja. "But this meal is for a full stomach."
Lu Ja’s Healthy Fried Rice

Ingredients
2 cups cooked jasmine rice
Salt to taste
Sugar to taste
Black pepper to taste
5 to 6 cloves of garlic
Cherry tomatoes, halved
Mixed bell peppers, diced
Long beans, sliced
1 bunch water spinach, chopped
2 eggs
Vegetable oil

Instructions
Add 1 tsp. neutral oil to a pan on medium high heat and cook egg until done. Transfer to a bowl.
Massage 1 tsp salt into cooked rice.
Add more oil to the pan and cook long beans until soft.
Stir continuously and add salt, sugar and pepper.
Add bell peppers and when incorporated stir in chopped water spinach and rice.
Combine, add in chopped egg and stir in any additional seasoning.
Let rice cook until you can hear it begin to crackle.
Stir and then add tomatoes and Thai basil leaves and flowers.
Stir and scrape the bottom to incorporate any crunchy bits.

Although the eggs and vegetables are flavorful on their own. if you're looking to pack a little more punch to the flavors of this dish, you can incorporate your own sauce when you add the rice.
Option 1:
1/2 tsp sesame oil
3 tsp soy sauce
Option 3:
3 tsp fish sauce
1 tsp oyster sauce
1/2 tsp sugar
Option 2:
1 1/2 tsp soy sauce
1 1/2 tsp dark soy sauce
For the best consistency when making fried rice, use cold leftover rice. Day old rice works perfectly because it will not become mushy when frying.
Vegetable fried rice can also be garnished with chopped scallions or cilantro and served with tomatoes and cucumbers on the side. You can also add chicken or shrimp if you don't want a strictly vegetarian dish.

Tips from the Kitchen: Butternut Squash
Meals Coordinator Sarah Farrell shares a quick and easy(ish) way to cut hardy, resilient butternut squash, and we include a few favorite recipes too!
It’s okay to admit a love-hate relationship with butternut squash. Yes, it can be hard to cut — but, wow, it also can be versatile and delicious! We love that this plentiful fall squash keeps so well in cold storage, and we are grateful to have generous sources who gift us butternut squash such as Cul2vate Farms and Bells Bend Farms.
Meals Coordinator Sarah Farrell shares a quick and easy(ish) way to cut these hardy, resilient vegetables below, and we include a few favorite recipes too!

Butternut squash in cold storage. Thank you, farmers!!
Red Clover & Carrot Cupcakes
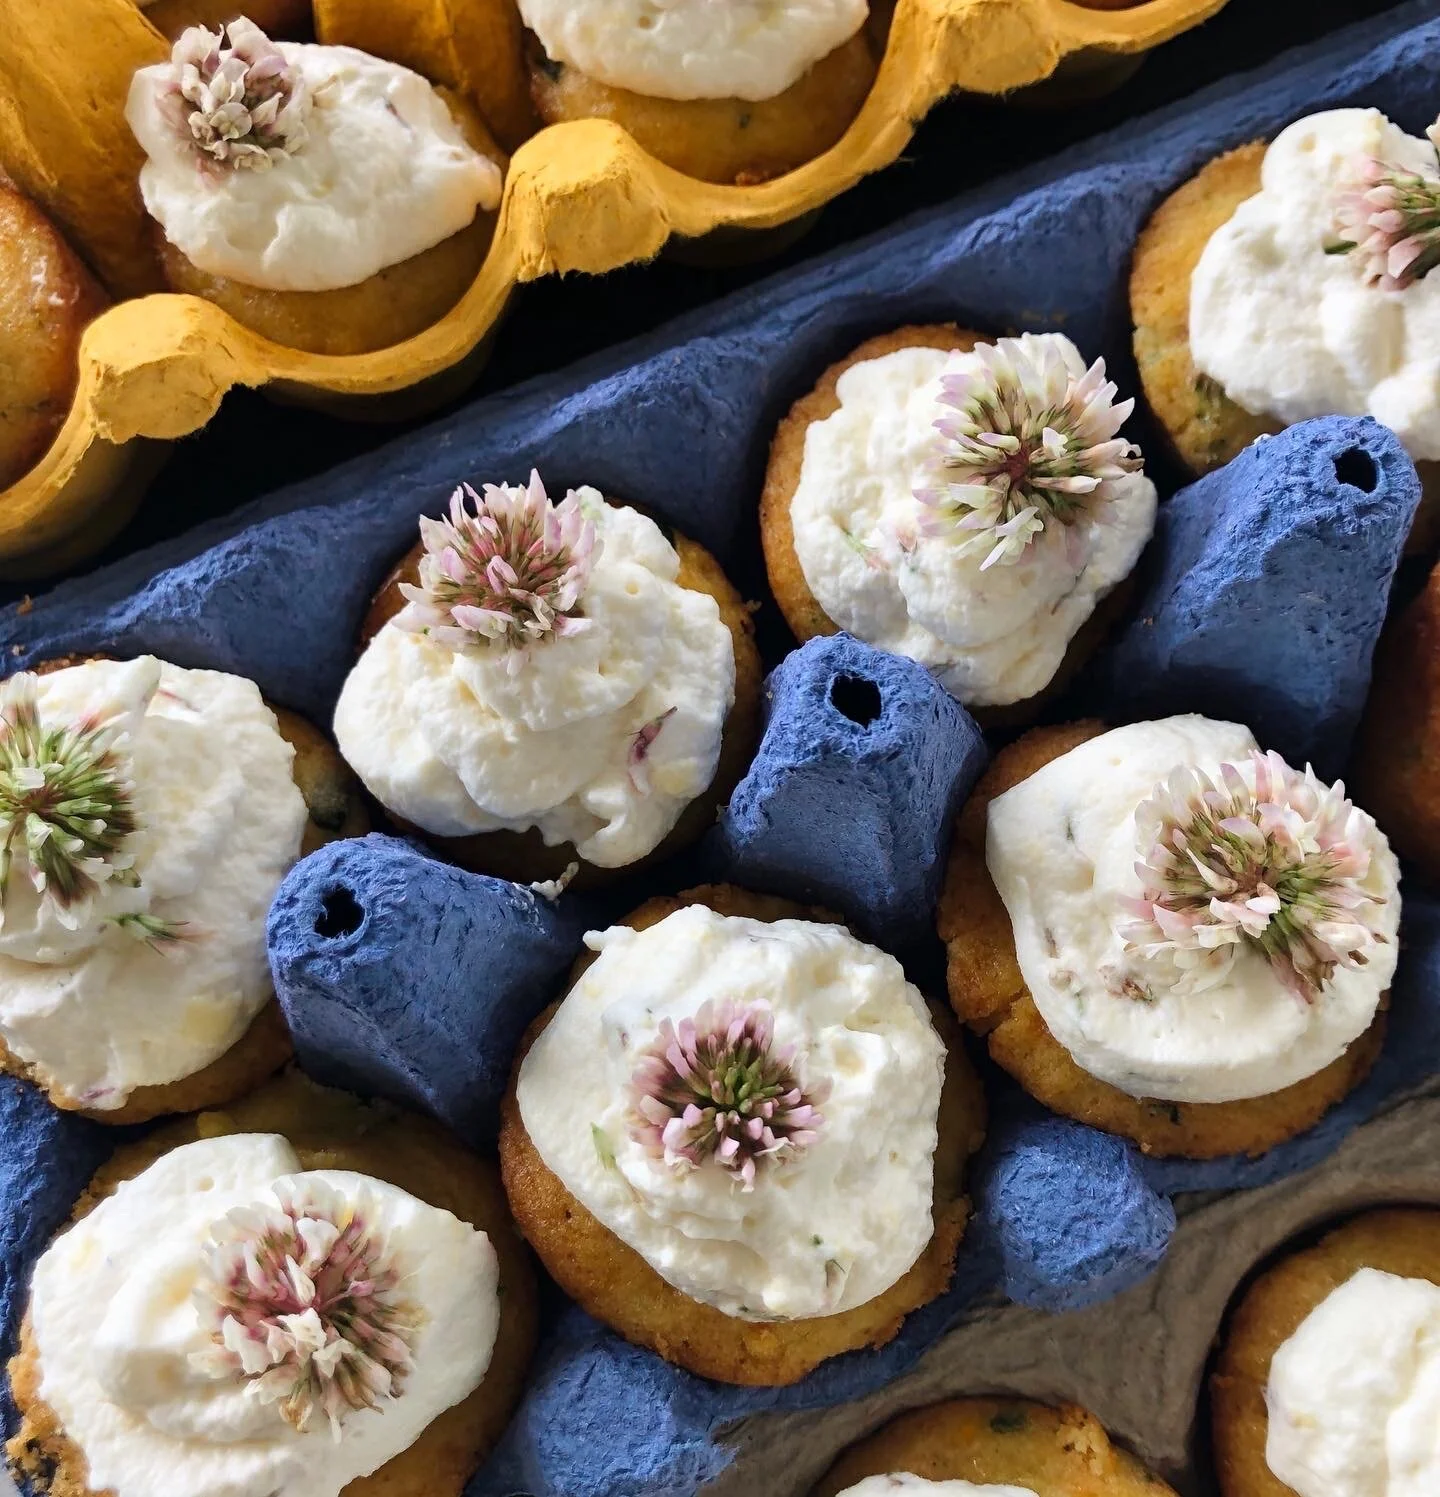
The Nashville Food Project’s Sustainability Team invited the wise Leah Larabell of High Garden Tea to join our staff meeting and lead us in a session of ethical wildcrafting. Naturally, we served snacks too including these Red Clover and Carrot Cupcakes. We’re sharing the recipe (from Elke) with a bit of Leah’s advice too.

Earlier this summer, The Nashville Food Project’s Sustainability Team invited the wise Leah Larabell of High Garden Tea to join our staff meeting and lead us in a session of ethical wildcrafting. Naturally, we served snacks too including these Red Clover and Carrot Cupcakes made by Elke Hoffman, Operations and Sustainability Manager. We’re sharing her recipe below along with this bit of wisdom from Leah who reminded us that we’re not only in nature but of nature.
“We abuse land because we regard it as a commodity belonging to us. When we see land as a community to which we belong, we may begin to use it with love and respect.”
- Aldo Leopold

Red Clover and Carrot Cupcakes
Ingredients:
1 cup shredded carrots
2/3 cup coconut oil
1/4 cup sugar
4 tablespoons clover honey
3/4 red clover flowers (washed & segmented)
2 large eggs
3/4 cups self-raising flour
3/4 cups almond flour ( can just use all self rising flour, but the almond flour compliments to the clover well)
1 Heaped tsp baking powder.
For the icing:
2 cups heavy whipping cream
1/4 cup clover honey
1/2 cup red or white clover flowers (washed & segmented)
1/4 cup powdered sugar (not necessary, but can be added for a sweeter taste)
20 clover flowers washed and left whole to top cupcakes
What to do:
Preheat Oven 350 degrees.
Grease mini muffin tins (regular muffin tins can be used, but cook times may vary).
Wash and finely grate the carrots.
Measure the oil and sugar into a bowl, add the segmented clover heads and beat in the eggs.
Sift the flour and baking powder into the bowl and add the grated carrot. Fold the flour and carrot into the oil, sugar, clover and eggs.
Pour the mixture into the prepared tins and bake in the pre-heated oven for 11-13 minutes until the cupcakes are firm and well risen. Allow to cool for 5 minutes, and then turn onto a cooling rack.
Whip the heavy whipping cream on high, slowly adding the clover segments and honey while it whips. You want it to be pretty stiff but be careful not to over whip.
Pipe the clover icing on top of the cupcakes, and add clover flowers on top for additional color and flavor.
Recipe inspired by this version from Huffington Post.
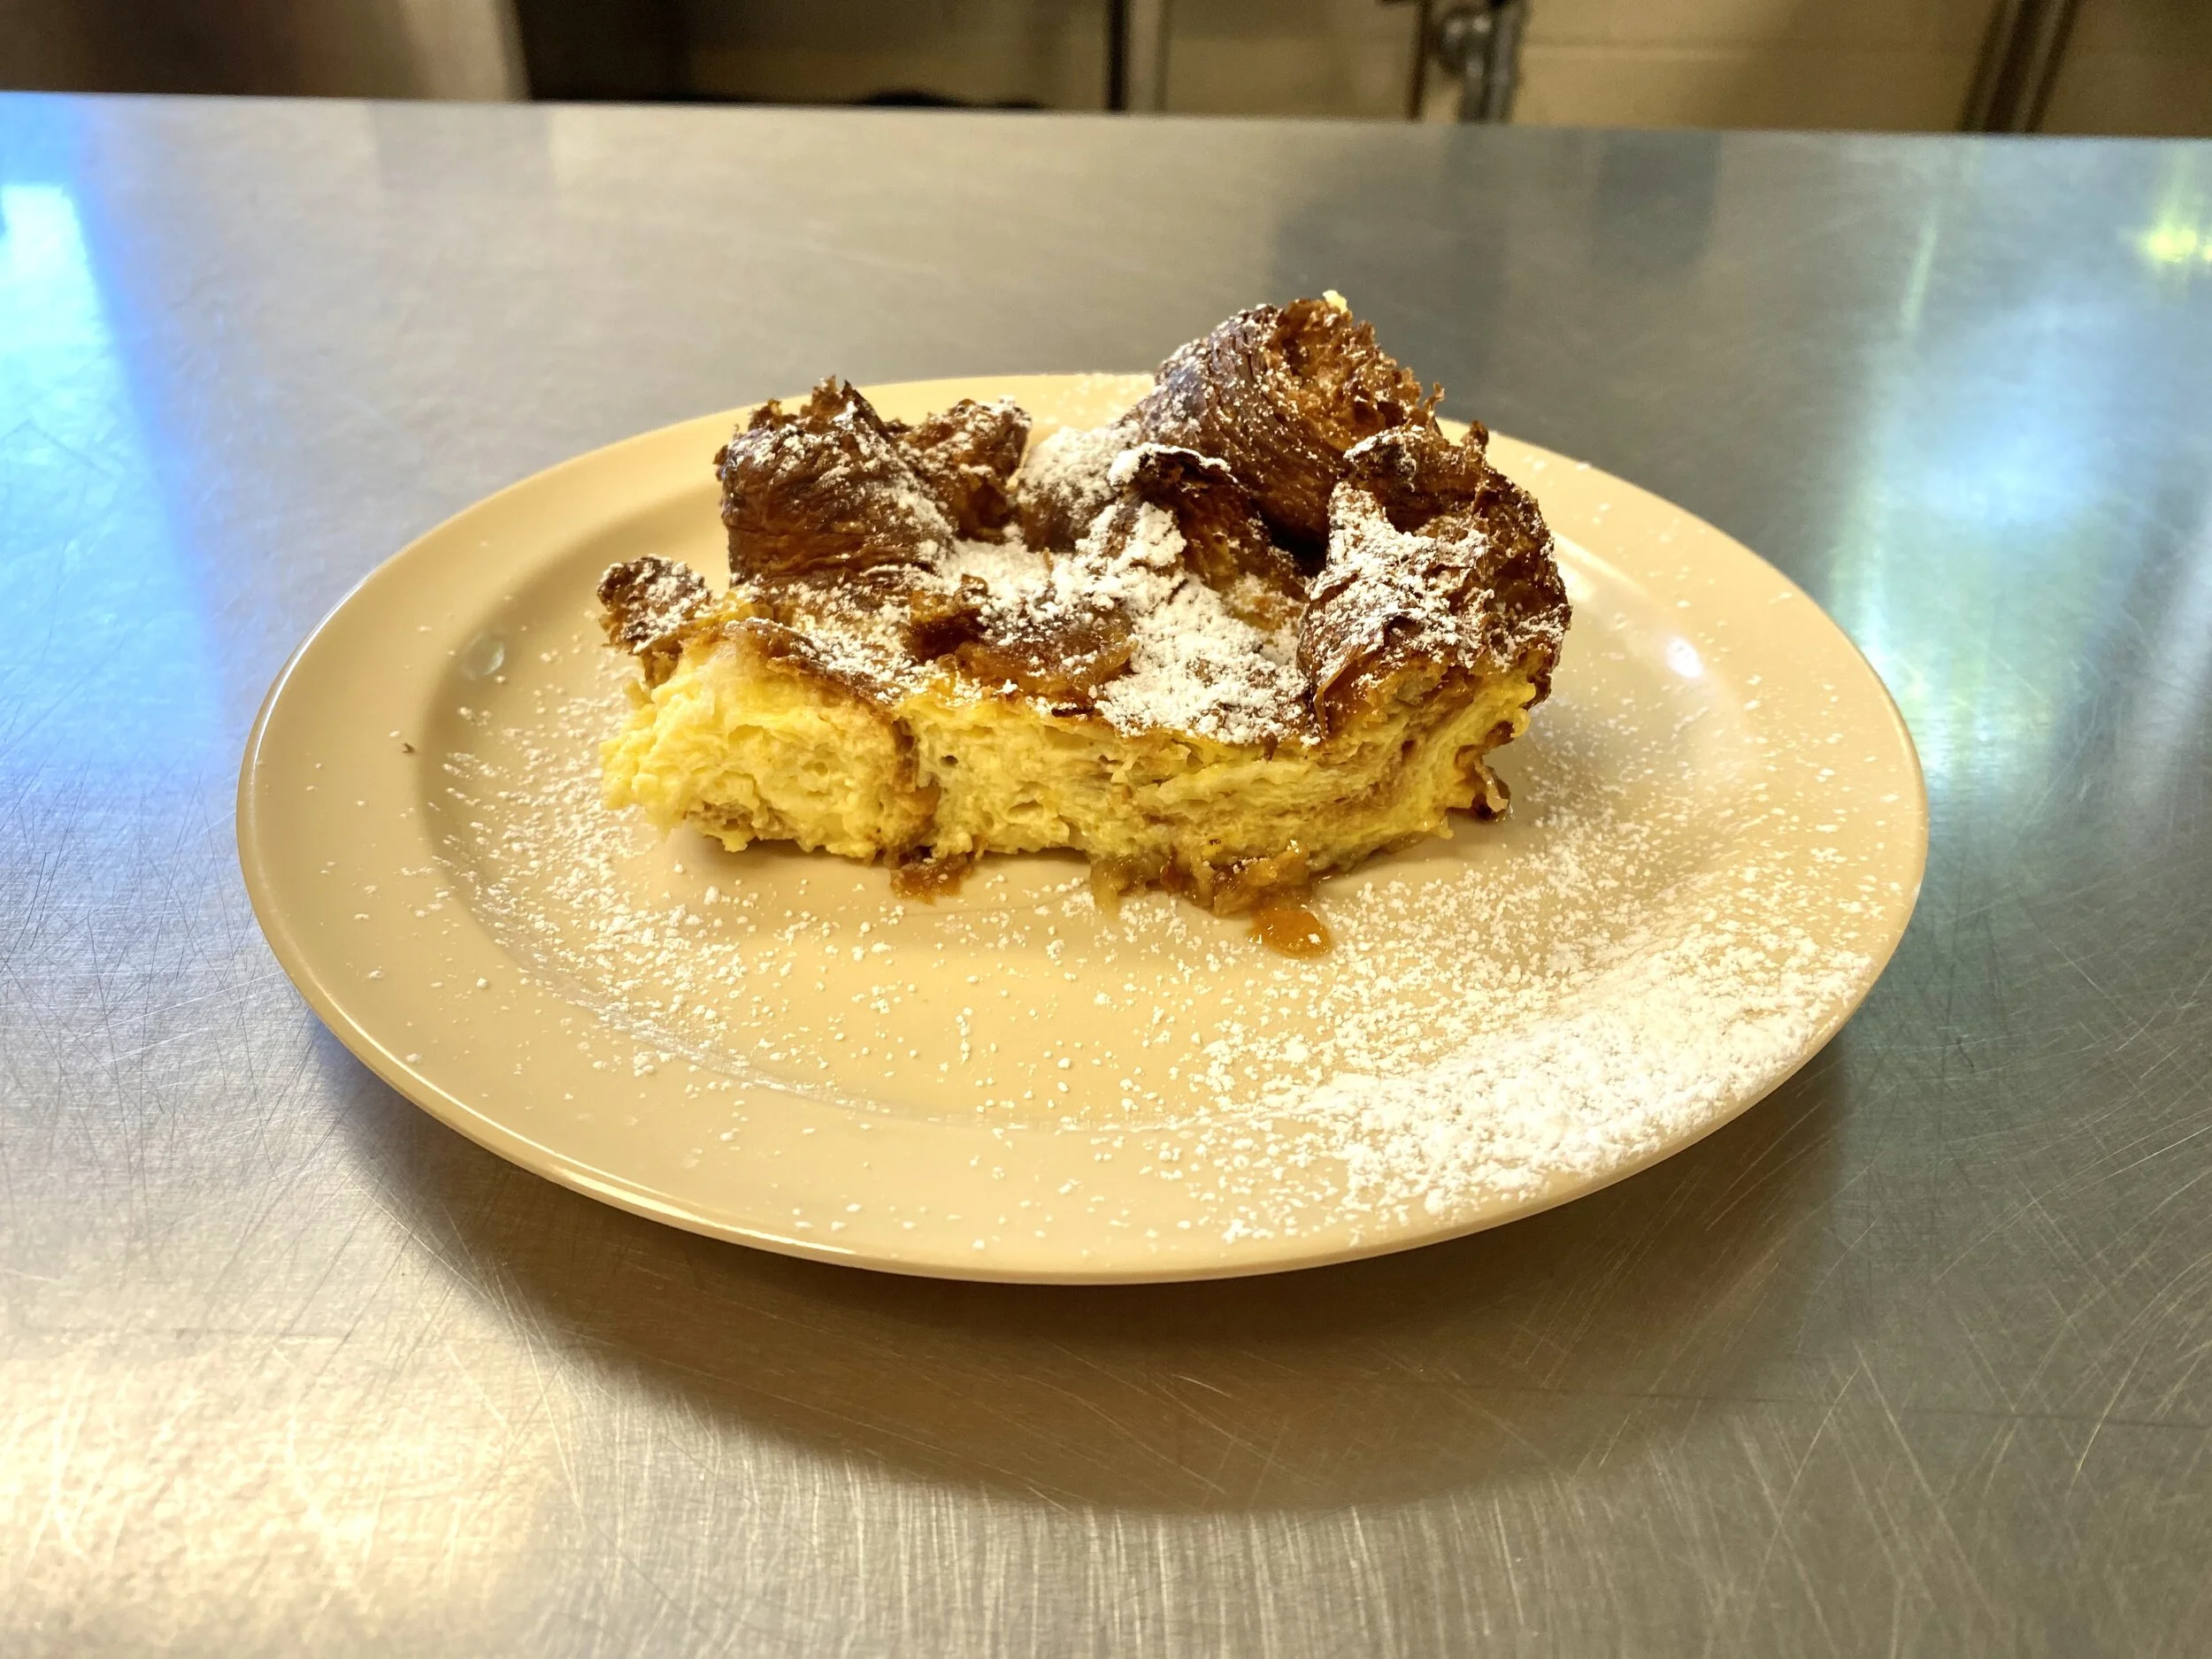
Recipes That Tell Our Stories: Meg's Overnight French Toast
Senior Meals Coordinator Meg Doster cooked up a special treat for the St. Luke’s Community House Pre-K children recently — her family’s favorite French Toast Bake. She shares the recipe and a bit about its backstory with us.
Senior Meals Coordinator Meg Doster cooked up a special treat for the St. Luke’s Community House Pre-K children recently — her family’s favorite French Toast Bake. Today on the blog, she shares the recipe and a bit about its backstory with us. It’s another example of how food tells our stories like the Dirty Pages recipe storytelling exhibit that hangs on the walls in our Community Dining at The Nashville Food Project headquarters.

My mom has a million cookbooks. The beautiful cacophony of books and loose-leaf paper are jam-packed like sardines in a skinny cabinet in my parents’ kitchen. She has recipes saved from her mother and her great-aunts scribbled on notecards; recipes printed from Pinterest from women in her bible study; recipes saved from my father’s mother as her memory wanes. The ones that we love have food stains and notes in the margins. Each one represents moments in her life and the people that have shaped and held her, like she shapes and holds our growing family.


In “The Pot Thickens: Solving Mysteries in the Kitchen,” compiled in the mid-1980s by my hometown junior women's league, you will find our Overnight French Toast. My mom has taken this recipe and elevated it over the years. It is one of those special dishes that we only serve once a year, and it never tastes the same way as when she makes it (I have tried! I don’t have the touch!). She often makes it after our Christmas Eve festivities, which don’t end until well past midnight. I don’t know why we never make it before our Christmas Eve party, but it’s not helpful to ask these questions to your mother when it is 1am and you just hosted 30 people. Nonetheless, this dish is perfect. Years of tweaking to the recipe has yielded one of the principal dishes in our family’s holiday repertoire. It does not feel like Christmas without our ritual of pulling the blender down from the cabinet (probably the only time out of the year we use the blender), cracking the eggs, and doctoring up a maple syrup on the stove. It consists of typical french toast ingredients (eggs, milk, bread, etc.) with the added twist of letting the french toast sit overnight to absorb the liquid. After it bakes, I recommend dusting it with powdered sugar for serving. It also makes for a lovely leftover, warmed in the microwave or eaten cold out of the tupperware.
Goodbye (and Thank You), Winter: A Reflection on Finding Beauty Even in the Toughest Seasons
Winter holds space for all of us to deal with the hard truths of the year that has just passed. And through the sharp lens of winter’s harsh reality, it gives us something else too: the prospect of new beginnings, and with it, the arrival of spring.

by Julia Baynor, Meals Manager
Ah, the seasons.
Even in our pandemic year, summer at The Nashville Food Project still managed to show how we receive so much abundance, with piles and piles of vegetables coming through our doors.
Through donations and sourcing from local farms, we were up to our ears in tomatoes, cucumbers and summer squash. The Tennessee summers are long, and bountiful produce filled our walk-ins until what seemed like October. We look forward to that time again.

Then summer slipped away and a beautiful fall descended upon us until the constant flux of donations started to dwindle. I found myself calling over to our headquarters kitchen from my office a few blocks away at St. Luke’s Community House, looking to source extra produce for our meals. “We’ve got nothing,” became the common refrain. Winter had started to set in.
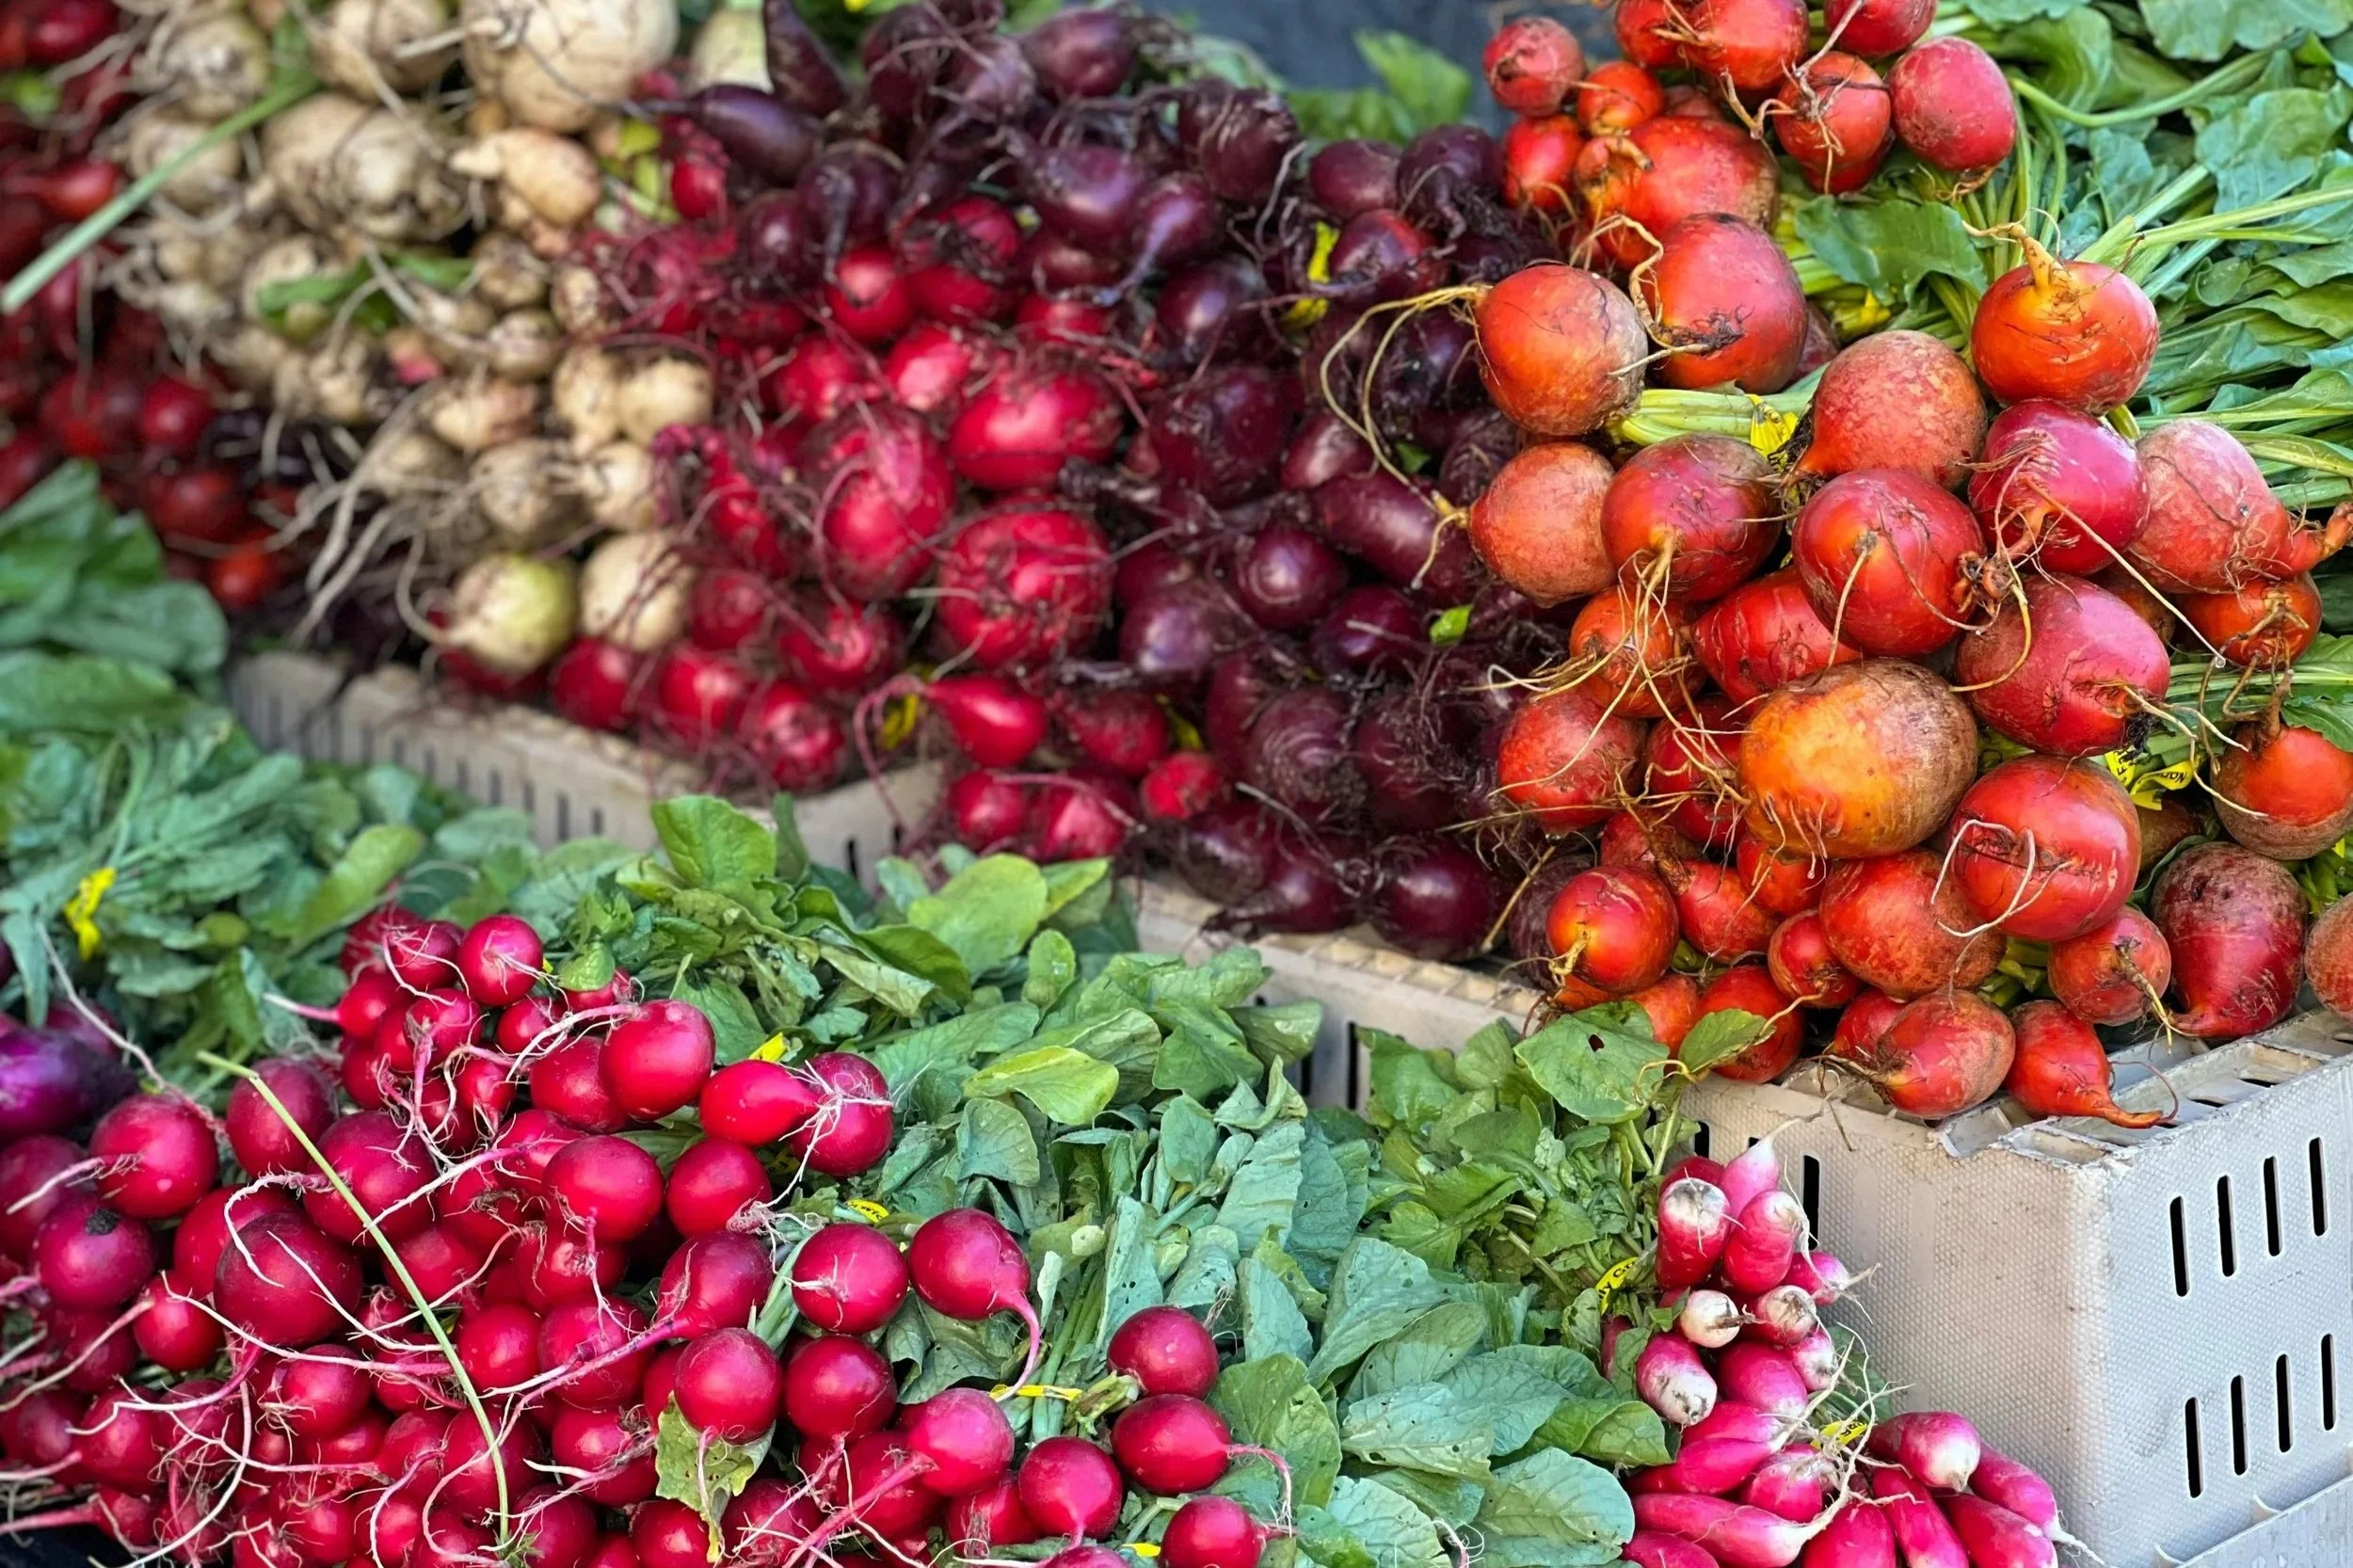
Fresh produce is one of the things I love most about my job at TNFP. I will never stop marveling at the natural rainbow housed in our bins: the crimson tipped lettuces, the blushing pinks of crunchy radishes, and the deep, dark violet of beets fill me with inspiration. Turning beautiful produce into delicious meals and sending them out to nourish our community is what I live for, but in the winter, things get a little harder. Produce becomes more scarce, and the items we do get aren’t always the easiest to work with. Butternut squash have tough skins and seeds that must be scraped out. Winter turnips come in with gnarled skin and stringy roots that must be peeled away. Working with winter produce can be arduous and slow, much like working through winter itself.

Around the same time the winter season descended upon us, I started contemplating winter myself. In the book “Wintering,” author Katherine May explores the many characteristics of physical winter but also recognizes the difficulties we as humans experience in our personal winters as well. As I read May’s perspectives about the cyclical nature of our lives and of the seasons, I found myself reflecting on the changes the previous year had wrought at The Nashville Food Project.
The meals team has been harboring a winter of its own. In addition to the psychic hardships and exhaustion of working on the front lines of a pandemic, many meals team members suffered the loss of loved ones over the course of the past year. This winter penetrated the fabric of our team as well as we saw several treasured veterans move on to other endeavors. As last days came and went, so did uncomfortable feelings about what to do next as a team. In a lot of ways it has felt like starting over, building our program from the ground up.
There were days that felt scary and discouraging. A meals team without several foundational members felt like staring into the darkness of winter. I kept going back to lines in “Wintering” which assured me, eventually, things would look up.
“Over and again, we find that winter offers us liminal spaces to inhabit. Yet we still refuse them. The work of the cold season is to learn to welcome them.”
I realized I had been looking at winter with the wrong perspective. With May’s musings on my mind, I felt my resistance to winter begin to thaw. We hired new team members who came with fresh energies like spring, and I began to feel hope again. With new people come new perspectives, and I look forward to the growth of our program that will come with their ideas.
I also began to welcome that hardy winter produce into the kitchen with less trepidation by focusing on the potential these scrappy vegetables held to become something delicious. This winter, we received upwards of 600 pounds of butternut squash from a local independent farmer, hundreds of pounds of root vegetables from Bells Bend farm, and, after a little winter storm made their delivery routes impossible, Imperfect Foods filled every shelf of our walk-in with boxes brimming with so-called “ugly” produce. In the darkness and cold of winter we were still able to make trays of colorful root vegetables, slowly roasted in our ovens until the peppery bite faded into sweetness. We made silky, garlicky turnip purees, creamy butternut squash pasta sauces, and peeled away the rough exteriors of “ugly” carrots to use in mirepoix for comforting winter soups. Winter vegetables are the perfect example of taking what is seemingly “nothing” and turning it into so much goodness.


On their way to becoming garlic-mashed turnips to serve alongside Meyer lemon-rosemary chicken.
Winter presents a set of circumstances none of us can control. But it also gives an opportunity to embrace the action of letting go. Winter holds space for all of us to deal with the hard truths of the year that has just passed. And through the sharp lens of winter’s harsh reality, it gives us something else too: the prospect of new beginnings, and with it, the arrival of spring.
As I sit outside with the sun on my face for the first time in what feels like months, I can feel it approaching.
“Life meanders like a path through the woods. We have seasons when we flourish and seasons when the leaves fall from us, revealing our bare bones. Given time, they grow again.” -Katherine May

Radish Tart in an Almond Flour Crust
Adapted from Martha Stewart and Dishing up the Dirt.
Yields 1 x 9 inch tart
Almond Flour Crust
2 cups almond flour
2 cloves garlic, minced
1 tsp dried parsley
1/2 tsp salt
pinch of ground black pepper
1/3 cup olive oil
1 Tbsp + 1 tsp water
Tart Filling
4 oz goat cheese, room temperature
8 oz cream cheese, room temperature
1 egg
1 tsp fresh thyme leaves
8 oz radishes (watermelon radishes are beautiful!), scrubbed, trimmed and thinly sliced.
2 tsp extra-virgin olive oil
Instructions:
1. Place a rack or sheet pan large enough to hold your tart pan in the center of the oven. Preheat the oven to 400F. Grease a 9 inch tart pan with oil. In a large bowl, whisk together the almond flour, garlic, parley, salt and pepper. Stir in the oil and water and mix until well combined. Press the dough into your greased tart pan, making sure the dough goes at least 1 1/4 inches up the sides. Bake until the crust is lightly golden and firm to the touch, about 18 minutes. Let the crust cool to room temp and reduce heat to 375F.
2. In a large bowl or the bowl of a food processor, whisk or blend together the goat cheese, cream cheese, thyme and egg.
3. Using a a spatula, spread the filling evenly over the crust.
4. Toss the thinly sliced radishes with salt, pepper and olive oil until evenly coated, then layer them over the filling. Sprinkle with flaky sea salt and bake in the oven until the radishes begin to shrivel and the filling is bubbling around the edges, 35-40 minutes. If you notice the crust getting too brown, cover the edges with tin foil.
5. Let the tart cool for about 15 minutes before slicing and serving. Top with more fresh thyme, or even some balsamic glaze! Enjoy!
State of the Plate: A Meal Study for Better Nutrition and Less Waste
Vanderbilt University Medical Center researchers studied our meals for children this summer to help us learn more about how meals are consumed—and to help us maximize economically sustainable nutrition for better child health. While we always try to include as many fresh vegetables from our gardens and local farms as possible, researchers formally measured the nutritional value of our meals. Then they looked at the parts of the meals children wanted to eat, and which parts were left on the plate.

At The Nashville Food Project, we talk a lot about reducing food waste particularly in our food recovery program, which kept about 205,000 pounds of food from the landfill in 2020. We also talk about food waste in the kitchen, as we work hard to make good use of every part of the plant or to steward every gift and resource to its highest best use.
But what about food waste after it leaves our kitchens and lands on the plate? What parts of our meals end up in the trash?
Thanks to a grant by the Joe C. Davis Foundation, Vanderbilt University Medical Center researchers studied our meals for children over the summer of 2020 to help us learn more about how meals are consumed—and to help us maximize economically sustainable nutrition for better child health. While we always try to include as many fresh vegetables from our gardens and local farms as possible, researchers formally measured the nutritional value of our meals. Then they looked at the parts of the meals children wanted to eat and which parts were left on the plate.
The results have been fascinating, encouraging and inspiring. VUMC concluded that as compared to meals provided by other vendors in the project, TNFP meals were lower in calories, carbohydrates, added sugars, saturated fat and total fat, and therefore much more nutritious than alternative options, and far exceeding federal nutrition guidelines.
Today we share a favorite dish among research participants in hopes that you will enjoy it too.

Chimichurri Roasted Chicken Drummies
1 cup parsley
1/2 cup basil
1/2 cup green onions
3 garlic cloves
1/4 teaspoon crushed red pepper flakes
1 cup olive oil
1/2 cup red wine vinegar
Salt and pepper to taste
1 pound chicken drummies or wings
1) Preheat oven to 350 degrees and lightly grease a sheet pan.
2) Make the chimichurri sauce by combining and blending all ingredients except chicken in a food processor or blender. Then marinate the chicken in 2/3 of chimichurri sauce.
3) Bake chicken for 20 minutes or until the internal temperature reaches 165 degrees.
4) Toss baked wings in additional sauce. Serve with roasted potatoes or sweet potatoes!
Thank you to researchers—Dr. Shari Barkin, LauraBeth Adams, Alexandrea Manis—for helping us think about the meals we share in new ways!
We are only just beginning
On November 3, many of us across the nation donned our masks—or sealed our envelopes—and submitted our votes with a deep conviction about which candidates will best set us up to move the needle in the direction of our values…However, countless unknowns, rising COVID numbers, and the brokenness of centuries of injustice continue to gnaw at us. The same convictions that surround the way we voted in this presidential election have shallow roots if they end when a POTUS is announced.

Photo of illustration as part of the book Peaceful Fights for Human Rights by Rob Sanders and Illustrated by Jared Andrew Schorr.
by Elizabeth Langgle-Martin, Community Engagement Manager
On November 3, many of us across the nation donned our masks—or sealed our envelopes—and submitted our votes with a deep conviction about which candidates will best set us up to move the needle in the direction of our values. After several tumultuous days (and if we are honest, the remainder of the Halloween candy), we now have a better picture of how our nation’s next season will look. However, countless unknowns, rising COVID numbers, and the brokenness of centuries of injustice continue to gnaw at us. The same convictions that surround the way we voted in this presidential election have shallow roots if they end when a POTUS is announced.
As I anxiously worked and waited for election day to come to a close, sourdough loaves resting on the counter and a mason jar filled with fresh water as my chosen methods of self-care, I listed the things I know to be true regardless of the outcome of this election. A couple weeks later, I offer those here.
1. Our systems were not designed to protect and value Black and brown bodies, much less the hearts, minds, joys, sorrows, wealth, and health of Black and brown people. My work and the work of other white folks is to continue dismantling oppressive systems (even those we may benefit from) and center the voices of leaders within Black and brown communities.
2. For those of us who are able to vote, local elections equal local power. When those of us who are able to vote choose not to vote in district, city, and state elections, we are giving away that power. In addition, we have access to city council meetings, oversight board committee gatherings, and so many more levels of local decision making that impact the care of our neighbors. If this election inspired you into new levels of action, there are spaces for you to move that work into a deep, localized, impactful presence.
3. We are all wrong. At some point, we have all been taught, internalized, and acted out of misinformation about ourselves and about others. It is our life’s work to identify, root out, and mitigate the harm we have caused because of that misinformation. When our intersections are clear of election signs and our junk mail returns to credit card offers, this is still the work for which we are responsible.
4. For every moment of injustice throughout history, there have been movements of resistance. How many names have I not known, how many faces of inspiration have I missed out on because they aren’t part of a standardized narrative, omitted from glossy grade-school textbooks? I’ll keep learning about those who used their bodies, minds, resources, and lives. This is the legacy I want to root myself in, the standard I want to hold myself to.
5. All systems of power must have checks and balances. Even those we cast a vote for. A healthy democracy means holding leaders accountable for the work they do (or don’t do) and the harm or good done by policies that are implemented under their leadership. May we be loyal to justice, equity, the dismantling of white supremacy, the health of our communities, and the care of all people above a single person or party.
6. “With fiercest hope, we believe that people and situations can change”. Part of The Nashville Food Project’s core values, I must admit that on certain days this statement feels more aspirational to me than something I know to be true. And yet, when torn between embracing fierce hope or paralyzing despair, I look at my tiny, vibrant daughter, think about good bones, and know that only hope will challenge me to be a part of creating a world I so deeply desire.
Fill up your water glass, get a moment in the sunshine, listen to this song, light a candle, and dig in. This work is far from over. There is still so much good trouble to be had. We are only just beginning.
P.S. Speaking of voting, did you know that The Nashville Food Project collaborated with Conexion Americas, the Margaret Maddox YMCA in East Nashville and the Southeast Nashville polling site to provide snacks during a few peak early voting times?

Waiting in line is a little sweeter with one of Joe Hodgson’s Pink Lady Apples or from-scratch pumpkin-banana bread! Whip up a little fall goodness with the recipe below:
Banana Pumpkin Bread
For the batter:
1 can pumpkin
2 cups mashed banana (about 5 bananas)
4 eggs
1 cup oil
1/2 cup sour cream
4 cups flour
1 1/4 tablespoon baking soda
1/2 to 1 tablespoon cinnamon
1/2 to 1 tablespoon nutmeg
2 1/2 cup sugar
1 1/4 cup brown sugar
1 tablespoon vanilla
1/2 tablespoon salt
For the topping:
1/3 cup oats
1/3 cup flour
2/3 cup sugar
Preheat the oven to 350 degrees.
In a large bowl, combine batter ingredients and pour into a shallow baking dish. In a separate bowl, combine topping ingredients and sprinkle over batter. Bake for about 20-25 minutes.
"Dirty Pages" Community Potluck
“I tell my daughters that when I go, they’ll know the good recipes by the dirty pages.” —Kim McKinney
That’s the quote that launched Dirty Pages, a recipe storytelling project celebrating our most well-loved recipes with their splatters and stains. We know they make good dishes, because they’ve been handed down to family and friends. But they also act as maps -- their scribbles in the margins helping connect us and tell our stories.
“I tell my daughters that when I go, they’ll know the good recipes by the dirty pages. —Kim McKinney”
That’s the quote that launched Dirty Pages, a recipe storytelling project celebrating our well-loved recipes with their splatters and stains. We know they make good dishes, because they’ve been handed down to family and friends. But they also act as maps, their scribbles in the margins helping connect us and tell our stories.
The Dirty Pages project has produced three exhibits. The first exhibit (featured in The New York Times) lives in the permanent collection at the Southern Food & Beverage Museum in New Orleans. The second exhibit, Dirty Pages: 10 Roads to Nashville, was featured at Casa Azafran. Now the third and most recent exhibit hangs at The Nashville Food Project.
To celebrate it, we’re hosting a “Dirty Pages” Community Potluck this Sunday, Feb. 16 at 1 p.m. If you’d like to join us, please bring a dish to share that serves about 8-10 people. We’ll have lunch and conversation and a bit of show-and-tell time for those who would like to talk about their recipe.
The event isn’t ticketed, and it’s open to all. Space, though, is limited, so please RSVP here. We hope to see you Sunday!
Also, please stay tuned for an exciting Dirty Pages-themed Simmer dinner next month!
In the meantime, TNFP staff shared their Dirty Pages in a team building meeting recently. Here are a few excerpts:

Julia Reynolds Thompson, Director of Garden Operation
Recipe: The Reynolds Family Eggnog
I chose the Reynolds Eggnog, which is a recipe my family makes every year. My great-grandfather, Edward Reynolds, had grown up in Pembroke, Kentucky, which is just on the other side of the state line. He grew up on a tobacco farm, but he and his brother hated tobacco farming, so they decided to leave Kentucky and go to Dallas. They lived in the YMCA there while they looked for work. They ended up in the clothing business and eventually they owned their own men’s clothing store, which was also passed through the family. I remember growing up playing inside the racks of clothes.
I like this recipe because I feel like it is a thread that connects all the way back to my great-grandfather and his journey from Kentucky to Texas. My family, growing up, felt very Texan. Everyone is from Texas and has been there a long time. But now that I live in Tennessee I like having that trace of story all the way back.
It’s a really simple recipe. It has four ingredients: a dozen eggs, 12 tablespoons of sugar, a pint of bourbon and a quart of whipping cream. We still make it every Christmas.

Bianca Morton, Chef Director
Recipes: My Grandfather’s Yeast Rolls
My grandfather baked something every meal—yeast rolls, fresh-baked breads, cakes, fried pies. I did not inherit that skill.
Every holiday he always brought fresh-baked, melt-in-your-mouth yeast rolls. He brought some for dinner and packaged some in gallon-sized Ziplock bags for each family to take home. We fought over them.
My first Christmas after graduating culinary school, I cooked a big, fancy dinner, my first one trying to impress everybody. Watching him eat, he was so happy and excited, and you could tell he was proud. Here’s the tear-jerker: He had a massive stroke that night. That was the last time I saw him smile. I spent the next two weeks caring for him in the hospital. He couldn’t communicate, but he looked at me and squeezed my hand, and it made me feel invincible, all his love. I’ve been chasing that, and every holiday I’ve been trying to make these rolls. This last Christmas, 18 years since he passed away, my family was like, “I think you got it.”

Tallu Schuyler Quinn, CEO
Recipe: Mama’s Marinara Sauce from Dom DeLuise’s “Eat This...It’ll Make You Feel Better” cookbook
My dad bought me this cookbook by Dom DeLuise. When I was young, maybe 8 or 9, I thought Dom was a chef, but I understand now he was just an actor and maybe not even a good one.
My parents wouldn’t let my brother and me buy a lot of stuff when we were kids, but they would pretty much always say yes if it was a book.
I remember making this marinara sauce with my dad and what a mess we made. When I was growing up, I loved food shows like The Frugal Gourmet, Julia Child and any other food show on the television. I vividly remember an episode of Mister Rogers’ Neighborhood when he visited a Pittsburgh bakery and learned how to make sourdough pretzels. Later on in life, I loved Food Network shows like Molto Mario, Nigella Lawson and Barefoot Contessa. I am now a mother to children who love watching Mind of a Chef, America’s Test Kitchen, and The Great British Baking Show.
My 7-year-old daughter is strong-willed, capable in the kitchen, and wildly creative. She makes grocery lists every week, begs me to “mise en place,” wants an internship at The Nashville Food Project’s kitchen, and recently made flyers for a pop-up bake shop at our house called “Lulah’s Larder.” In other words, every page is a dirty page in Lulah’s world. The scope of her big ideas overwhelms me, and now I know that’s how my own mom must have felt as she figured out how to give me the space I needed to be me. Maybe still does. I obviously know that Lulah is not me, and she is not mine, but the congruence and similarity of the kitchen obsessions settle over me, and that where I go when I reflect on this dirty page from my past—it connects me to the mystery of my own life; I’m so grateful for that.

Grace Biggs, Director of Food Access
Recipe: Chicken Noodle Soup
This is my mom’s chicken noodle soup and her mom’s, and it’s one of my favorite early memories. The noodles are the main event of this recipe. My mom made the dough from scratch, rolled it out, and cut the noodles dumpling-style. They would be laid out taking up the whole kitchen table, which was most of our kitchen, for hours. My sister and I would sneak dough off the table, and she told me she added the note later to “double the recipe” because of “sneaky fingers.” My grandmother would make it when we were sick and bring it over in Mason jars. I’ve adapted my own version of the original recipe over the years by adding veggies and sometimes even curry, but anytime I make it I feel connected with them.

Elizabeth Langgle-Martin, Community Engagement Manager
Recipe: Wassail
Wassail is something that my family drank every holiday season, and I always remember that we had enough of it to share with other people—that it could be a gift at a time that could be stressful. It was fun for our family to share. We would fill up big Mason jars and give it to teachers and neighbors. And I have funny memories of lugging big, hot sloshing posts of wassail to family gatherings—inching down the road and hoping that it’s not spilling out in the back.
It’s a twist on apple cider, and it’s something a lot of my friends know as our family holiday beverage. My siblings and I still make it in our own spaces.
Bianca's Skillet Cornbread
Bianca Morton is up to her elbows in tomatoes. A few yellow bins sit brimming with red and orange orbs perfuming The Nashville Food Project kitchen with their clean, acidic scent and mingling with the earthy tones of pasta roiling in a giant kettle…
By Jennifer Justus, Culinary Community Liason

Bianca Morton, Chef Director at TNFP’s California Avenue kitchen.
Bianca Morton is up to her elbows in tomatoes. A few yellow bins sit brimming with red and orange orbs perfuming The Nashville Food Project kitchen with their clean, acidic scent and mingling with the earthy tones of pasta roiling in a giant kettle.
The pasta will get tossed in tomato sauce, of course. That’s because Bianca has been working quickly to have all the summer tomatoes processed—chopped for green salads, dehydrated for later, or whirled up in enchilada sauces and marinas for layering into lasagnas.
She has to think smart and fast every day about how to use thousands of pounds of food that generously come through our doors from farms and markets. And then she works with volunteers and TNFP co-workers to turn ingredients into scratch-made meals for those who need it.
And it’s not just tomatoes. As Bianca sorted donated chicken from Cracker Barrel recently —determining its next iteration as chicken salad, chicken pot pie or roasted with balsamic and rosemary—a volunteer team filled pans with roasted peppers from our production gardens with hunks of bread that will become strata.
“Do you have any spinach?” one of the volunteers asked.
Bianca disappeared to the walk-in, one of her kitchen domains, and returned a few moments later carrying containers from Whole Foods.
“How about baby kale?”
“Perfect,” the volunteer said.
While the stratas will go to the YWCA and veterans through Operation Stand Down and workers’ dignity workshops on wage theft, Bianca is already thinking about meals for seniors at Wedgewood Towers and Fifty Forward.

Breakfast stratas being prepared for meal partner sites.
The truth is Bianca has been sharing food long before her days at the food project.
During middle and high school, she baked her step-grandmother’s pound cake every time someone had a birthday. “I would bring it in a cake container. Cut slices all day long and share with everybody,” she says.
She had turned to cooking as a way to help cope with a clinical depression diagnosis as a teenager. “I cooked when I was happy. I cooked when I was sad. I cooked when I was angry,” she says. “When I was angry, I would go in there and bang the hell out of pots everywhere. You were liable to get two meats for dinner that night.”
She cooked for the family at least four days a week. But she always brought her lunch the next day sharing the leftovers. “This is funny now that I’m thinking about it and here (at TNFP)… I would bring enough to feed four or five people,” she says. “Everyone would eat off my lunch.”
Bianca’s curiosity about food came early, but she skipped a few steps on the typical path. When her mother bought her an Easy Bake Oven at age 10, Bianca left it in the box. But when her mom went out to choir practice or Bible study on Wednesday nights, Bianca snuck into the kitchen for the real thing. “I knew I had a three-hour window. I would take her Betty Crocker cookbook, and I would flip through that and figure out what I was gonna make.”
That usually meant cakes since they often had pantry staples on hand.
“As soon as she would leave… I was on it. I would fix my cake batter up and bake my cake. I would cool my cake and put it in a Zip-lock bag with a butter knife. I had cakes hidden in the piano bench, in my toy box, where I could go any time and cut me a little slice of cake off.”
The night her mother caught her, though, Bianca had fallen asleep with a cake in the oven. She woke up to find it, burnt and black, outside her door with a note. Her mother instructed her to change clothes after school and be ready to go. “I was like ‘she is gonna drop me off somewhere,’” she recalled. “She is literally abandoning me.”
But her mother took her to the grocery store instead.
“We were walking down the aisles and she said pick out stuff you want to learn how to make. So, I was like grabbing meats and everything. She would cook that for dinner and have me watch. I was like, ‘I love this.’”
Bianca (right) at culinary school in Atlanta.
After high school, Bianca went to culinary school in Atlanta. She took double the course load and graduated early while also working full-time as dining coordinator in a retirement center. Then she moved back to Nashville and took jobs at convention centers and downtown hotels.
Those jobs warranted a tough exterior with their anxiety-inducing pace and high volume in a male-dominated and often unhealthy industry. But she also learned lessons that stick with her today. Like the time an unexpected snowstorm hit Nashville turning a 20 percent occupancy hotel to 100 percent within minutes as a line formed out the door. Bianca slept (or more like napped occasionally) at the hotel for three days and learned that staying ahead—even chopping onions and peppers when there’s an extra few minutes— is essential.
Now at The Nashville Food Project, Bianca says the intensity of turning out thousands of meals each week takes on a new meaning. “In that instance, it was like ‘okay we gotta get the job done.’ But now, it’s rewarding. It makes me feel lighter, like I have an effect on other people — that I’m actually working in my gift. That I have a purpose… I care about the impact that I have on the next person whether it’s direct or indirect. So I’m constantly thinking, how I can make it better? Or, how can I make best use of my skills to be a blessing to someone else in any kind of capacity?”
That doesn’t mean she’s lost all her hardcore kitchen vibes. You’ll find her some days cruising through the kitchen on a mission — cell phone tethered to one ear via ear bud and a Venti Starbucks nearby with more pumps than she probably ought to admit. Working in a nonprofit kitchen, after all, has taken some getting used to.

An incoming donation from the Bells Bend Conservation Corridor this summer.
When she first started at TNFP, a truck full of donations would arrive – all needing to be sorted, sized up and put away quickly – and Bianca viewed it as time and work. But Katie Duivan, catering and events manager would “turn flips,” Bianca says. “She would be like, ‘Oh my god look at this. This is beautiful.’”
“Where I come from you couldn’t show that,” she says. “I had to be hard. I couldn’t be friendly. Then they’d be like, ‘Oh, you’re a woman and that’s a weakness.’ I had to run with the big dogs.”
But being here makes it easier to be genuine, she says. “I can smile. And the days I don’t smile, and I’m gruff, it’s fine. They accept me for who I am. Here they celebrate our differences and what makes us uniquely us.”
Plus, she says Katie, her other co-workers and the environment of a kitchen filled with the purpose of stewardship and service, might have rubbed off on her bringing her back to those days when she shared lunch at the cafeteria table with nothing to gain or prove.
“It’s kind of like somebody is throwing happy glitter,” she says. “You’re going to get some happy glitter on you, and you’re not gonna be able to get it off.”
Lodge Cast Iron recently donated several skillets to The Nashville Food Project. We asked Bianca to share her favorite skillet recipe for cornbread. In her family, they like it sweet, almost like cake, she says. “I was raised that if you didn’t eat sweet cornbread, you were making dressing.”
She bakes this version for her family every other week and considers it a staple at Sunday dinner. Tag us on social media in a photo of your favorite cast-iron recipe, and we’ll enter you into a drawing for a new Lodge skillet.

Bianca’s Skillet Cornbread
Ingredients
1/2 cup self-rising cornmeal
1 1/2 cup self-rising flour
2/3 cup sugar
1/3 cup oil plus 3 tbsp oil
2 eggs beaten
1 1/4 cup milk
2 teaspoons honey
3 tablespoons melted butter
Directions
Preheat oven to 350 degrees.
In a medium bowl, combine cornmeal, flour and sugar. Mix in 1/3 cup of the oil, eggs and milk.
Heat remaining 3 tablespoons oil in the cast-iron skillet. Pour hot oil into mixed batter. Bake for 30 minutes or until golden brown.
Top with the melted butter and honey before serving.
Sweet Peas Recap & Bean Burrito Bowl Recipe
Throughout the summer The Nashville Food Project dramatically increased the meals we shared through partner non-profits to an all time high of 7,500 meals weekly to support the summer nutrition needs of children’s programming in addition to our ongoing partnerships…
By Elizabeth Langgle-Martin, Community Engagement Manager

ONE side dish for one day’s summer meal deliveries ready to be loaded at our California Avenue kitchen.
Throughout this summer The Nashville Food Project dramatically increased the meals we shared through partner non-profits to an all time high of 7,500 meals weekly to support the summer nutrition needs of children’s programming in addition to our ongoing partnerships.
Carefully curated meals were prepared and delivered daily using gifted produce, recovered food, and the efforts of countless volunteers and their culinary creativity. Hefty servings of gumbo, chicken carbonara, veggie wraps, fruit and garden salads were delivered in gleaming pans.

Insulated food carriers used to deliver meals. All of these (plus more!) were cram-packed with freshly made, nutritious meals cooked in our two kitchens by TNFP staff, interns and volunteers.
Our partners are always serving to a range of palates. Naturally, some children are more adventurous while others try new dishes with a little more caution. We were thrilled when we received the following feedback from one of our summer programming partners:
““The kids really loved the burrito bowls. That was a major hit. Actually, all the meals this week went over really well.””
Burrito bowls are perhaps the perfect food as they allow the incorporation of so many fresh ingredients while permitting a wide range of people to customize tastes and textures that hit the spot. Here is our Chef Director Bianca’s bean burrito bowl recipe that was all the rage this summer!
Bianca’s Bean Burrito Bowls
Serves 4-6
Ingredients
2 tbsp olive oil
1 red onion diced
1 bell pepper diced
1 tbsp ground cumin
1 tsp salt and pepper
3 cloves of garlic chopped (or 3 tbsp garlic powder)
1 lb cooked beans (or 4 cans) - Black, Pinto or Kidney are our favorites!
1/2 c cilantro
1/4 cup of your favorite salsa
3 cups brown rice (cooked)
1 to 3 cup of cheese
Plus any additional sautéed seasonal veggies if desired!
Directions
In the olive oil, sauté onions, peppers, spices and garlic until tender. Add cooked beans and cilantro. Mix in salsa. Scoop cooked rice in bowl. Top rice with the bean mixture and shredded cheese.
Feeling fancy? Garnish with salsa, avocado, cilantro, sour cream or green onions!
Do you make burrito bowls at home? What are your favorite flavor combinations?
Local Food + Lemon Shallot Vinaigrette
As construction cranes loom over Nashville and development creeps into the countryside, we’re thankful for a growing number of farmers who make the best use of our fertile land and do the hard work of tending it for produce that nourishes our community. The Nashville Food Project wants to support this work. In fact, our commitment to purchasing local food is a growing portion of how our meals happen…
By TNFP’s Culinary Community Liaison, Jennifer Justus

As construction cranes loom over Nashville and development creeps into the countryside, we’re thankful for a growing number of farmers who make the best use of our fertile land and do the hard work of tending it for produce that nourishes our community.
The Nashville Food Project wants to support this work. We’re committed to a vision of vibrant community food security, in which all members of our community have the food they want and need through a just and sustainable food system. With this vision in mind, we’ve committed to deepening our relationship to local farms by purchasing and supporting local food.
In fact, our commitment to purchasing local food is a growing portion of how our meals happen. We entered 2019 knowing this would be a year of transitions for our own gardens, moving all production to the newly opened Community Farm at Mill Ridge Park (read more about the grand opening of that farm here). With less produce coming from our gardens this season, we sought farm partners we can support with our dollars whose produce can help supplement the food we grow and meals we make and share. Currently, the majority of food for our meals comes from donated and recovered food. The slice of pie for ‘local food’ represents our food purchases from local farms.
What’s going into a TNFP MEAL?

With a dedicated local farm purchasing budget, we put out the word early this year that we’re seeking to purchase locally-grown produce from area farmers on a weekly, seasonal basis for use in our meals program. This resulted in new relationships with four farms: Rally House Farms, Bloomsbury Farms, West Glow Farm, and SE Daugherty & Sons.
Here’s a bit about each farm:
Rally House Farms recycles shipping containers for growing hydroponically and providing healthy, fresh produce year round. The operation needs 90 percent less water, no harmful pesticides or herbicides and a fraction of the physical space of traditional farms, which means they’ve turned a paved corner of Murfreesboro Pike and Fesslers Lane into a thriving, sustainable food source. Though Rally House Farms operates as its own for-profit business, it’s connected with Rally House Recovery Homes, which aims to provide temporary structure and employment to those in recovery and transition.
Bloomsbury Farms is located over 400 acres in Smyrna, Tennessee. Owner and farmer Lauren Palmer has farming in her family. Her father grew up on a dairy farm, though his parents were forced off the land by the Army Corps of Engineers and eminent domain. A love of the land continued with his motto: “bloom where you were planted.”
West Glow Farm is a small-scale, Kingston Springs farm with naturally grown vegetables, fruits and flowers. Farmer Booth Jewett (a Nashville Food Project alum) works to grow food in a way that honors and regenerates the land and all who live on it.
SE Daugherty & Sons launched in 2016 with Shaun Daugherty at the helm. As lead cultivator (and former personal trainer), he’s made it his life’s mission to make “good-tasting, good-for-you foods accessible to everyone.”

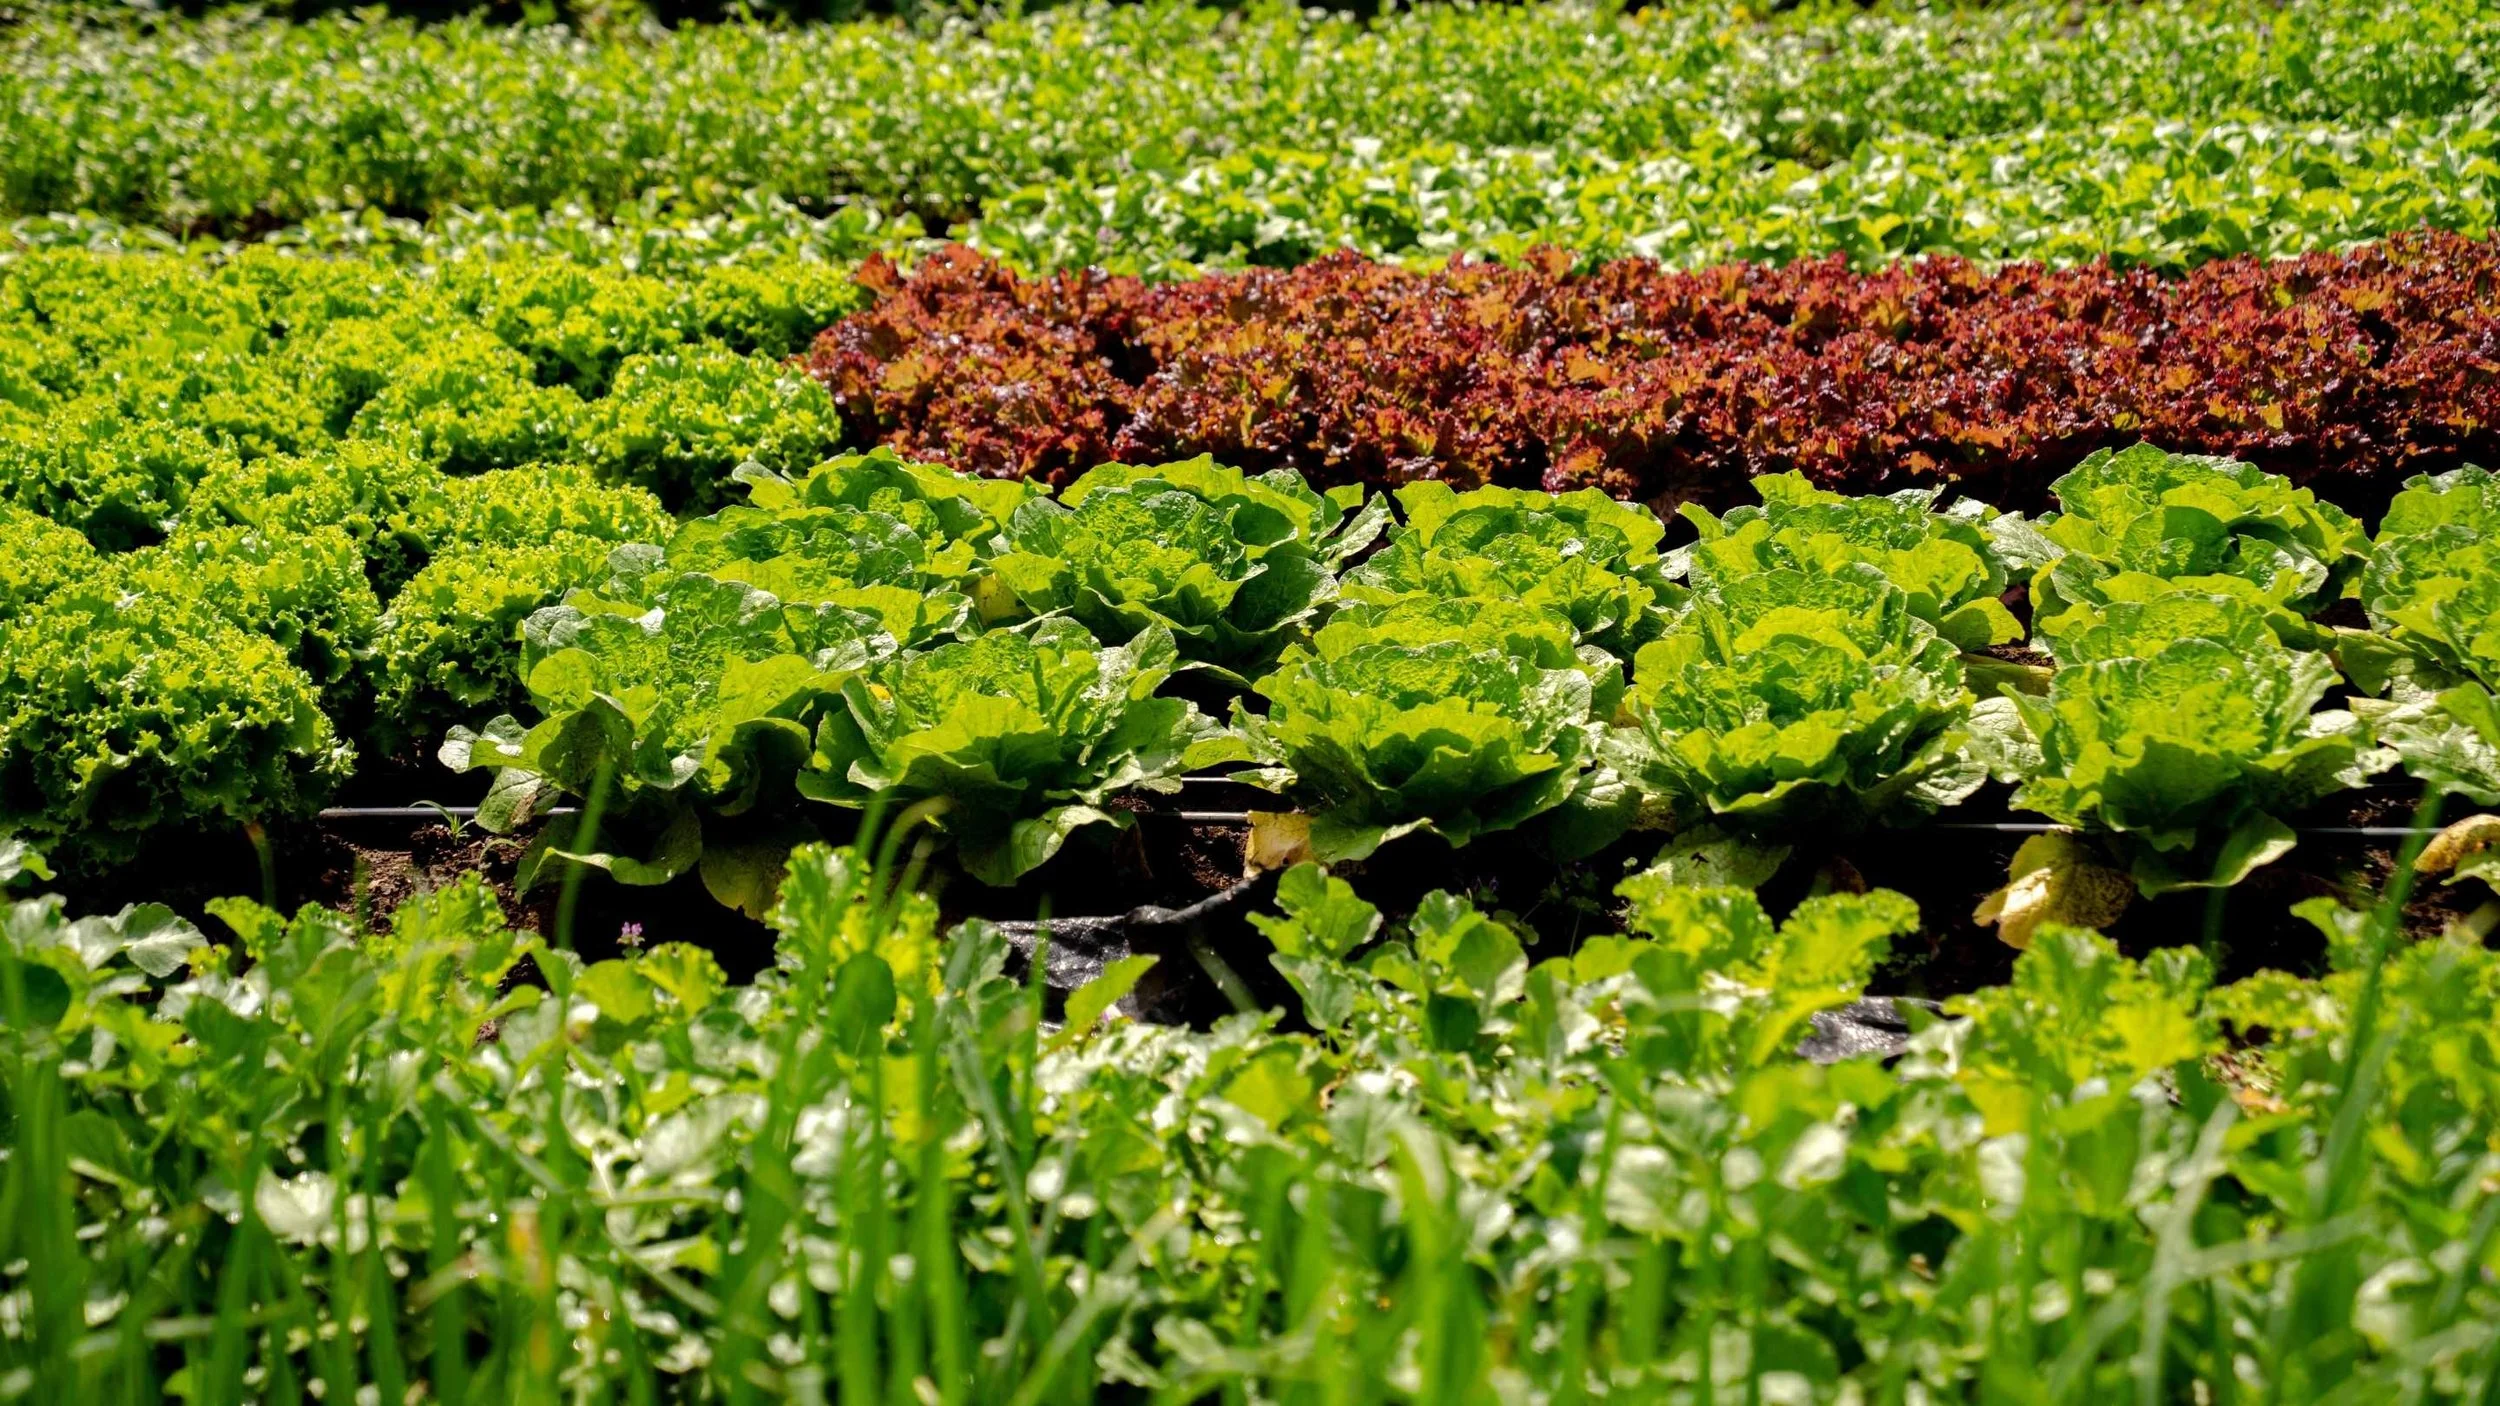
In one of our first farm partner deliveries to our kitchen from Rally House, we received lettuces. Here’s a go-to recipe we often use when whipping up dressings for our salads. It’s a simple set of directions for committing to memory that allows the gifts of the earth to shine.
Lemon Shallot Vinaigrette
(courtesy of Christa Bentley)
Yields 2 cups
Ingredients
2 shallots, finely chopped
2 cloves of garlic, finely chopped
1/2 cup lemon juice
2 tablespoons white wine vinegar
2 tablespoons Dijon mustard
1 cup olive oil
1 tablespoon honey (or until desired sweetness)
Salt and pepper to taste
Directions
In a medium bowl, combine shallots, garlic, lemon juice, vinegar and mustard. Whisk in olive oil and honey. Season with salt and pepper to taste. Drizzle on local greens, toss and serve.
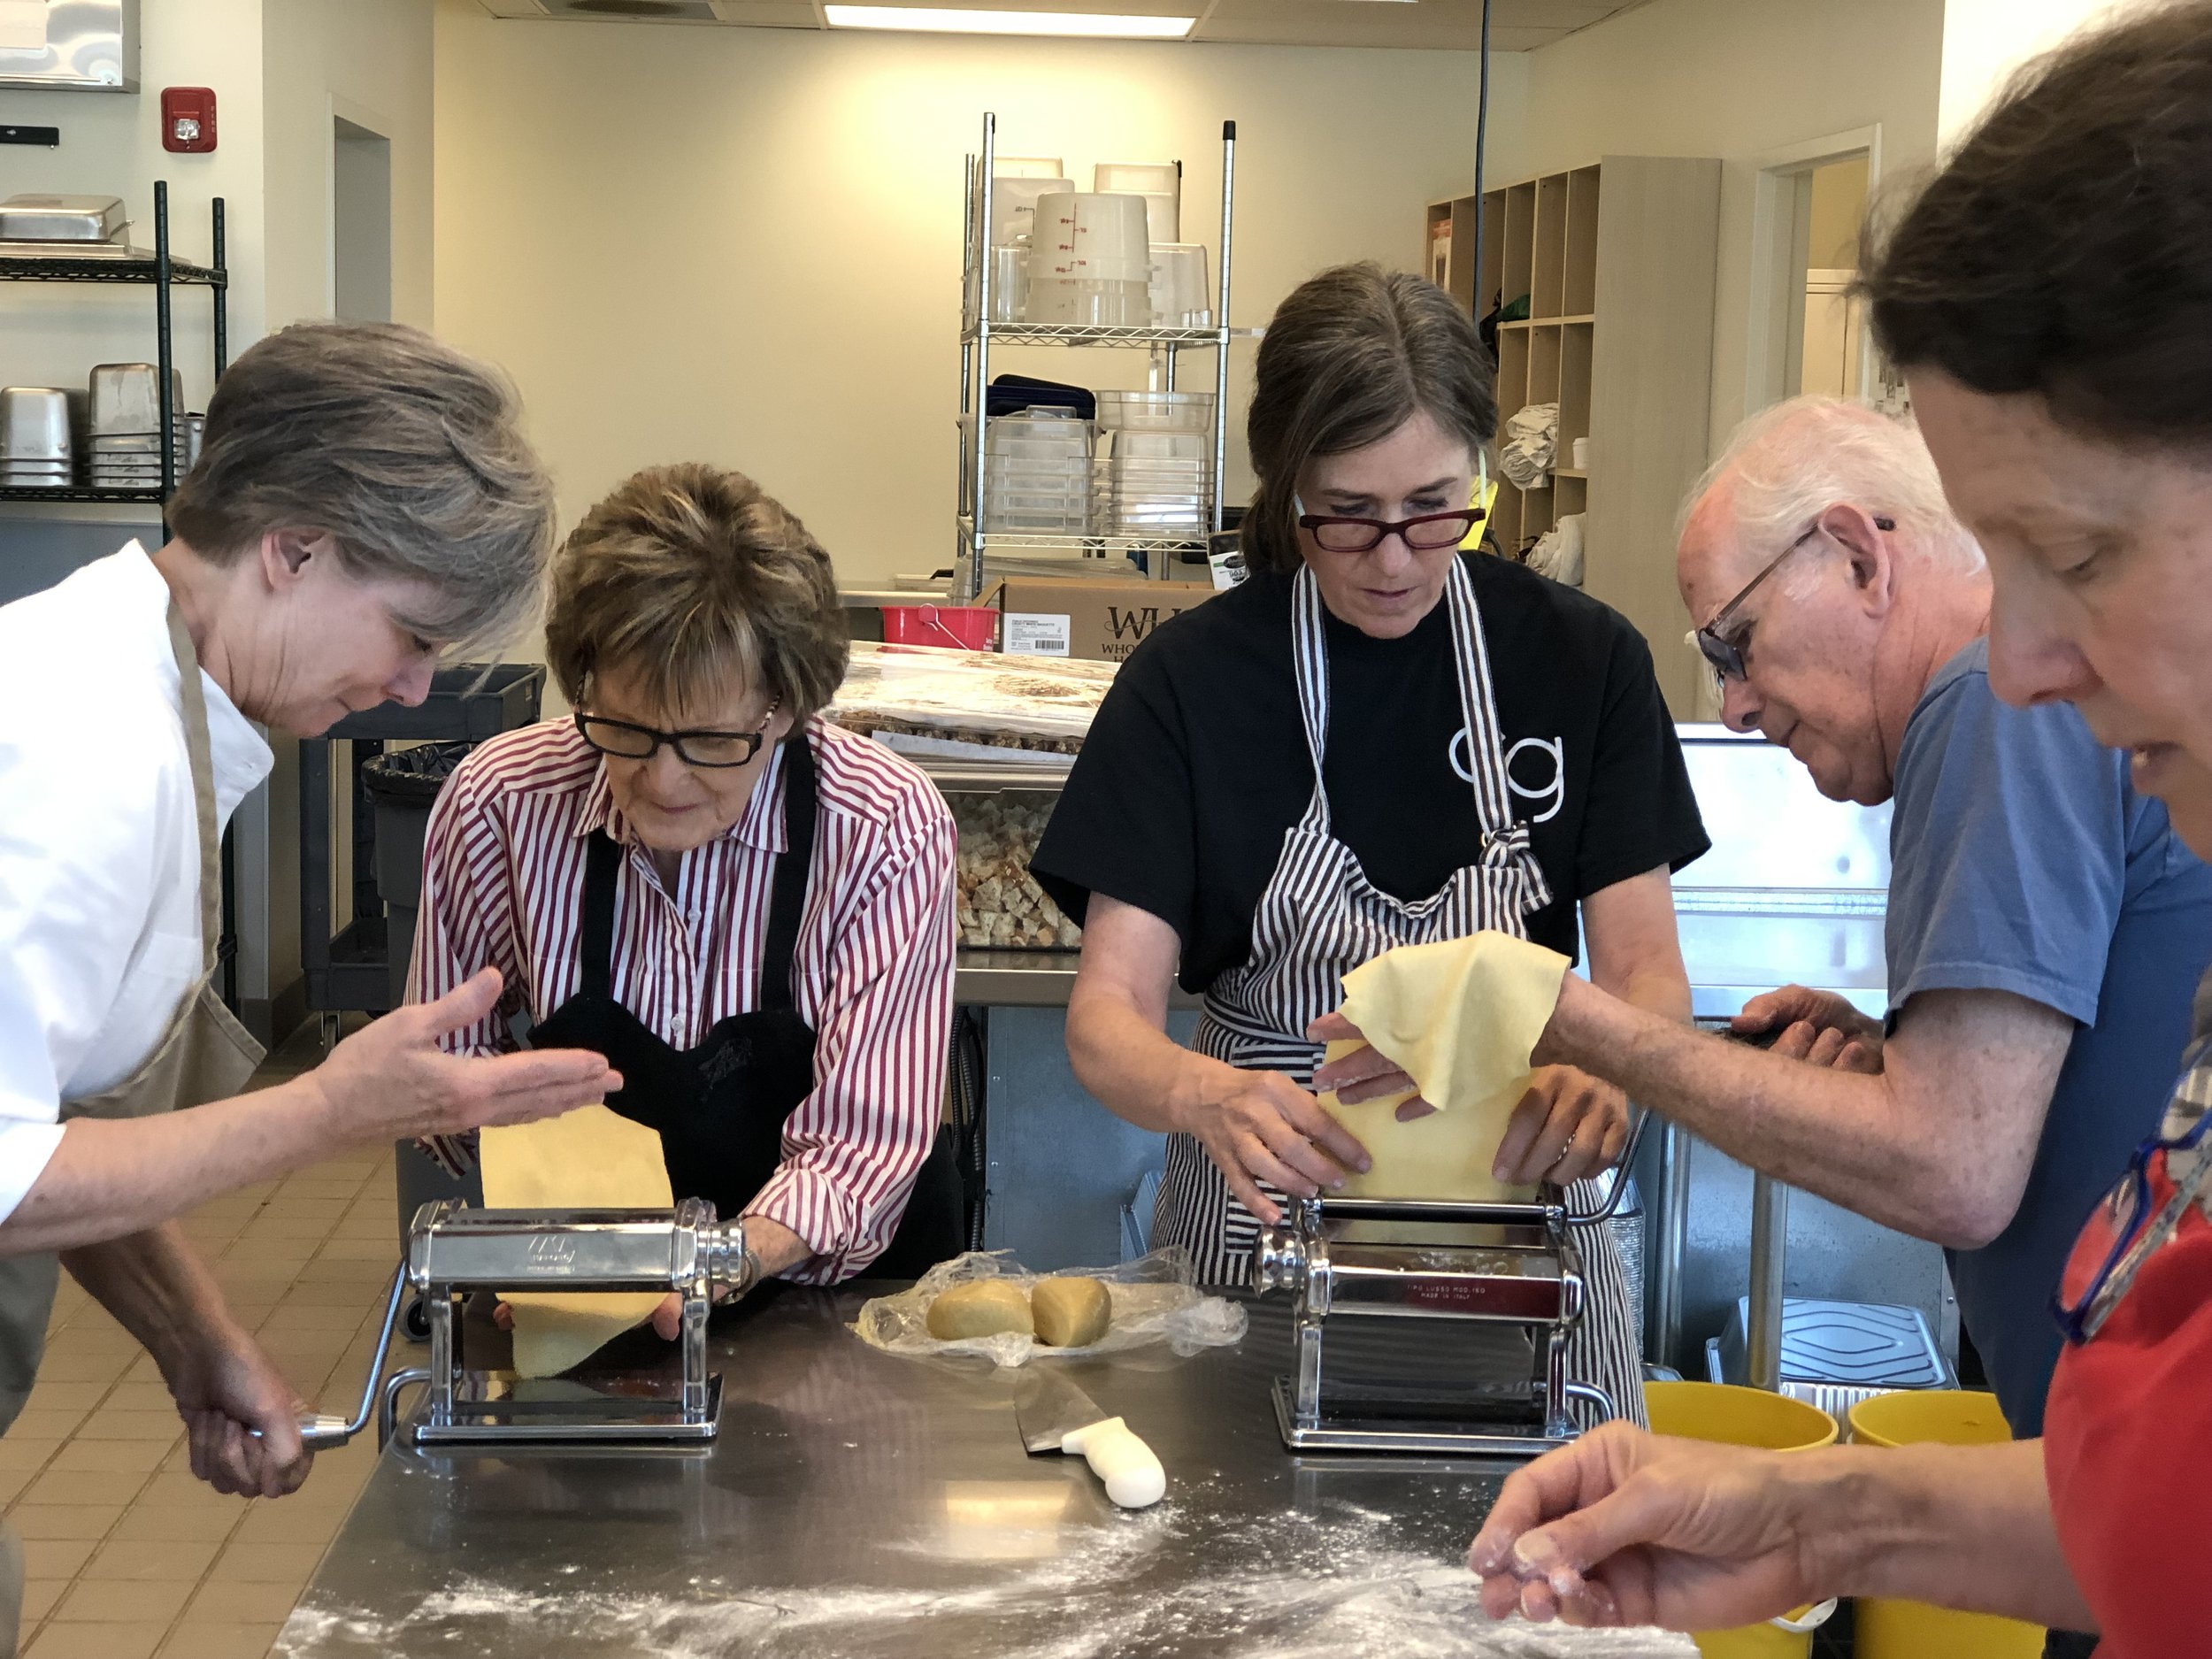
Homemade Pasta
Any given day you walk through The Nashville Food Project’s kitchens or gardens, the incredible care put into the little details of the work is so evident. One great example? Every week, a group of friends and acquaintances comes together in our kitchens to make fresh bread and pasta from scratch for our meals program.
By TNFP’s Impact Manager, Grace Biggs

Any given day you walk through The Nashville Food Project’s kitchens or gardens, the incredible care put into the little details of the work is so evident. One great example? Every week, a group of friends and acquaintances comes together in our kitchens to make fresh bread and pasta from scratch for our meals program.
The group is led by long-time TNFP volunteer Rob Stein, a retired orthopedic surgeon and bread maker. He started inviting friends to bake with him at our St. Luke’s kitchens about three years ago, where they’ve made everything from challah to artisan dinner rolls. Fresh pasta is their most recent addition.

“My wife and I had been making pasta at home for many years,” says Rob. “And we just thought, hey, why don’t we do it at the Food Project? Fresh pasta normally would be considered a gourmet item… I think it’s nice that at TNFP you can say you’re sharing the best. We want to be proud of the food we’re sharing with our community.”
I’m joining them on one of their regular Wednesday prep times at our California Avenue kitchen. Today, they’re making fettuccine as an entree for fifty seniors. “We’ve gotten very efficient,” says Rob. “When we bake rolls at the St. Luke’s kitchen on Thursdays, we scoot off to the side and make the pasta dough so it has time to rest.” Like clockwork, aprons are handed out, and the team starts clamping pasta machines onto the prep tables. Though some were new to the group, an easy flow quickly develops.
Pasta making is a two-part process. First, you make the dough. Then, after a rest period, you roll it out the dough and cut it to shape, such as lasagna sheets, ravioli, or linguine.
For the dough, Rob uses a light egg pasta recipe by Lidia Bastianich, a renowned Italian-Croatian chef. “It’s a very reliable recipe,” he explains. “It’s more of a northern Italian recipe, because it’s got 2 eggs in it. In the south, they don’t use eggs at all. It’s just flour, oil and water.” To cut and roll your pasta, we recommend using a pasta machine (like this one), but you can also roll and cut the dough by hand.

Ready to try it out for yourself? Don’t be intimidated, it’s easier than you think! Below, we’re sharing Lidia’s recipe for a light egg pasta dough, plus a guide on using a pasta machine.
Homemade Pasta

Part One: Making the Dough
recipe by Lidia Bastianich
Ingredients
2 cups all-purpose flour, plus more for dusting (Rob also recommends using semolina flour)
2 large eggs
¼ cup extra virgin olive oil
3 tablespoons water
To make the dough by hand, measure the flour and shake it through a sieve into a medium mixing bowl. Drop the eggs and/or egg yolks into a small bowl; beat briefly with a fork to break them up. Pour in the measured amounts of oil and water, and mix well with the eggs. Pour the wet ingredients into the flour. Toss and mix everything with a fork until all the flour is moistened and starts to clump together. Lightly flour your hands, then gather the clumps and begin kneading right in the bowl, folding the raggedy mass. Turn the dough out onto a very lightly floured surface and knead by hand for another 30 seconds or so, until it’s smooth, soft, and stretchy. Form the dough into a disk, wrap it tightly in plastic wrap, and let it rest at room temperature for at least ½ hour.
Part Two: Rolling and Cutting
(adapted from The Spruce Eats)

Set up your pasta machine, clamping it to a table. Turn the dial to the widest setting (usually 1). Next, divide the pasta dough into four pieces. Take one piece, and flatten it into a rectangle shape and feed it through the rollers. It's best to work with a helper, so one person can turn the crank and the other person can guide the dough into the machine with one hand and catch it with the other hand.
Begin rolling it thinner by turning the dial to the next narrowest setting (usually 2). Roll the pasta through the machine. Continue reducing the settings until the dough is rolled as thinly as you'd like (we usually go to 6). If the sheet of pasta gets too long, you can cut it in half with a knife.

Attach the noodle-cutting attachment to the pasta machine. Then, feed the thinly rolled sheet of pasta into the cutting attachment, catching the noodles by draping them over your hands as they're cranked out of the machine.
Repeat the entire process with the remaining pieces of dough.

Finished noodles can be kept on a special pasta drying rack or you can scatter them on a sheet pan that's been dusted with rice flour or cornmeal. Be sure to separate the noodles and toss them with rice flour so they don’t stick together.
To cook the pasta, add a small handful of salt to the boiling water and add your pasta. Fresh pasta only takes 2 to 3 minutes to cook in boiling, salted water. Drain the pasta well and serve it with the sauce of your choice.
Basic Chicken Stock
Ever wonder about the difference between stock and broth? As we’re still deep in soup season, we figured this would be a good time to take stock in our own stock. The person on staff to consult? David Price, sous coordinator at The Nashville Food Project’s St. Luke’s Kitchen…
By Culinary Community Liason, Jennifer Justus
Ever wonder about the difference between stock and broth? As we’re still deep in soup season, we figured this would be a good time to take stock in our own stock.
The person on staff to consult? David Price, sous coordinator at The Nashville Food Project’s St. Luke’s Kitchen. He appreciates a good stock and helps explain how to do it here.

First, we talked about stock vs. broth:
Stock generally comes from simmering bones, pieces of meat or scraps, connective tissue and sometimes vegetables in water. Broth is made from vegetables and sometimes meat with no connective tissue or bones.
Well-made stock, in contrast to broth, will have body and should solidify into a gel. It results in a rich base that adds depth of flavor and silky texture to soups, greens, beans or for braising meats.

To begin the stock process, David breaks down a whole chicken (click here to watch a video on that process). Then he adds water and salt -- and sometimes some vegetables that he has on hand -- before bringing the liquid to simmer for about four hours.
“I come from an environment where good food was a luxury, and to be able to create that for yourself is really empowering,” he says. “And also the idea of waste-not-want-not has always been a key motivator for me in a lot of ways, especially with my work in the kitchen. What I really value at The Nashville Food Project is being able to convert things that would otherwise have been wasted. ”
David says he likes being able to make use of the less popular parts of the chicken – the necks, tails or organ meat, for example, and make several meals in a more economical and sustainable way.
“I guess it is philosophical in a way, because my philosophy is waste-not-want-not. My philosophy is to make that dollar work for me. And I’m able to do both those things by breaking down my own chickens and making my own stock.”
Basic Chicken Stock
Adapted loosely from The Food Lab.
Makes about 2 quarts
Ingredients
1 chicken, cut into pieces
4 quarts water
Salt and pepper to taste
Vegetables on hand – a few smashed garlic cloves, an onion, a couple carrots or celery, roughly chopped
A couple of bay leaves
Directions
1. Cut chicken into pieces. Reserve the chicken breasts for another use. Place remaining parts, bones and any organs into a medium-to-large stockpot.
2. Cover the chicken pieces with water, about four quarts.
“It’s better to have too much water than not enough,” David says. “You don’t want to be making soup and need four quarts and only have three.”
If your stock seems too weak at the end of the process, you can always reduce it down by simmering it longer. “All the stuff that’s in that water will stay.”

3. Add salt – starting conservatively (about a tablespoon to begin). It’s easy to add more salt but mostly impossible to take it away. Sometimes David might use soy sauce instead of salt if he knows that the end result of his stock will benefit from that flavor.
4. Bring water and chicken to a boil but immediate reduce heat to simmer for about four hours, occasionally skimming off any foam or scum that rises to the surface.
5. About an hour into the process, use a pair of tongs to remove larger pieces of meat such as drumsticks and thighs. Remove cooked meat from the bones, reserving for another use, and place bones back into stock while it finishes simmering.
6. Take stock off heat, taste and season with salt and pepper if needed. Strain stock with a fine-mesh strainer into a large container. Discard the solids.

7. Place the stock in the refrigerator where it will keep for five days (or freeze it to keep for three months). Use stock to make soups, braise meats or cook greens and beans or to begin sauces.
8. Enjoy!!
Bottle Gourd Curry
One of the things we love most about the connection between our gardens and our kitchens is the fun challenge of incorporating local, seasonal foods you don’t often find at area grocery stores. For example? All summer long, a vine has been working its way up, over and all around the trellis entryway to the Woodmont garden behind TNFP’s office...

One of the things we love most about the connection between our gardens and our kitchens is the fun challenge of incorporating local, seasonal foods you don’t often find at area grocery stores.
For example? All summer long, a vine has been working its way up, over and all around the trellis entryway to the Woodmont garden behind TNFP’s office. Through the window of our kitchen, cooks and meal prep volunteers have been watching this slow progress for months — and finally, last week, walked the 20 feet from the back door of the kitchen to harvest the huge, rounded fruits: bottle gourd!

Tomato & masking tape for size reference!
Bottle gourd — also known as calabash, white-flowered gourd, New Guinea bean, Tasmania bean and long melon — comes in lots of different shapes and sizes, but generally can be either harvested young to be eaten as a vegetable or harvested mature to be dried and used as a container. This is a great example of a plant that can provide a lot of health benefits. Not only does it have a cooling effect in the body, but it’s also said to help maintain a healthy heart and blood pressure and even helps reduce sleeping disorders.
So… what do you cook with bottle gourd? While there are lots of options, we decide to feature it in a curry dish on menus at different meal sites throughout last week. We also grated it to use as a replacement for zucchini in zucchini bread.
Try it out our version of a bottle gourd curry with the recipe below!
Bottle Gourd Curry
Makes 4-6 servings
Ingredients
3 tbsp olive oil or vegetable oil, and as needed
1 tbsp ginger garlic paste
1/2 cup chopped onion
1/2 cup chopped tomato
2 cups cubed bottle gourd
1 tbsp red chili paste
2 tbsp garam masala
2 tsp cumin
2 tsp turmeric
Salt to taste
1 can of coconut milk
Coriander to taste
2 tsp brown sugar
Rice (optional to serve)
Directions
Wash bottle gourd under running water. Peel the skin and chop to bite-sized pieces (we found this article helpful for more detail on cleaning and preparing bottle gourd).
Pour oil to a wide, heavy-bottomed pan. Then add ginger-garlic paste, and saute chopped onion. Once soft, add tomato, then bottle gourd and spices (red chili paste, garam masala, cumin, turmeric and salt). If you have other seasonal vegetables on hand, you could add those as well.
Fry on medium to high flame for 3 to 5 minutes; keep stirring to avoid burning. If the gourd is not tender or less juicy, cover the pan and cook until the gourd is fully cooked. If tender, continue to fry without covering until it is fully cooked. Careful not to overcook!
Add coconut milk and stir well to mix. Last, add coriander and brown sugar. Serve curry over cooked rice.
Based on recipe from Indian Healthy Recipes and notes from TNFP volunteer cooks Mary Dionne and Meera Sardessai.
Salmon Cakes
Much of our food recovery efforts are through ongoing Food Donation Partnerships with local grocers, farmers, markets and restaurants. Every day, we’re astounded by the generosity and creativity of these partners…
Much of our food recovery efforts are through ongoing Food Donation Partnerships with local grocers, farmers, markets and restaurants. Every day, we’re astounded by the generosity and creativity of these partners in support of our mission to alleviate hunger and cultivate community.
A great example is our partnership with our neighbors at Green Hills Grille. On their menu is an incredible salmon filet served as a square portion. The restaurant cuts off all of the trimmings, but instead of just throwing them away, they freeze them and drop them off with us each week. We cook them up and use them for meals like our delicious salmon patties, an all-around favorite at our meal sites! Try it out for yourself with the recipe below.

TNFP Salmon Cakes
Makes 50-60 cakes
Ingredients
12 lbs poached salmon
Olive oil
3 c mixed color bell peppers, very small dice
2 c celery, very small dice
1 c chopped parsley
5 T capers
1 T hot sauce
2 T worcestershire sauce
1/4 c Old Bay
10 c bread crumbs
4 c mayo
3 T dijon
6 eggs
Directions
Preheat oven to 375 degrees. Saute diced vegetables until soft. Allow to cool. Add to gently flaked salmon. Mix remaining ingredients and add to salmon mixture. Season with salt and pepper to taste.
Portion in 3-4 oz servings about the size of a deck of cards. Shape and place on lightly oiled baking sheet, spray tops lightly with additional oil. Bake for 10-15 minutes until firm and lightly colored. Alternatively, pan fry in olive oil for 2-3 minutes on each side until golden and crusty.
Hummingbird Cake
There may not be a more beloved dessert here at TNFP than hummingbird cake. This is one of those recipes that just keeps following us through the years, with different hand-written versions tucked away in kitchen drawers…

A hummingbird cake prepared by truck volunteer, Doug, for long-time Vine Hill Towers resident, Milton.
There may not be a more beloved dessert here at TNFP than hummingbird cake. This is one of those recipes that just keeps following us through the years, with different hand-written versions tucked away in kitchen drawers -- it has been an undisputed crowd favorite.
It's especially popular at a Friday lunch at Vine Hill Towers, where the note "Please send hummingbird cake!" is relayed to the kitchen almost weekly, a request from the same long-time resident, Milton. Last month, long-time Vine Hill truck volunteer Doug decided to answer by personally preparing and sharing a hummingbird cake for Milton (pictured above) -- just because he knew it was his favorite.
We say a lot that food has the power to bring people together in powerful ways. But sometimes these stories happen in small, ordinary ways that we don't see or hear about. Like this hummingbird cake, shared between friends.
TNFP Hummingbird Cake
Cake Ingredients
- 4 eggs
- 2 cups sugar
- 3 cups all-purpose flour
- 1 tsp. baking soda
- 1 tsp. ground cinnamon
- 3/4 cup vegetable oil
- 1 cup pineapple puree
- 1 tsp. vanilla extract
- 1 cup fresh pineapple, small diced
- 1/2 cup pecans, chopped
Frosting Ingredients
- 8 oz cream cheese, room temp
- 1 cup powdered sugar
- 4 oz butter, softened
- 1 tbsp vanilla
Directions
Preheat oven to 325 degrees. In a bowl, cream together eggs and sugar until pale and fluffy. Sift all dry ingredients together and add to egg and sugar mixture. Mix until just incorporated. Combine all wet ingredients and add to mixture until fully incorporated. Fold in pineapples and pecans, then pour into a paper-lined full sheet tray. Bake for 15 minutes. Flip, then bake for another 15 minutes.
To prepare frosting, cream together cream cheese and butter. Add powdered sugar and vanilla. When cake is baked and cooled, build layers with icing.

A pick-up version of the recipe we love to use for events! Same premise, just cut small circles out of the sheet cake before layering.
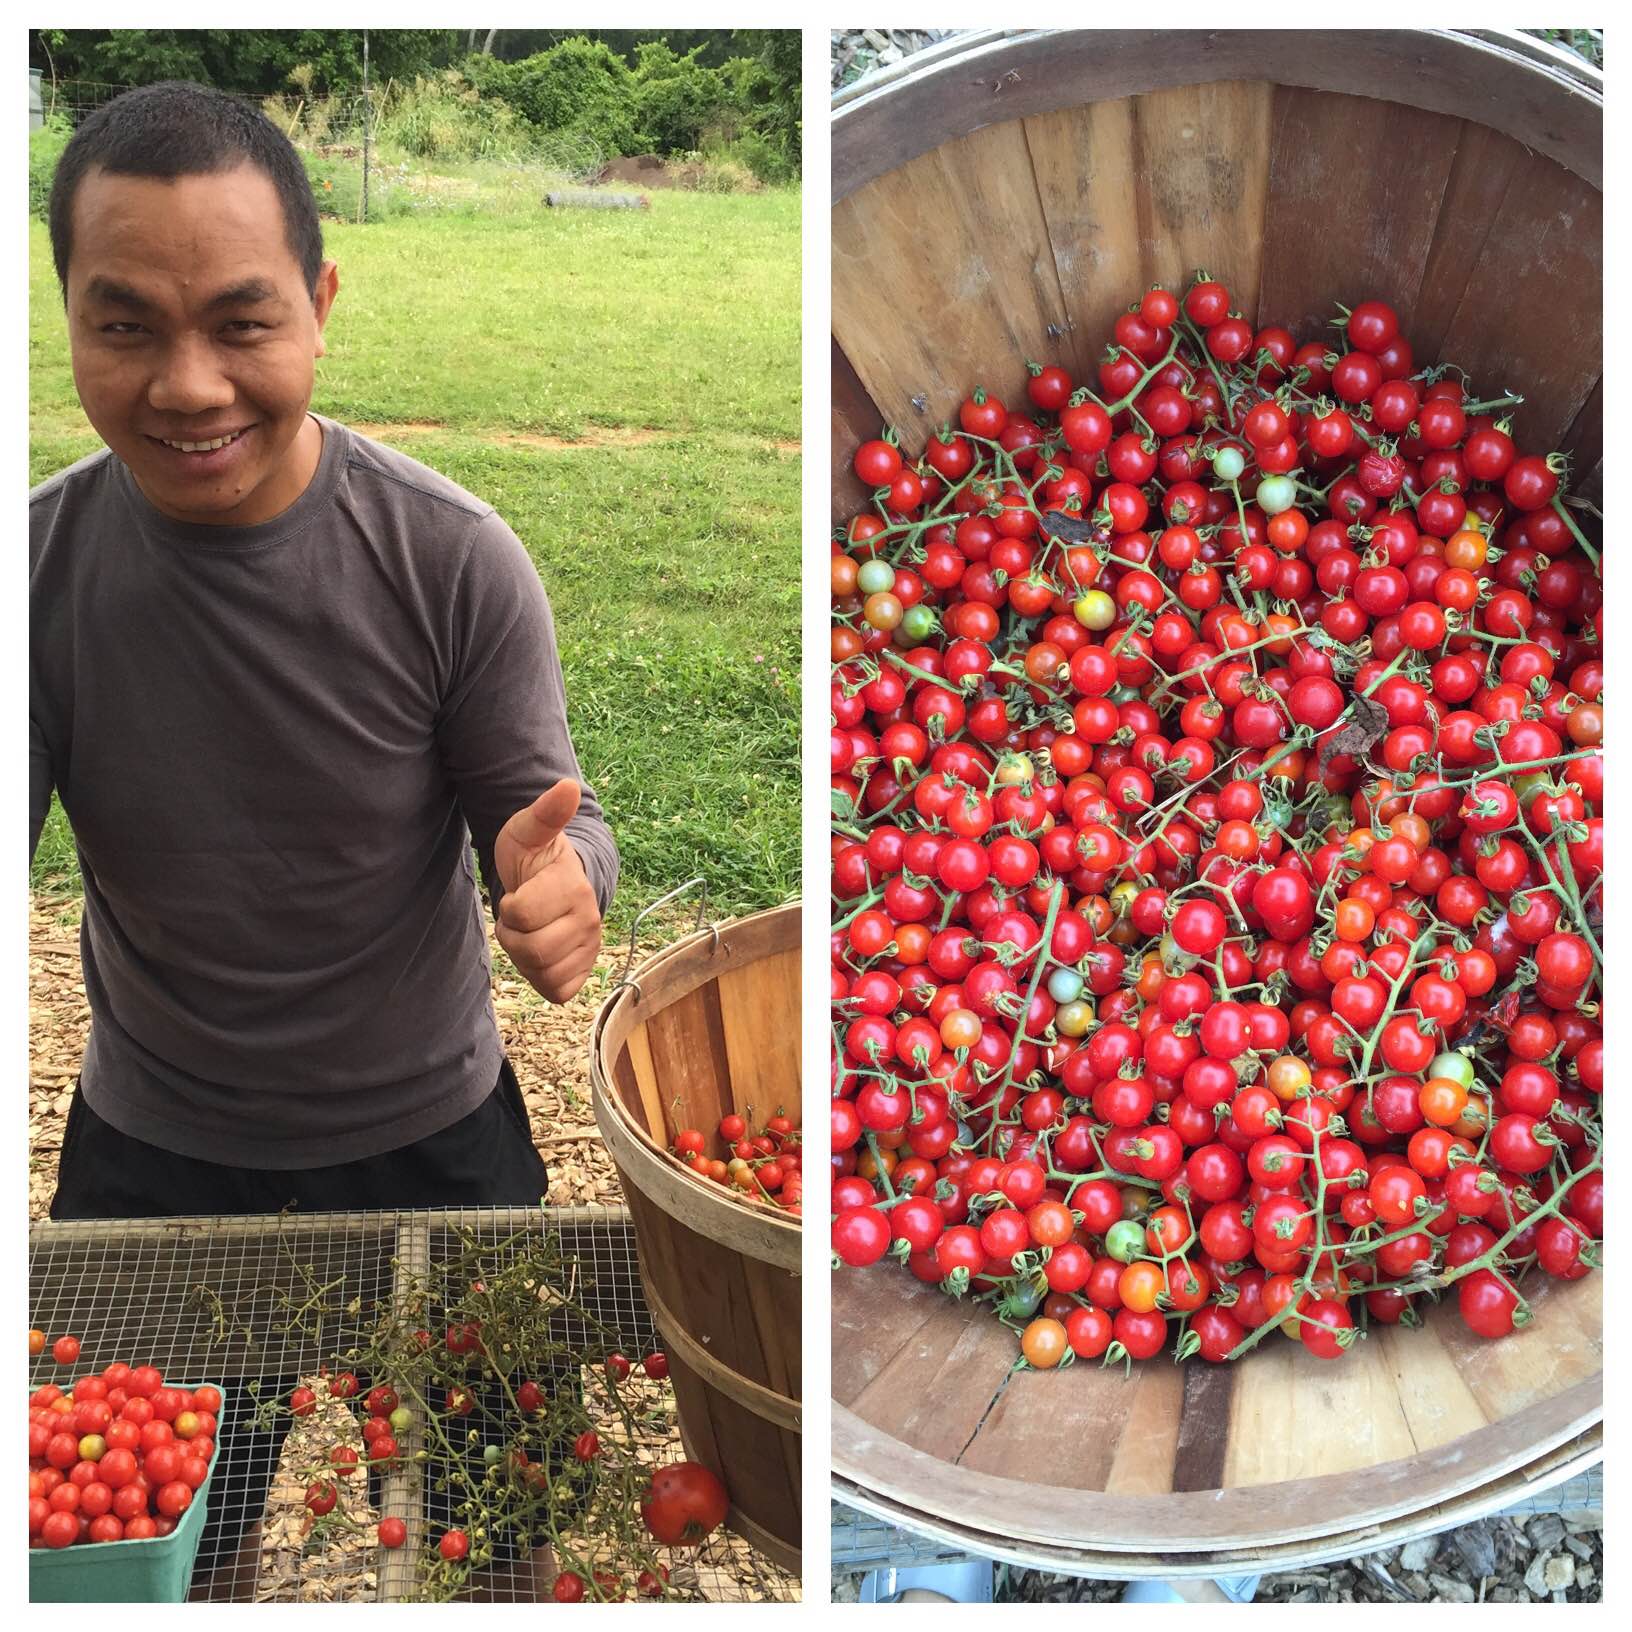
Achaar - A Taste of Asia
Wwhen we asked the farmers of Growing Together what to do with tomatoes for sampling at the Nashville Farmers’ Market, they suggested achaar — a tomato-based chutney popular in Bhutanese and Nepali cuisine…
We’ve reached that glorious time in Tennessee summers when tomatoes hang heavy from the vine, begging to be plucked and sliced or tossed into the mouth like candy when cherry-sized.
It’s a time for BLTs and marinara sauces, tomato pies and fresh salsas.
But when we asked the farmers of Growing Together what to do with tomatoes for sampling at the Nashville Farmers’ Market, they suggested achaar.
Achaar, a tomato-based chutney popular in Bhutanese and Nepali cuisine, can be made in a variety of combinations that might include cilantro or mint, peppers and tomatoes. It’s often served alongside lentils and basmati rice, adding zap and zing to the meal.
Since the Growing Together farmers also happen to grow arugula, we included the spicy green leaves with this version called Golbheda ko Achaar. Roasting the tomatoes deepens the entire dish with rich flavor.
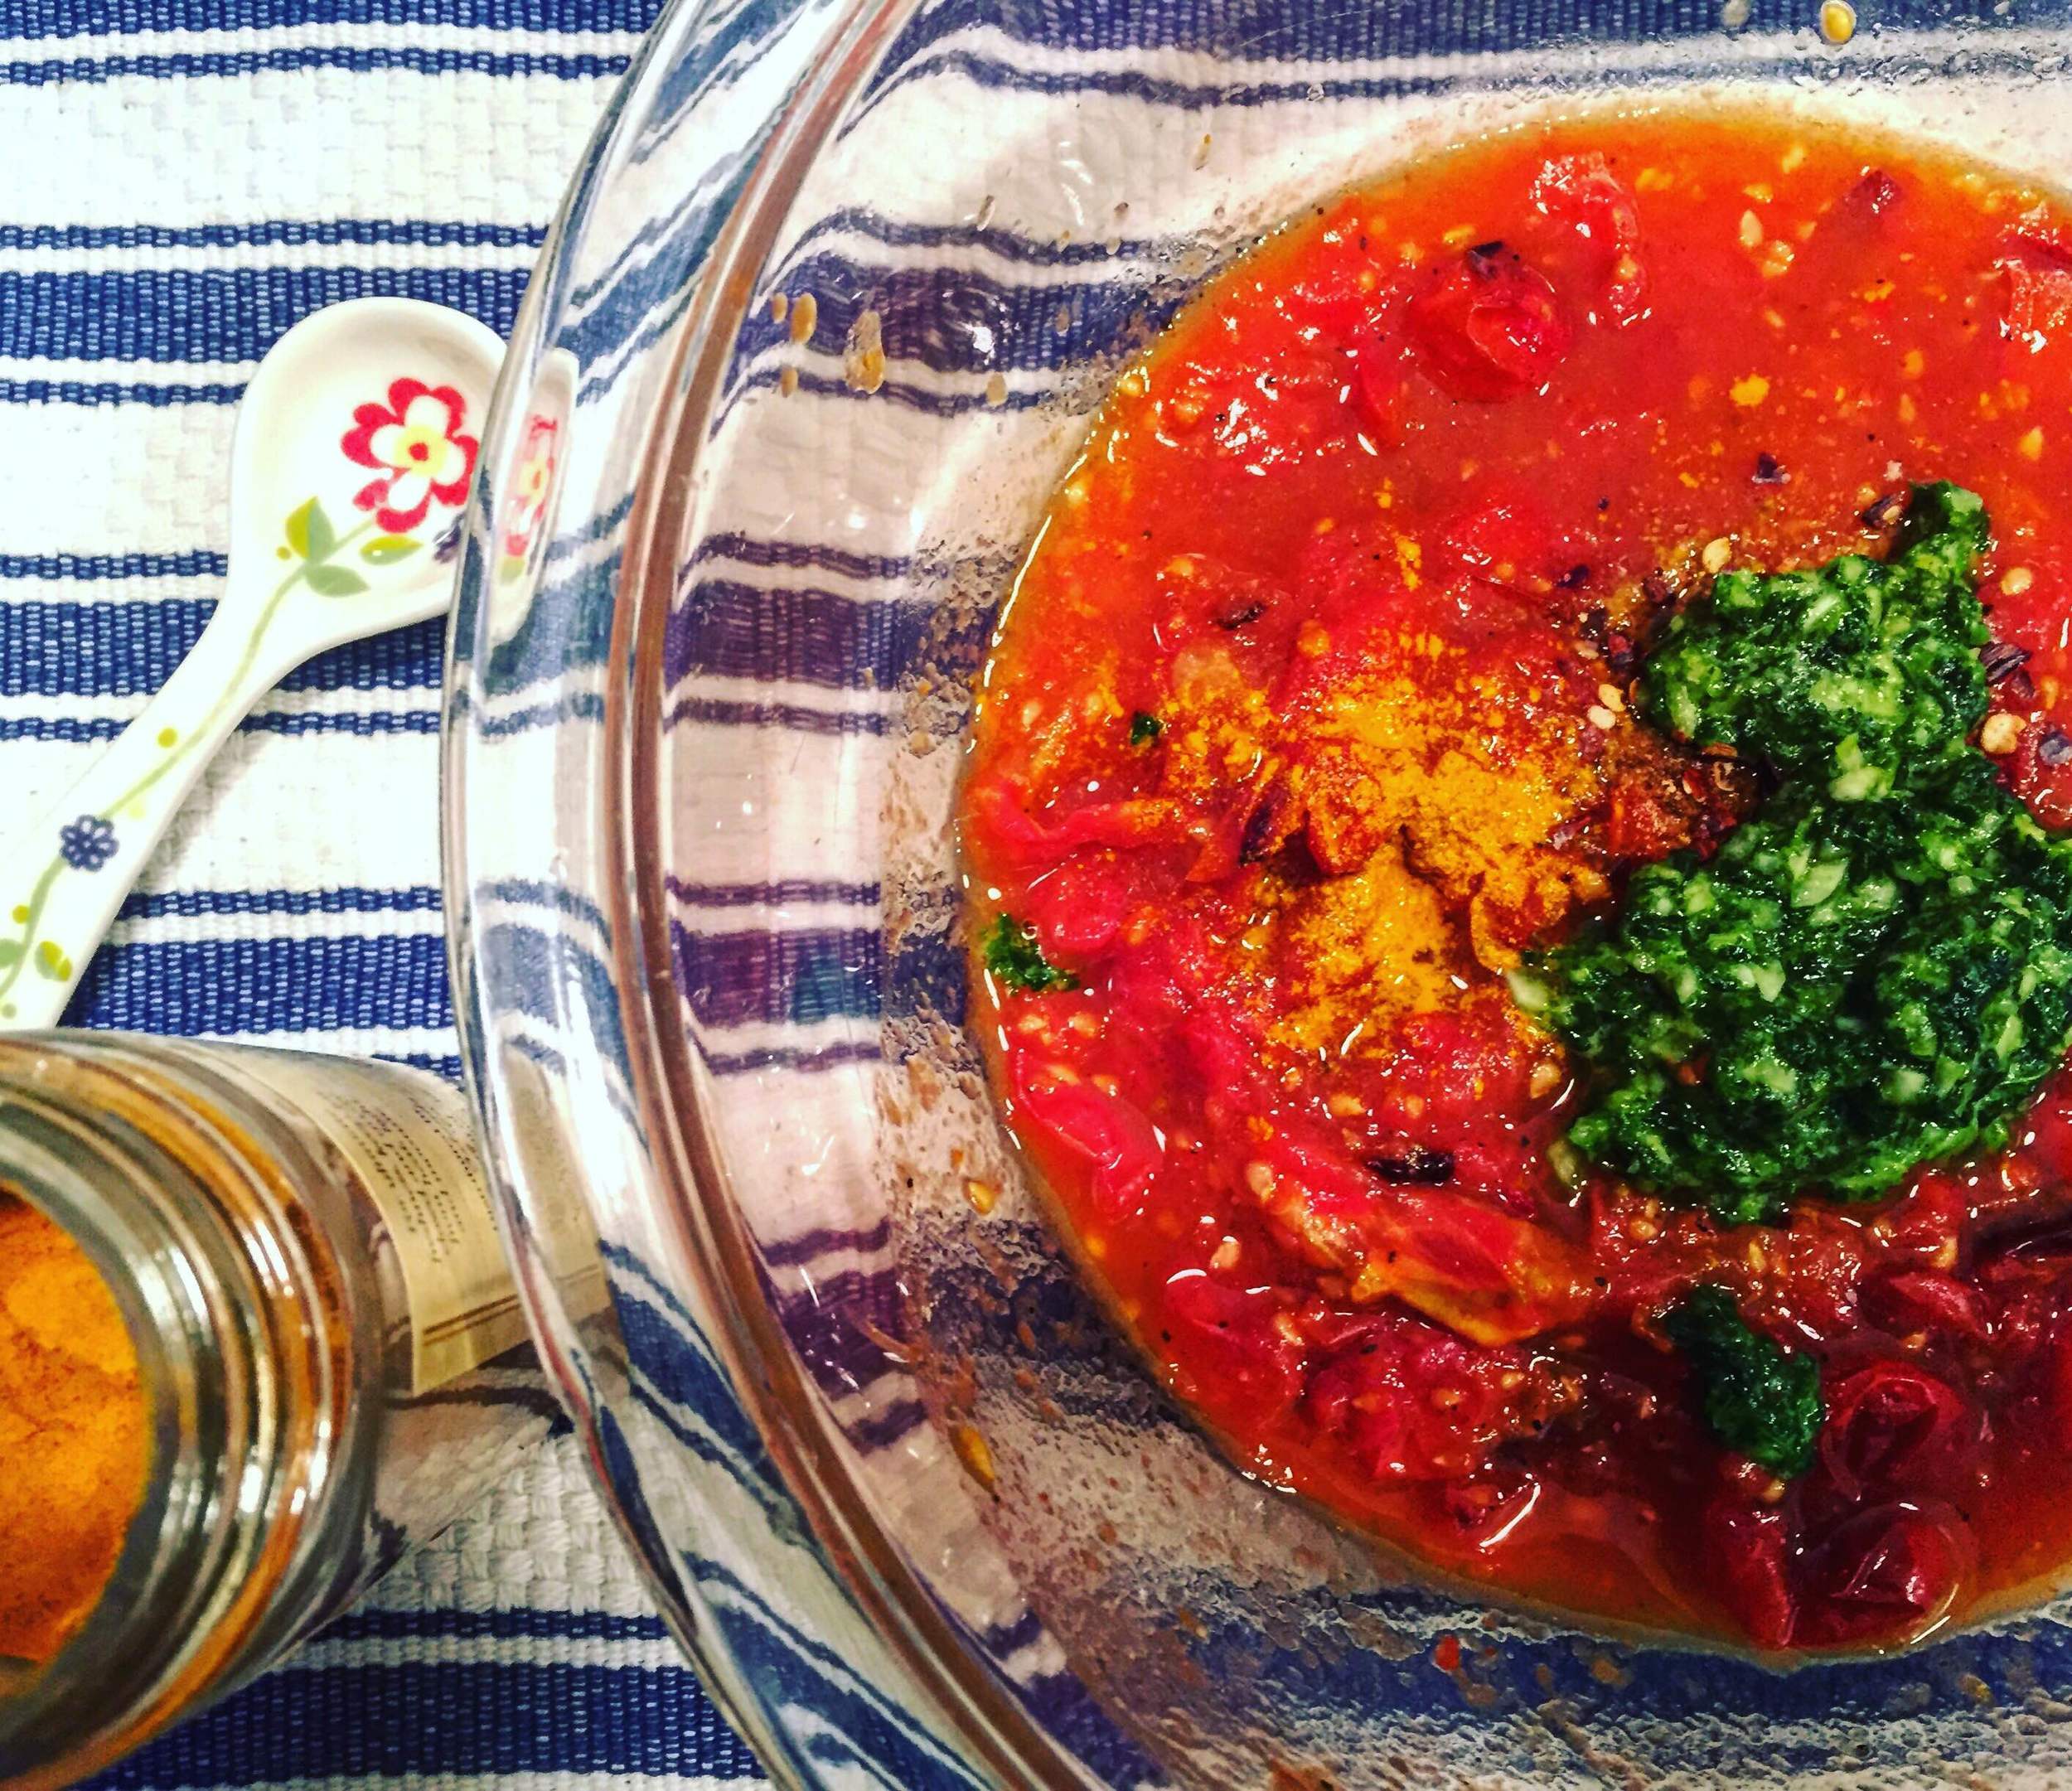
We paired samples of achaar with slices of baguette from Village Bakery & Provisions, a fantastic shop inside the Market House. And we’re happy to report that the little cups of spicy tomato flew off our table at the market.
We hope you’ll visit the Growing Together farmers at their Nashville Farmers’ Market booth on Saturday, August 20 from 8am to 2:30pm. We’ll send you home with a taste of achaar while supplies last—or at least some tomatoes and the recipe to make it at home!
Golbheda ko Achaar (Tomato Chutney)
This dish is a favorite in Bhutanese and Nepali cultures, and it has many variations with mint or cilantro instead of arugula, for example. It’s generally served as an accompaniment to lentils and rice or bread.
Makes about 4 servings
Ingredients:
Four medium-sized tomatoes or a couple handfuls of cherry tomatoes
Olive oil for baking dish and tomatoes
Salt and pepper to season plus 1 teaspoon for the arugula paste
A handful of arugula
2 cloves garlic, minced
1/4 teaspoon red chile flake
1/4 teaspoon of coriander
1/4 teaspoon cumin
Pinch of turmeric
Squeeze of fresh lime juice
Directions:
Preheat oven to 350 degrees.
Oil a baking dish. Wash and half the larger tomatoes and lightly coat them in oil as well. Arrange the tomatoes in the baking dish in a single layer with their cut sides up and sprinkle lightly with salt. Roast the tomatoes until their skins are wrinkled and browning in places about 1 hour.
While the tomatoes roast, combine 1 teaspoon salt with arugula in a mortar and pestle. Crush the two ingredients together until a paste forms. (If you don’t have a mortar and pestle, you can use the bottom of a clean jelly jar or coffee mug to grind ingredients on a cutting board.)
Gently peel the skins from the tomatoes and combine the tomatoes with the arugula mixture and remaining spices. Taste and add a squeeze of lime juice or so to your liking. Adjust seasoning, if needed, and serve alongside lentils or curry dishes as a small side dish or flavorful condiment.
Adapted recipe from thegundruk.com
Oven-Roasted Strawberry and Rosemary Jam
Today we've got a great post from loyal volunteer and board member, Judy Wright, on a TNFP recipe - oven-roasted strawberry and rosemary jam. Judy regularly shares her impressive knowledge through her blog at JudysChickens.org.
If you haven't met loyal TNFP volunteer and board member Judy Wright, then you are missing out! Judy cooks regularly in our kitchen and she shares with us so many great recipes (Judy's Mom's Meatloaf, anyone?) and tips for the kitchen and garden. Judy regularly shares her impressive knowledge through her blog at JudysChickens.org, and periodically we'll be sharing some of those posts. Today we've got a great post from Judy on a TNFP recipe - oven-roasted strawberry and rosemary jam.
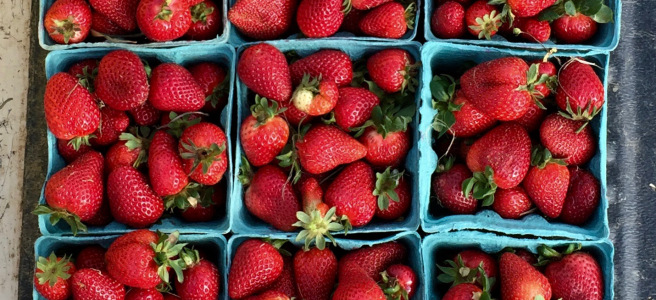
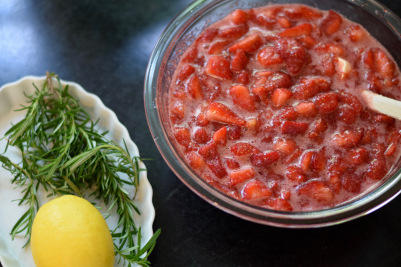
Summer. In. A. Jar. The local strawberry season is too short for many of us; just six weeks. Have you ever wanted to capture the smell and flavor of a just-picked, warm, lusciously ripe strawberry? If so, try making a jar of this oven-roasted strawberry and rosemary jam with a touch of lemon juice or balsamic vinegar. This recipe was given to me by my friend, Malinda Hersh, Associate Director at The Nashville Food Project, and it is easy to make.

Malinda made this jam three years ago, packaged in half-pint mason jars, for TNFP’s deluxe gift baskets prepared for attendees of the Nourish Patron’s Party held annually at the legendary Bluebird Cafe. Inspired by Malinda’s gift, I have been making my own small batch of this jam every year since, as soon as the venerable Tennessee strawberries come in. Nourish is a Nashville fundraiser which brings together the South’s most innovative chefs for an evening of delicious food and wine. This year the event will take place on July 28th at the Hutton.
The idea for this post started last week when I read in Edible Nashville, a gorgeous publication on local food trends, for which I am now a contributing writer on gardening(!!), that the first Tennessee strawberries were starting to come in. On a whim, I emailed Hank Delvin at Delvin Farms at 7:00 A.M. to tell him I had this fabulous recipe for roasted strawberry jam that I wanted to make and by-the-way, I was looking for ripe strawberries. He said they were getting ready to pick that morning and invited me to come along.

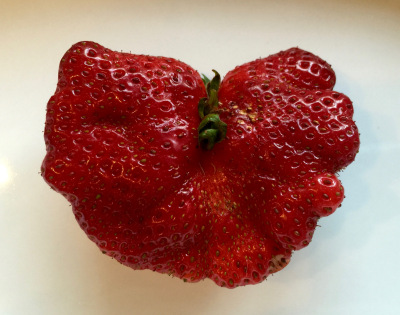
I love driving out to Delvin Farms in College Grove, Tennessee. It’s a beautiful drive, and I know I’ll always learn something new about botany and organic growing practices from Hank, and his dad if he’s around. Check out this post from last year when I chronicled a morning spent gleaning vegetables for TNFP at Delvin Farms. The most interesting tidbit I learned on my most recent trip was the concept of incomplete pollination. Like for many of you, I’ve seen the results of incomplete pollination, misshapen berries like the ones in the picture below, I just didn’t know there was a name or reason for it.

By the way, misshapen isn’t alway ugly. Look at this amazing strawberry I found in the field. My friend, Roberta, said it looks like an angel. Indeed.
Hank plants new June-bearing strawberry plants in long rows of plastic-covered raised beds every September. The plastic keeps the weeds out, since, as an organic farm, they do not use chemical weed-killers.

The plants go dormant in the winter and start growing again in the spring. Once the delicate flowers start blooming, it is imperative that the tender blooms be protected from frost.

To this end, whenever the temperature dips, Hank’s staff has to cover the rows of strawberries with agricultural cloth. This past spring there were six such frosts in the three weeks preceding their first harvest.
Strawberries are considered self-pollinators and as such, their male and female parts are on the same flower. It takes gravity, the wind, rain, and some insect pollinators to move the pollen across the flower to pollinate it. If the plants are covered, the wind and bees can’t do their part.
I was amazed to see the plants’ leaves waving in the wind, a wind I couldn’t even feel.
Pistils and stamens. Remember them?

The strawberry flower is not your typical flower. Yes, it has the male parts which are the yellow pollen coated anthers known as stamens. And it has the female part called an ovule that connects to an ovary and collectively is known as the pistil. However, whereas most flowers only have one pistil, the strawberry is an aggregate fruit and, as such, has as many as 500 spike-like ovules, each one an immature egg needing to be pollinated so it can produce seed. The more of those ovules that get pollinated, the bigger, puffier, and more perfect the strawberry.

The Recipe!
Yield: 4 cups of jam
8 cups (2 quarts) strawberries, stems removed and berries quartered
4 cups granulated sugar
¼ cup lemon juice or balsamic vinegar
4 bushy sprigs fresh rosemary (1/2 ounce).
Clean and hull two quarts of strawberries. Figure on four cups of berries in each quart container.

Slice berries into lengthwise quarters.

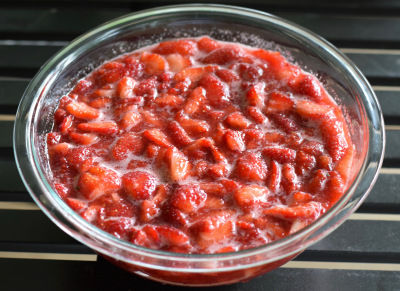
Add strawberries and sugar to a mixing bowl, stir and allow to macerate, which means to break down and soften.

Allow berries to macerate for two hours, or up to 24 hours, stirring regularly to re-incorporate the sugar that sinks to the bottom of the bowl into the mixture. Don’t skip this step. It’s what helps the berry chunks keep their shape.
Squeeze the juice out from one large lemon and set aside.

Pour the macerated strawberries and the lemon juice into a large saucepan. Bring to a rolling boil over high heat. Be careful not to let the juice boil over.

Once the mixture reaches a full boil, reduce the heat and continue cooking, uncovered, for ten minutes. About five minutes into the cooking time, add the rosemary sprigs to the pot, stir, and continue to cook.

Cooking the berries and sugar together helps release the naturally occurring pectin from the strawberries. Pectin is a gum-like substance that is needed to “set” jams and jellies. It occurs naturally in fruits, but more can be added in the form of powder if a faster set is desired. Adding an acid, such as lemon juice or vinegar, helps fruit release its natural pectin. For more on pectin, read my post about making grape jelly.
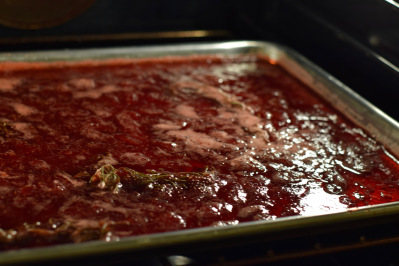
Now it is time to roast the berries.
Preheat oven to 150º. If your oven’s lowest temperature setting is a little higher than that, that is fine. You could even set the oven to convection roast and cook it in half the time, but I prefer the slow cook method.
Pour the mixture, including the rosemary, into a 13″ by 18″ baking pan. Place pan on the middle oven shelf and roast for 10 hours, or until the syrup is thickened and has a gel-like appearance. I often put it in the oven at bedtime and take it out the next morning.
How to test hot jelly for gel formation: Use a chilled wooden spoon to scoop up some jam. Allow jam to cool and then tilt the spoon so jam drips off. If the drips form a triangle-shaped thick flake, it is ready. Don’t get too hung up here with the testing. After 10 hours, assume it is going to be great!

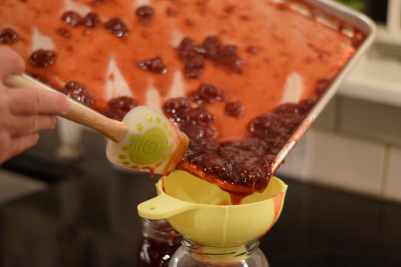
Ladle into four 8-ounce hot, clean jars using a large-holed funnel and either
- Process in a water bath for 10 minutes, using the appropriate two-part jar caps, aka “canning,” or
- Cover with lids, let cool, and store in the refrigerator until ready to use, or
- Freeze in plastic containers.
I love the combination of strawberries, a little sugar, and balsamic vinegar, so I often substitute four tablespoons of balsamic vinegar for the lemon juice. The balsamic vinegar not only flavors the jam, but it also gives it a smoother, earthier taste than the lemon juice. Having said that, my kids prefer the lemon juice version.

I love this jam spooned over @judyschickens granola and served with plain, low-fat kefir.
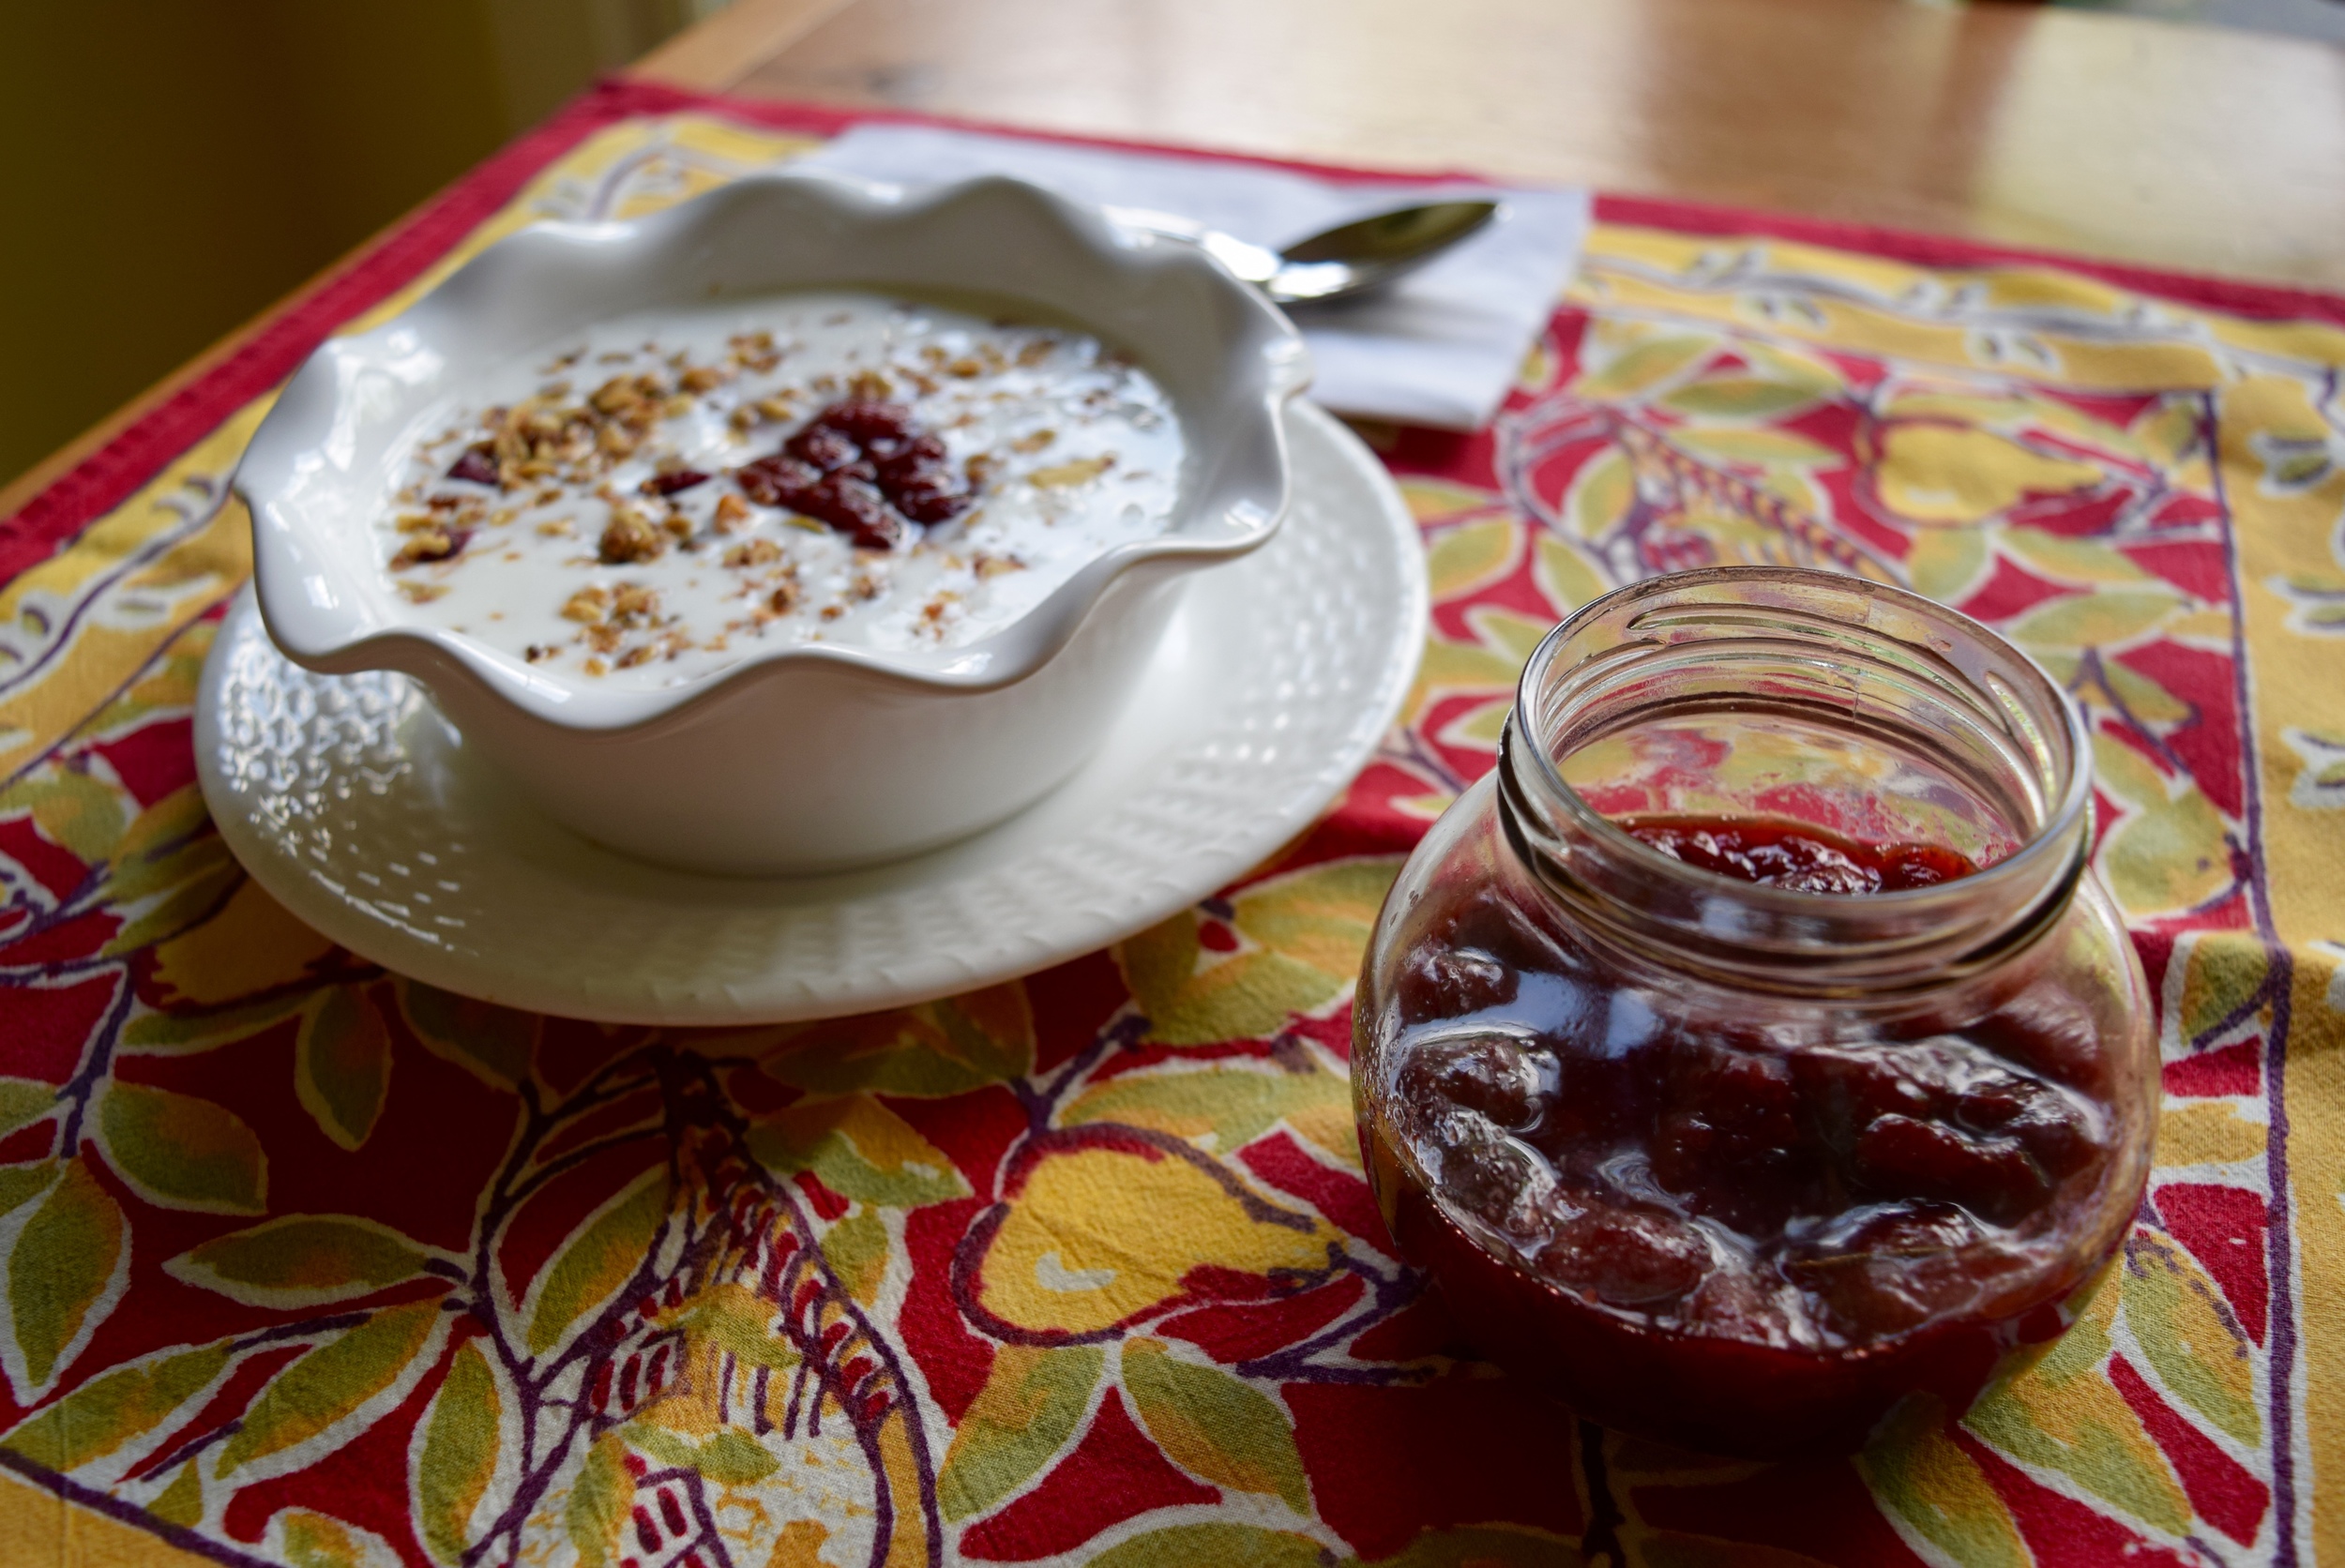
About The Nashville Food Project
The Nashville Food Project brings people together to grow, cook and share nourishing food, with the goals of cultivating community and alleviating hunger in our city. Their primary fundraising event, Nourish, will take place on July 28th this year instead of in June. The Patron’s Party for this event is at the legendary Bluebird Cafe and will take place on July 13th. Tickets go on sale May 20th.

© 2016 Judy Wright. All rights reserved.
Cookbook Shares Burmese Family Recipes
When Garden Intern Kate Patterson learned she would need to complete an oral history project for her Foodways class at Belmont University, she decided to compile a cookbook of traditional family recipes from Burmese immigrants growing food in the refugee agriculture program…

When Garden Intern Kate Patterson learned she would need to complete an oral history project for her Foodways class at Belmont University, she decided to compile a cookbook of traditional family recipes from Burmese immigrants growing food in the refugee agriculture program.
Over the past several months, she interviewed six women and two men with the help of an interpreter to learn about Burmese family dishes.
“They grow a lot of the things in the garden. Then they use it in the recipe,” she says. “So that was a cool aspect to tie into their stories.”
The recipes include a fish curry, soups and noodle dishes as well as sweet sticky rice wrapped in bamboo.
Unlike in American culture where recipes might be pulled from a book or a recipe box, Kate said all of the dishes shared were learned by watching and doing in the kitchen.
"A lot of the participants had trouble writing them, because they never had written them before,” she says. “It was neat that they still survived through generations."
But despite the differences in learning and sometimes unfamiliar ingredients involved, Kate said it was interesting to take note in the similarities across cultures as well.
“Their parents teach them to cook, and they cook with siblings. Even though it’s different dishes, it’s still the same concept that these recipes are passed down over generations. It is unifying."
As a junior at Belmont, Kate is considering a career that explores community development and the role that farming can play in creating solutions. She grew up with gardens in the backyard, and her father grew up on a farm.

Kate working in the Wedgewood Urban Garden.
If she had to choose a recipe from her life for a cookbook, she said she would choose one that has family significance, too.
“We always make this cookie at Christmastime that’s been passed down. Spritz cookies. It’s almond flavored cookies that we make with a cookie press. My dad grew up making them, and it’s a traditional Swedish thing to do.”
Kate gave us a sneak peek of her Burmese cookbook project by sharing the recipe and story below from Hpong, pictured here:

Hpong is from the Kachin state in Myanmar and he moved to the United States with his wife and two kids a year ago. He enjoys cooking a variety of dishes and he has many memories associated with this traditional Kachin recipe.
Hpong enjoys cooking the traditional Kachin recipe, Kachin Chet. He said that most Kachin people know how to make this dish and they make and eat it almost every day. He learned to make this dish by watching his parents and siblings cook it, and by cooking it with them. He said that the recipe was never written. It was passed down from generation to generation by showing others how to make it. This recipe is important to him because it has good flavor and is delicious and healthy.
The ingredients in this recipe are natural, meaning many come from the garden. Some items from this recipe that are grown in the garden are: chilies, garlic, and lemongrass. There are other ingredients that he has not been able to find in the United States so he has had to either modify the recipe or buy the ingredients elsewhere. He mentioned that he had to buy the light amber from Malaysia. Also, he was unable to find another ingredient that had a sour leaf, so he has had to replace that ingredient with a Roselle leaf, bamboo shoot, or lemongrass.
Hpong’s favorite meat to use in this dish is fish. When asked if he thinks pork is as good to use he said, “not as (good as) chicken, beef or fish, that’s good.” You can use any kind of fish-- small or big. He typically only uses river fish, but he says that you can also use fish from the sea.
When he lived in Myanmar, everyone in the village would have their own chicken, beef, and river fish and would cook them in their houses. They would then share them with each other. Sometimes they would buy the ingredients that they needed from the market. Now, living in the U.S., he buys the fish from the grocery store.
Hpong speaks of how the dish is also healthy for you, saying, “It’s kind of like medicine. It can prevent the stomach ache.” He said that the water he drank in Myanmar came directly from the ground and was dirty and that there was a lot of bacteria in each cup of water. He also mentioned how some foods are like a medicine, protecting you from getting sick, such as some beef and fruit. One ingredient in this recipe that has medicinal qualities is the cooked fish.
Hpong says that this dish is easy to make and that he will never forget how to make it. He enjoys serving it for guests when they come over for dinner. He still eats this dish just as often as he did when he lived in Myanmar.

Kachin Chet
This recipe has been passed down from generations by word of mouth and because of that there are not specific measurements for the ingredients.
- Meat: Fish, Pork, Beef, or Chicken.
- Sour leaf -- can use Roselle leaf or bamboo shoot
- Garlic flower
- Pepper
- Chili pepper
- Salt
- Sesame powder
- Water- 150ml
1. Place all ingredients in a large pot.
2. Place pot on stovetop over medium heat until all water is gone.
3. Serve hot.